Download
1 / 25
350 likes | 783 Vues
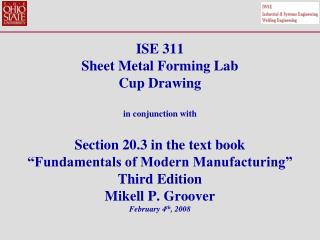
ISE 311 Sheet Metal Forming Lab Cup Drawing in conjunction with Section 20.3 in the text book “Fundamentals of Modern Manufacturing” Third Edition Mikell P. Groover February 4 th , 2008. Outline. Introduction Mechanics of Drawing Engineering Analysis of Drawing Defects in Drawing

E N D
ISE 311Sheet Metal Forming LabCup Drawingin conjunction withSection 20.3 in the text book“Fundamentals of Modern Manufacturing”Third EditionMikell P. GrooverFebruary 4th, 2008
Outline • Introduction • Mechanics of Drawing • Engineering Analysis of Drawing • Defects in Drawing • Objectives of the Lab • Sheet Metal Forming (Material and Equipment) • Sheet Metal Forming (FE simulations) • Summary
Introduction Basic Principles of Drawing Drawing is a sheet metal forming operation used to make cup-shaped, box-shaped, or other complex-curved, hollow-shaped parts. It is performed by placing a piece of sheet metal over a die cavity and then pushing the sheet into the opening with a punch. The blank is held down flat against the die by a blankholder.
Mechanics of Drawing A blank of diameter Db is drawn into the die by means of a punch of diameter Dp. The punch and die have corner radii Rp and Rd, respectively. The sides of the die and punch are separated by a clearance, c, which is about 10% greater than the sheet thickness. The punch applies a downward force, F, to deform the metal while the downward holding force, Fh, is applied by the blankholder.
Mechanics of Drawing As the punch proceeds towards its final position, the workpiece experiences a complex sequence of stresses and strains as it is formed into its final shape. In step 1, the blankholder force, Fh, is applied and the punch begins to move towards the sheet material. In step 2, the sheet material is subjected to a bending operation. The sheet is bent over the corner of the punch and the corner of the die. In step 3, as the punch continues moving down, a straightening action occurs in the metal that was previously bent over the die radius. Metal from the flange is drawn into the die opening to form the cylinder wall.
Mechanics of Drawing In step 4, As the metal in the flange moves toward the center, it is subjected to the following state of stress: 1- Compression in the circumferential direction (the outer perimeter becomes smaller) 2- Tension in the radial direction 3- A relatively small compression in the thickness direction Since the volume of metal remains constant, and because the circumferential stress is relatively large, the sheet will thicken as it moves in the flange area. (this is why the clearance between the punch and die is higher than the sheet thickness by about 10%) In order for the material to be drawn: 1- Friction between the sheet material and surfaces of the blankholder and die must be overcome. 2- Deformation energy should be provided.
Mechanics of Drawing The downward motion of the punch results in a continuation of the metal flow caused by drawing and compression. Some thinning at the cylinder walls occurs as well. Step 5 shows the completed drawing process.
Deep Drawing Tooling The next slide illustrates the deep drawing tooling used in the lab. The blank is placed between the die and the blank holder. To center the blank, the student should make sure that it is touching the two pins. The blank holder is attachedtothree pneumatic cylinders which move it up and down and also provide the required holding force (by controlling the air pressure inside the cylinders). The punch is directly attached to the ram of the mechanical press. Three guides are used to make sure the tools remain concentric during the process.
Deep Drawing Tooling Pneumatic cylinder (3) Guide (3) Blank holder Pins (2) Blank holder Die Punch
Engineering Analysis of Drawing The drawing ratio, DR, gives an indication of the severity of the drawing operation: the higher the ratio, the greater the severity. The drawing ratio is defined as: Where, Db = blank diameter and Dp = punch diameter. This value is dependant upon punch and die corner radii, friction conditions, draw depth, and material properties of the sheet metal.
Engineering Analysis of Drawing The drawing force required to perform a drawing operation can be roughly estimated by the following formula: ; where F = Drawing force t = Original blank thickness TS = Tensile strength Db = Blank diameter Dp = Punch diameter Increasing the DR will increase the punch force, and this will result in excessive thinning or even fracture in the cup wall. DR < LDR ; where LDR = the Limiting Drawing Ratio
Defects in Drawing A number of defects in drawing can occur, which include: (a) Wrinkling in the flange occurs due to compressive buckling in the circumferential direction (blank holding force should be sufficient to prevent buckling from occurring). (b) Wrinkling in the wall takes place when a wrinkled flange is drawn into the cup or if the clearance is very large, resulting in a large suspended (unsupported) region. (c) Tearing occurs because of high tensile stresses that cause thinning and failure of the metal in the cup wall. Tearing can also occur in a drawing process if the die has a sharp corner radius. (d) Earring occurs when the material is anisotropic, i.e. has varying properties in different directions. (e) Surface scratches can be seen on the drawn part if the punch and die are not smooth or if the lubrication of the process is poor.
Objectives This lab has the following objectives: • Become familiarized with the basic processes used in sheet metal forming. • Analyze a cup drawing operation and attempt to select the best process parameters.
Sheet Metal Forming – Cup Drawing • Test Materials and Equipment • Robinson (Open Back Inclinable- OBI) press • Model A3 • 25-ton capacity • Safety Equipment and Instructions • Wear safety glasses. • Conduct the test as directed by the instructor. • Do not use hands to put or remove specimens on the die – use the supplied tongs. • Turn off the OBI press whenever you need to adjust its setting.
Sheet Metal Forming – Cup Drawing Procedure: • Obtain specimens to be tested and record the material data onto your data sheet. • Choose one sample and place it in the tooling using the tongs. • For the first specimen, set the air pressure for the blankholder cylinders to approximately 30 psi. • Step on the foot pedal to cycle the press one time.
Sheet Metal Forming – Cup Drawing Procedure (continued): • If the part does not fall out of the bottom on its own, try the following: Case 1: The part is completely formed but stuck in the die cavity * Step the pedal again. If the part did not fall, then * Put a small wooden cylinder in the die cavity and step the pedal. Case 2: The part is torn (you can see the flange on surface of the die) * Use a wooden stick to raise the sample up and remove it through the gap between the die and blank holder Case 3: The part is stuck around the punch Ask the lab instructor for help Note: BE SURE the flywheel has completely stopped and the holding pressure is zero before attempting to retrieve the part and NEVER put your hands between the die and the blank holder (always use the supplied wooden stick)
Sheet Metal Forming – Cup Drawing Procedure (continued): • Inspect the formed part and record any observed defects. If the part is not ideal, adjust the blank holding pressure (or other process parameters) to improve the part quality. • Select another specimen of the same material and try your new process parameters. Again, record any defects and speculate appropriate adjustments to the process parameters. • Adjust the parameters again and form your third specimen. Inspect the material and record any observed defects. • Repeat steps 4-9 for the remaining materials.
Finite Element Analysis (FEA) and Simulations With FEA it is possible to emulate the metal flow (the cup shape, the thinning in the cup wall, the stresses and strains in the deforming cup material) during deep drawing. The next few slides illustrate the simulation of a cup drawing process generated by FEA that simulates the actual deformation of a steel sheet specimen.
Cup Drawing Simulation Steel 1010: (BHF: 1,000 Lbs) Stage A (before drawing)
Cup Drawing Simulation Steel 1010: (BHF: 1,000 Lbs) Stage B
Cup Drawing Simulation Steel 1010: (BHF: 1,000 Lbs) Stage C
Cup Drawing Simulation Steel 1010: (BHF: 1,000 Lbs) Stage D
Cup Drawing Simulation Steel 1010: (BHF: 1,000 Lbs) Stage E
Cup Drawing Simulation Steel 1010: (BHF: 1,000 LBS) Load-Stroke Curve Each point on the curve represents one of the stages from A to E D E C B A
Summary – Sheet Metal Forming Lab This lab preparation material introduced: • The basic principles of shearing, bending and deep drawing, as well as terminology used • The objectives of and the expected outcomes from the evaluation of experimental trials • The testing equipment and the test procedure