
Joint Mobilization
E N D
Presentation Transcript
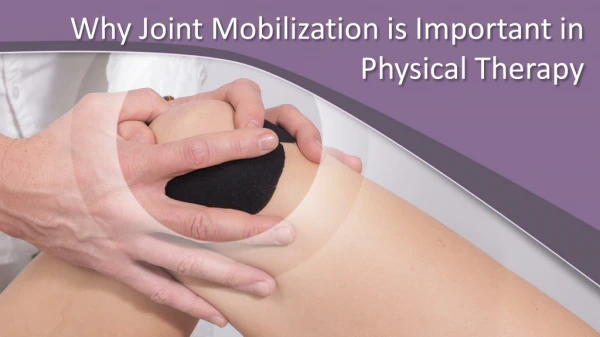
Joint Mobilization Techniques Utilized in Rehabilitation
What is Joint Mobilization? • “Joint Mobs” • Manual therapy technique • Used to modulate pain • Used to increase ROM • Used to treat joint dysfunctions that limit ROM by specifically addressing altered joint mechanics • Factors that may alter joint mechanics: • Pain & Muscle guarding • Joint hypomobility • Joint effusion • Contractures or adhesions in the joint capsules or supporting ligaments • Malalignment or subluxation of bony surfaces
Pondering Thoughts • Would you perform joint mobilizations on someone who has a hypermobile joint?
Terminology • Mobilization– passive joint movement for increasing ROM or decreasing pain • Applied to joints & related soft tissues at varying speeds & amplitudes using physiologic or accessory motions • Force is light enough that patient’s can stop the movement • Manipulation– passive joint movement for increasing joint mobility • Incorporates a sudden, forceful thrust that is beyond the patient’s control
Terminology • Self-Mobilization (Automobilization) – self-stretching techniques that specifically use joint traction or glides that direct the stretch force to the joint capsule • Mobilization with Movement (MWM) – concurrent application of a sustained accessory mobilization applied by a clinician & an active physiologic movement to end range applied by the patient • Applied in a pain-free direction
Terminology • Physiologic Movements– movements done voluntarily • Osteokinematics – motions of the bones • Accessory Movements– movements within the joint & surrounding tissues that are necessary for normal ROM, but can not be voluntarily performed • Component motions – motions that accompany active motion, but are not under voluntary control • Ex: Upward rotation of scapula & rotation of clavicle that occur with shoulder flexion • Joint play – motions that occur within the joint • Determined by joint capsule’s laxity • Can be demonstrated passively, but not performed actively
Terminology • Arthrokinematics– motions of bone surfaces within the joint • 5 motions - Roll, Slide, Spin, Compression, Distraction • Muscle energy – use an active contraction of deep muscles that attach near the joint & whose line of pull can cause the desired accessory motion • Clinician stabilizes segment on which the distal aspect of the muscle attaches; command for an isometric contraction of the muscle is given, which causes the accessory movement of the joint • Thrust– high-velocity, short-amplitude motion that the patient can not prevent • Performed at end of pathologic limit of the joint (snap adhesions, stimulate joint receptors) • Techniques that are beyond the scope of our practice!
Terminology • Concave – hollowed or rounded inward • Convex – curved or rounded outward
Relationship Between Physiological & Accessory Motion • Biomechanics of joint motion • Physiological motion • Result of concentric or eccentric active muscle contractions • Bones moving about an axis or through flexion, extension, abduction, adduction or rotation • Accessory Motion • Motion of articular surfaces relative to one another • Generally associated with physiological movement • Necessary for full range of physiological motion to occur • Ligament & joint capsule involvement in motion
Ovoid – one surface is convex, other surface is concave What is an example of an ovoid joint? Sellar (saddle) – one surface is concave in one direction & convex in the other, with the opposing surface convex & concave respectively What is an example of a sellar joint? 5 types of joint arthrokinematics Roll Slide Spin Compression Distraction 3 components of joint mobilization Roll, Spin, Slide Joint motion usually often involves a combination of rolling, sliding & spinning Joint Shapes & Arthrokinematics
Roll • A series of points on one articulating surface come into contact with a series of points on another surface • Rocking chair analogy; ball rolling on ground • Example: Femoral condyles rolling on tibial plateau • Roll occurs in direction of movement • Occurs on incongruent (unequal) surfaces • Usually occurs in combination with sliding or spinning
Spin • Occurs when one bone rotates around a stationary longitudinal mechanical axis • Same point on the moving surface creates an arc of a circle as the bone spins • Example: Radial head at the humeroradial joint during pronation/supination; shoulder flexion/extension; hip flexion/extension • Spin does not occur by itself during normal joint motion
Slide • Specific point on one surface comes into contact with a series of points on another surface • Surfaces are congruent • When a passive mobilization technique is applied to produce a slide in the joint – referred to as a GLIDE. • Combined rolling-sliding in a joint • The more congruent the surfaces are, the more sliding there is • The more incongruent the joint surfaces are, the more rolling there is
Compression – • Decrease in space between two joint surfaces • Adds stability to a joint • Normal reaction of a joint to muscle contraction • Distraction - • Two surfaces are pulled apart • Often used in combination with joint mobilizations to increase stretch of capsule.
Convex-Concave & Concave-Convex Rule • Basic application of correct mobilization techniques - **need to understand this! • Relationship of articulating surfaces associated with sliding/gliding • One joint surface is MOBILE & one is STABLE • Concave-convex rule: concave joint surfaces slide in the SAME direction as the bone movement (convex is STABLE) • If concave joint is moving on stationary convex surface – glide occurs in same direction as roll
Convex-concave rule: convex joint surfaces slide in the OPPOSITE direction of the bone movement (concave is STABLE) • If convex surface in moving on stationary concave surface – gliding occurs in opposite direction to roll
Effects of Joint Mobilization • Neurophysiological effects – • Stimulates mechanoreceptors to pain • Affect muscle spasm & muscle guarding – nociceptive stimulation • Increase in awareness of position & motion because of afferent nerve impulses • Nutritional effects – • Distraction or small gliding movements – cause synovial fluid movement • Movement can improve nutrient exchange due to joint swelling & immobilization • Mechanical effects – • Improve mobility of hypomobile joints (adhesions & thickened CT from immobilization – loosens) • Maintains extensibility & tensile strength of articular tissues • Cracking noise may sometimes occur
Should not be used haphazardly Avoid the following: Inflammatory arthritis Malignancy Tuberculosis Osteoporosis Ligamentous rupture Herniated disks with nerve compression Bone disease Neurological involvement Bone fracture Congenital bone deformities Vascular disorders Joint effusion May use I & II mobilizations to relieve pain Contraindications for Mobilization
Precautions • Osteoarthritis • Pregnancy • Flu • Total joint replacement • Severe scoliosis • Poor general health • Patient’s inability to relax
Maitland Joint Mobilization Grading Scale • Grading based on amplitude of movement & where within available ROM the force is applied. • Grade I • Small amplitude rhythmic oscillating movement at the beginning of range of movement • Manage pain and spasm • Grade II • Large amplitude rhythmic oscillating movement within midrange of movement • Manage pain and spasm • Grades I & II – often used before & after treatment with grades III & IV
Grade III • Large amplitude rhythmic oscillating movement up to point of limitation (PL) in range of movement • Used to gain motion within the joint • Stretches capsule & CT structures • Grade IV • Small amplitude rhythmic oscillating movement at very end range of movement • Used to gain motion within the joint • Used when resistance limits movement in absence of pain • Grade V – (thrust technique) - Manipulation • Small amplitude, quick thrust at end of range • Velocity vs. force • Requires training
Indications for Mobilization • Grades I and II - primarily used for pain • Pain must be treated prior to stiffness • Painful conditions can be treated daily • Small amplitude oscillations stimulate mechanoreceptors - limit pain perception • Grades III and IV - primarily used to increase motion • Stiff or hypomobile joints should be treated 3-4 times per week – alternate with active motion exercises
If limited or painful ROM, examine & decide which tissues are limiting function Determine whether treatment will be directed primarily toward relieving pain or stretching a joint or soft tissue limitation Quality of pain when testing ROM helps determine stage of recovery & dosage of techniques 1) If pain is experienced BEFORE tissue limitation, gentle pain-inhibiting joint techniques may be used Stretching under these circumstances is contraindicated If pain is experienced CONCURRENTLY with tissue limitation (e.g. pain & limitation that occur when damaged tissue begins to heal) the limitation is treated cautiously – gentle stretching techniques used If pain is experienced AFTER tissue limitation is met because of stretching of tight capsular tissue, the joint can be stretched aggressively ALWAYS Examine PRIORto Treatment
Joint Positions • Resting position • Maximum joint play - position in which joint capsule and ligaments are most relaxed • Evaluation and treatment position utilized with hypomobile joints • Loose-packed position • Articulating surfaces are maximally separated • Joint will exhibit greatest amount of joint play • Position used for both traction and joint mobilization • Close-packed position • Joint surfaces are in maximal contact to each other • General rule: Extremes of joint motion are close-packed, & midrange positions are loose-packed.
Joint Mobilization Application • All joint mobilizations follow the convex-concave rule • Patient should be relaxed • Explain purpose of treatment & sensations to expect to patient • Evaluate BEFORE & AFTER treatment • Stop the treatment if it is too painful for the patient • Use proper body mechanics • Use gravity to assist the mobilization technique if possible • Begin & end treatments with Grade I or II oscillations
Positioning & Stabilization • Patient & extremity should be positioned so that the patient can RELAX • Initial mobilization is performed in a loose-packed position • In some cases, the position to use is the one in which the joint is least painful • Firmly & comfortably stabilize one joint segment, usually the proximal bone • Hand, belt, assistant • Prevents unwanted stress & makes the stretch force more specific & effective
Treatment Force & Direction of Movement • Treatment force is applied as close to the opposing joint surface as possible • The larger the contact surface is, the more comfortable the procedure will be (use flat surface of hand vs. thumb) • Direction of movement during treatment is either PARALLEL or PERENDICULAR to the treatment plane
Treatment Direction • Treatment plane lies on the concave articulating surface, perpendicular to a line from the center of the convex articulating surface (Kisner & Colby, p. 226 Fig. 6-11) • Joint traction techniques are applied perpendicular to the treatment plane • Entire bone is moved so that the joint surfaces are separated
Gliding techniques are applied parallel to the treatment plane • Glide in the direction in which the slide would normally occur for the desired motion • Direction of sliding is easily determined by using the convex-concave rule • The entire bone is moved so that there is gliding of one joint surface on the other • When using grade III gliding techniques, a grade I distraction should be used • If gliding in the restricted direction is too painful, begin gliding mobilizations in the painless direction then progress to gliding in restricted direction when not as painful • Reevaluate the joint response the next day or have the patient report at the next visit • If increased pain, reduce amplitude of oscillations • If joint is the same or better, perform either of the following: • Repeat the same maneuver if goal is to maintain joint play • Progress to sustained grade III traction or glides if the goal is to increase joint play
Joint mobilization sessions usually involve: 3-6 sets of oscillations Perform 2-3 oscillations per second Lasting 20-60 seconds for tightness Lasting 1-2 minutes for pain 2-3 oscillations per second Apply smooth, regular oscillations Vary speed of oscillations for different effects For painful joints, apply intermittent distraction for 7-10 seconds with a few seconds of rest in between for several cycles For restricted joints, apply a minimum of a 6-second stretch force, followed by partial release then repeat with slow, intermittent stretches at 3-4 second intervals Speed, Rhythm, & Duration of Movements
Patient Response • May cause soreness • Perform joint mobilizations on alternate days to allow soreness to decrease & tissue healing to occur • Patient should perform ROM techniques • Patient’s joint & ROM should be reassessed after treatment, & again before the next treatment • Pain is always the guide
Joint Traction Techniques • Technique involving pulling one articulating surface away from another – creating separation • Performed perpendicular to treatment plane • Used to decrease pain or reduce joint hypomobility
Kaltenborn Traction Grading • Grade I (loosen) • Neutralizes pressure in joint without actual surface separation • Produce pain relief by reducing compressive forces • Grade II (tighten or take up slack) • Separates articulating surfaces, taking up slack or eliminating play within joint capsule • Used initially to determine joint sensitivity • Grade III (stretch) • Involves stretching of soft tissue surrounding joint • Increase mobility in hypomobile joint
Grade I traction should be used initially to reduce chance of painful reaction • 10 second intermittent grade I & II traction can be used • Distracting joint surface up to a grade III & releasing allows for return to resting position • Grade III traction should be used in conjunction with mobilization glides for hypomobile joints • Application of grade III traction (loose-pack position) • Grade III and IV oscillations within pain limitation to decrease hypomobility
References • Houglum, P.A. (2005). Therapeutic exercise for musculoskeletal injuries, 2nd ed. Human Kinetics: Champaign, IL • Kisner, C. & Colby, L.A. (2002). Therapeutic exercise: Foundations and techniques, 4th ed. F.A. Davis: Philadelphia. • http://www.pt.ntu.edu.tw/hmchai/Kinesiology/KINmotion/JointStructionAndFunciton.htm • www.google.com (images)