Digital Camera Class 1
Gold Country Computer Learning Center GCCLC Digital Camera Class 1 Revised, July 2009 Lesson slides Lesson 1 Lesson 2 Lesson 3 Lesson 4 Lesson 1 Introduction to Digital Cameras The Community Center layout Needed by students for this course: Your camera with batteries and memory card

Digital Camera Class 1
E N D
Presentation Transcript
Gold Country Computer Learning Center GCCLC Digital Camera Class 1 Revised, July 2009
Lesson slides • Lesson 1 • Lesson 2 • Lesson 3 • Lesson 4
Lesson 1Introduction to Digital Cameras • The Community Center layout • Needed by students for this course: • Your camera with batteries and memory card • Batteries charged • Manual for the camera • Student guide for this course • USB Cable connection camera to PC (opt)
Lesson One • Finding information about your camera • What type of batteries are used in your camera • What type and size of memory in your camera • Basic camera modes • Optical and digital zoom in your camera • Transferring Images to PC
Camera Basics • Camera Basics • Data chips – not film • Various types • Reusable • Learn basic functions • More enjoyable use • Practice between lessons
My CameraExercise 1-1 • Begin recording camera information • Enter as you complete various exercises
Types Alkaline Lithium Nickel Cadmium NiMH (Nickel Metal Hydride) Li-ion (Lithium Ion) External battery packs Exercise 1-2 Remove the battery(ies) from your camera. Are they rechargeable or standard? Record the information in the chart found in Exercise 1-1. Replace the battery(ies). Camera Standard FeaturesBatteries
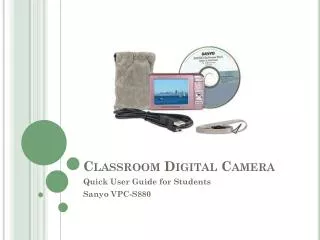
Exercise 1-3 Turn off camera Open the memory door Remove the memory Record the type of memory Types of memory Compact flash SD Memory xD Picture Cards Memory Stick Smart media Microdrive Camera Standard FeaturesCamera Memory 1
Camera Standard FeaturesCamera Memory 2 • How many memory cards and what size? • Memory card costs (as of 7/2009) • SanDisk 2GB Ultra II CompactFlash Card $7 • SanDisk 2GB SD Memory Card $3 • SanDisk 4GB SDHC Memory Card $9 • SanDisk 1GB xD Memory Card $16 • SanDisk 2GB xD Memory Card $25 • SanDisk 4GB Memory Stick Pro Duo $18 • SanDisk 8GB Memory Stick Pro Duo $32 • SanDisk 4GB microSD Memory Card $13
Number of Photos per camera memory and pixel capacity of the camera-for highest resolution & least compression Camera Standard FeaturesCamera Memory 3 Source: Olympus MP = mega pixel
Camera Modes • What is a “mode”? • Picture taking modes = settings • Pre-programmed camera settings • Simplifies picture taking • Includes some of these settings: • Shutter speed • How long the shutter stays open • Shutter opening • How much light is let in through the lens • How many pixels of the shot will be saved to memory
Camera ModesExercise 1-4 • Look closely at your camera – get out your manual • Some modes • Auto • Landscape • Action • Close-up (macro) • Video • Night • Portrait
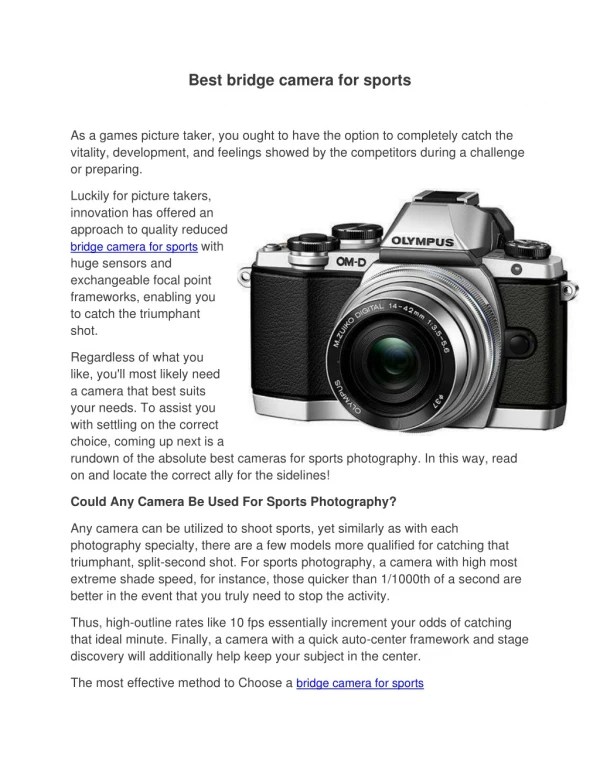
Cameras Lenses • Zoom – almost all digital cameras - standard • Zoom types • Optical – what is the magnification of yours? • lens moves in and out • true telephoto • Digital – Causes loss of quality! Use cautiously • lens doesn’t move • camera magnifies existing optical image • SLR – single lens reflex • Removable lenses
Taking a Few Test PhotosExercise 1-5 (pg11) • Two-step shooting • Press half-way down (why?) • Then press the rest of the way • Turn on your camera • Take a “head” picture of someone in the classroom • Take a picture of something across the classroom • Turn your camera off
Transfer the PhotosExercise 1-6 (page 12) • Turn off your camera • Insert data chip into the PC(or use USB cable & followcamera instructions) • Select first option in window • Select photos to download • Enter your name forthe “group”
Transfer the PhotosExercise 1-6 (page 15-cont.) • After photos are copied • Click Next • Click Finish • If enough time – instructor will show how to view the photos • Remove your data chip(or properly disconnectUSB cable) • Turn off the PC • Note: See the alternative procedure in the student manual (page 12) if the wizard does not appear
Homework for Lesson 1Get ready for Lesson 2 • During the week • Review your camera manual so that you are familiar with each of the functions/modes discussed in class • Practice taking some pictures • Practice copying photos to your PC
Lesson 2Using the Camera • Student needs for this lesson • Your camera with charged batteries and data chip • Manual for the camera • Student guide for this course • This lesson • Finding more information about your camera • Image quality settings • Optical (and digital) zoom in your camera • What are the zoom ratings of your camera? • Flash modes of your camera • Picture taking exercises
Review of Basic Camera Functions and Controls • On/Off – Button or sliding lens cover • Batteries • Memory • Modes – Auto, (Semi-Manual, and Manual), landscape, action, close-up, video, night, portrait • Lenses – Optical (and Digital) zoom
Image Quality Settings (1/2) • Image quality settings affect the quality of the picture and the number of pictures your data chip will hold • Higher the quality – the fewer number of pictures • Example(Cannon128 MB card)
Image Quality Settings (2/2)Examples Canon Olympus
Optical and Digital Zoom • Background about Zoom • Advantages • Changes image from wide-angle to close-up (telephoto) • Brings a far image closer • Zoom – almost all digital cameras - standard • Zoom types • Optical – what is the magnification of your camera lens? • Lens moves in and out (W and T) • True telephoto • Compare digital camera lenses by the optical zoom rating • Digital – what is the digital zoom rating of your camera lens? • Lens doesn’t move • Camera magnifies the existing optical image • Crops the existing optical image – and magnifies • Best to disable digital zoom in your camera unless your are sure of results
Zoom Lens Effects • Wide Angle • “Objects in mirror are closer than they appear” • Distorts near objects larger than reality • Deep perspective • Zoom • Distorts distant objects larger than reality • Shallow perspective
Portraits are usually best taken zoomed out to prevent close features from appearing fatter But experiment for effect! Zoom Lens Effects Wide Angle Zoom
More Zoom Wide Angle – 0.5x Normal – 1x Zoom – 3x Zoom – 8x
Lens Resolution in Digital Cameras • Resolution = pixels captured when taking the picture • Associated with file size • Associated with picture quality • 2 MP vs. 3 MP in amount of data captured • A 3 MP camera with a 10x optical zoom – records maximum of 3 MP of data
Resolution = Picture Quality • Quality = size of the printed picture • The larger is the file size, the larger can be the printed picture • The number of pixels matters • High quality requires more pixels Pixels
Resolution Examples Low Resolution High Resolution
FlashExercise 2-1 (p 23) • What flash features does your camera have? • Flash ModesCheck below your camera features • Auto [ ] • Flash On, Fill Flash, or [ ]Forced Flash • Flash OFF [ ] • Red-eye reduction [ ]
Picture Taking – 10 minutesExercise 2-2(p 24) • (Zoom – 2 pictures – flash off) Find a distant object in the classroom up against the wall - like the door and take pictures with no zoom and then maximum optical zoom of your camera. • (Zoom – 1 pictures – flash off) This time take a picture of someone or an object that is in the foreground using optical zoom– like maybe 5 feet in front of a wall, door or bookcase. • (Flash – 2 pictures – “Off and Auto flash”) Find an object that is slightly shaded or in a shadow like in the front of the classroom with the front lights off, or open one of the closets. • Take a picture with flash off. • Then turn flash on Automatic and take the same picture. • (Flash – 2 pictures) Find a person who is slightly in the shade or shadow • Take a head picture with Auto flash • Take one picture with “red eye” flash turned on. • (Flash – 2 pictures) With flash OFF, take a head picture of someone who is well illuminated then take the same picture with a flash (fill flash) turned on. This will help to show the “wash out” effects that a flash will have.
Reviewing Your Photos using your cameraExercise 2-3(p 25) • Review photos using the playback feature • Delete photos that do not meet your expectations • To do this, use your instruction manual for the camera • Generally you use the Viewing, or Browsing, feature of the camera to see the photo on the LCD display • Select the erase picture button and confirm that you want it erased. Erase one picture at a time • View the next picture and perform the same steps. If you do not want to erase the picture, then simply select the next photo on the camera.
Transfer Photos to the PCExercises 2-4 and 2-5 • Start the PC • Turn off the camera • Remove the data chip – insert in PC • Select “Copy pictures to a folder” (p 26) • Select photos to download • Enter the directory name group = your name • Next then Finish
Removing Images from the Data Chip (p 30) • Data chip looks like a hard drive • File and Folder Tasks • Move – takes from chip to PC • Copy – adds a copy to PC • Delete – deletes from chip
End of Lesson 2 • Remove data chip from PC • Place data chip back in camera • Turn off the PC • Homework for Lesson 3 • Review optical and digital zoom • What is your camera’s flash range in feet? • Practice taking pictures then removing photos from the data chip • When chip is in the camera • When chip is in the PC
Lesson 3Composition and E-mailing • Student needs for this lesson • Your camera with charged batteries and data chip • Manual for the camera • Student guide for this course • This Lesson: • Composing your pictures • Composition tips • E-mailing your pictures
Review from Lesson 2 • What is the difference between optical and digital zoom? • Did you have enough time to work on flash? Any questions? • Difference between Auto, Fill or manual flash, and flash off? • Reviewing, deleting images using the camera? • Copying images to your PC?
Composing Your Pictures(as you take them) • Strong point of interest • A focal point that is off-center (Rule of Thirds) • Add people for scale and interest • Bad weather photos can be very interesting • Overcast – few shadows • Fill-flash useful
Composition Tips • Tip 1: Get down to their level
Composition Tips • Tip 2: Plain background
Composition Tips • Tip 3: Using flash outdoors • Fill flash • Manual flash
Composition Tips • Tip 4: Move in close to subject • Three feet (+) is good • Fill picture area with subject
Composition Tips • Tip 5: Take some vertical pictures • Drama
Composition Tips • Tip 6: Move it from the middle
Composition Tips • Tip 7: Focus control – lock the focus (two-step) • Half-way down to focus and lock in the lens setting • Wait for the OK signal • Focus on subject
Composition Tips • Tip 8: Lock the focus • “Center weighted” focus • Focus on the subject – then move to compose • Use two-step process
Composition Tips • Tip 9: Delays in auto-focus • Happens when camera is confused • Use two-step process • Point at main area of interest and press half-way to focus • Compose picture and press the rest of the way
Composition Tips • Tip 10: Know flash range of your camera • Main mistake – subject out of flash range • Use “night flash” – background with subject up front • What is your camera’s flash range? _______ ft.
Composition Tips • Tip 11: Watch the light • Use flash when needed • Move subject or yourself
Composition Tips • Tip 12: Be a picture director • Take control of the picture • Pick the location • Arrange your subjects when needed