Digital camera basics
Photographic Imaging. Digital camera basics. What DSLR stands for . DSLR stands for “Digital Single Lens Reflex”.

Digital camera basics
E N D
Presentation Transcript
Photographic Imaging Digital camera basics
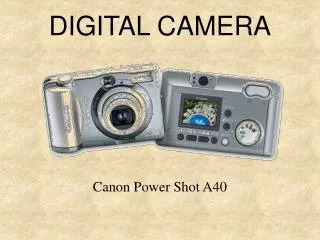
What DSLR stands for • DSLR stands for “Digital Single Lens Reflex”. • A DSLR is a digital camera that uses mirrors to direct light from the lens to the viewfinder, which is a hole on the back of the camera that you look through to see what you are taking a picture of.
Diagram of a camera Lens Reflex mirror Shutter Image sensor Matte focusing screen Condenser lens Pentaprism Eyepiece/Viewfinder
Exposure • Exposure is the amount of light collected by the sensor in your camera during a single picture. • If the shot is exposed too long the photograph will be washed out. • If the shot is exposed too short the photograph will appear too dark. • Almost all cameras today have light meters which measure the light in the given shot and set an ideal exposure • The three primary controls your camera uses for exposure are aperture , shutter speed, and ISO.
Before taking a photo, consider these three things • Aperture • Shutter speed • ISO
Aperture in a camera • Simply put, aperture is a hole within a lens, through which light travels into the camera body. • It is easier to understand the concept if you just think about our eyes. Every camera that we know of today is designed like human eyes.
Aperture in a Camera • The pupil is essentially what we refer to as aperture in photography. The amount of light that enters the retina is limited to the size of the pupil – the larger the pupil, the more light enters the retina. • The easiest way to remember aperture, is by associating it with your pupil. Large pupil size equals large aperture, while small pupil size equals small aperture.
Size of Aperture – Large versus Small Aperture • In photography, aperture is expressed in f-numbers (for example f/5.6). These f-numbers that are known as “f-stops” are a way of describing the size of the aperture, or how open or closed the aperture is. • A smaller f-stop means a larger aperture, while a larger f-stop means a smaller aperture. For example, f/1.4 is larger than f/2.0 and much larger than f/8.0.
Aperture basics • Small apertures (high f/numbers ie f/22) increase the depth of field, bringing both the main subject and background into focus. • Large apertures (low f/numbers ie f/2.8) soften background details. • Depth of field (DOF) is the distance to which objects behind and in front of the focal point appear to be in focus.
Shallow depth of field, f1.4 Larger depth of field, f/22
Shutter Speed • Shutter speed, also known as “exposure time”, stands for the length of time a camera shutter is open to expose light into the camera sensor. • If the shutter speed is fast, it can help to freeze action completely. • If the shutter speed is slow, it can create an effect called “motion blur”, where moving objects appear blurred along the direction of the motion.
How shutter speeds are measured • Shutter speeds are typically measured in fractions of a second, when they are under a second. • For example 1/4 means a quarter of a second, while 1/250 means one two-hundred-and-fiftieth of a second or four milliseconds.
1/2000 second shutter speed 1/20 second shutter speed
Rule of thumb for shutter speed • The slowest shutter speed for hand held photography is 1/60. Anything lower then that should either be on a tripod or on a straight, solid surface. • Any slower handheld shutter speed begins to get motion blur and your photograph may be out of focus.
ISO ISO is the level of sensitivity of your camera to available light. The lower the ISO number, the less sensitive it is to the light, while a higher ISO number increases the sensitivity of your camera. The component within your camera that can change sensitivity is called “image sensor” or simply “sensor” With increased sensitivity, your camera sensor can capture images in low-light environments without having to use a flash. But higher sensitivity comes at an expense – it adds grain or “noise” to the pictures.
What ISO to use • When there is plenty of light, you should always use the lowest ISO, to retain the most detail and to have the highest image quality. • There are some cases where you might want to use low ISO in dim or dark environments – for example, if you have your camera mounted on a tripod or sitting on a flat surface.
When to increase ISO • You should increase the ISO when there is not enough light for the camera to be able to quickly capture an image. • Other cases where you might want to increase ISO are when you need to get ultra-fast shots. • Before increasing the ISO, you should think if it is OK to introduce noise to the image.
General rule of thumb • Bright and sunny, 100 iso • Cloudy, 250 iso • Indoors, 400 iso • Night time without a flash, 1600 iso
Modes on the DSLR • M- Manual Control over aperture and shutter • A- Aperture Priority • S- Shutter Priority • P- Camera sets shutter speed and aperture
Control Panel Shows the ISO, shutter speed, aperture, white balance, amount of images left on the memory card, and image size.
Rear control panel Delete Button Playback Button Menu Button White balance/lock ISO/checkerboard Quality/ Enlarge Playback Screen AE-L/ AF-L- locks exposure Rear dial Up/down/left/right dial Dot/L- locks OK- playback
White Balance • White balance ensures that colors are unaffected by the color of the light source. • The options are: Auto, Incandescent, fluorescent, direct sunlight, flash, cloudy, shade, and K (choose color temperature from list of values).
How to hold a DSLR • Have the camera strap around your neck at all times and • Hold the camera by the lens and hand grip if possible- treat with care!
What to check for after taking a photograph • Is the image over exposed/ under exposed? • Is the image in focus? • Is the image cut off or hard to see? • Is the image visually interesting? • Are there any distracting elements in the background that shouldn’t be there? • Should you change your point of view and get closer/further/lower/higher and reshoot?
Website on exposure • Camera Simulator • http://camerasim.com/camera-simulator/