Video Camera Basics
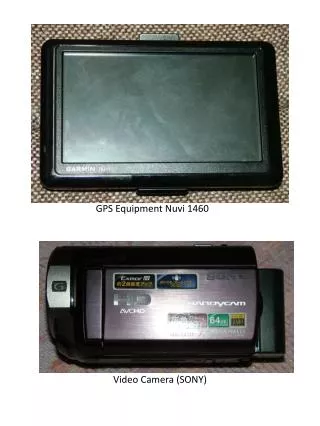
Video Camera Basics. Video Camera Functions (Sony DCR-SR47). Video Camera Functions . Lens Cover – Check make sure the lens is clean Open Screen – Auto on and off Touch Screen Home Button – Cabinet Icon – Delete Play Play Focus Mode Button – Video vs. Photo Photo Button.

Video Camera Basics
E N D
Presentation Transcript
Video Camera Functions • Lens Cover – Check make sure the lens is clean • Open Screen – Auto on and off • Touch Screen • Home Button – Cabinet Icon – Delete • Play • Play • Focus • Mode Button – Video vs. Photo • Photo Button
How to Hold a Video Camera • Use the hand strap at all times • Do not touch the lens • Do not hold the camera by the screen • Hold the camera straight • To avoid ‘camera shake’: • Use two hands • Hold the camera close to your body • Lean against something stable • Ideally use a tripod
Shooting Techniques • Think about you positioning of yourself and the camera • Think about your audio • Learn how to walk with a camera • Press stop before moving • Shoot from different angels • http://calgary.ctvnews.ca/video
Extreme Wide ViewUsed to show the subjects surroundings and to establish the setting. It’s the first shot of a new scene, known as the “establishing shot”.
Long Shot Full Body shot, Feet to Top of Head. Subject is dominant but background remains. Amputation Rule: Do not cut peoples heads or feet off. It looks strange, as if they are amputated
Medium Shot Waist or Lower Chest to Top of Head (most common shot for reports). The subject is more dominant and background less important.
Close-up Shoulders to Top of Head. Subject becomes the main focus and background is minimal. Used to show the features of the subject. *Note: Never film a “floating head” shot where you see a person’s entire head, but not their neck and shoulders.
Extreme Close-up Close-in on just a body part. Used to convey emotion. Use Rarely to Never: Extreme close-ups are ok for some “B” Roll but generally not to be used on people.
Simplicity You never want to put your subject against a busy background. Each scene should contain a single story. To simplify the shot you may need to alter your background or camera position.
Rule of Thirds It is used to create a more interesting photo.
Rule of Thirds It is the idea of breaking a photo down into thirds (both vertically and horizontally), there are 9 parts. This grid creates four main points, which you should consider placing points of interest in.
Lighting Increase the lighting as much as possible and direct towards the subject. Never film with bright light behind the subject, including light from windows. Also do not film against a solid white wall.
Leader (Head and Tail) • Anytime you film ANYTHING, include at least 5 full seconds of static footage at the beginning and end of your recording. • This allows room for editing later, ensuring that needed words or footage aren’t cut off
Other Tips • Experiment • Take lots of shots at different angels • Review and critique your video