Multi Camera Basics Theory
Multi Camera Basics Theory. Missions Fest 2008. Plenary Sessions. Plenary Sessions. Plenary Sessions. Interviews. Worship and Music. Course Outline Class 1 THEORY Class 2 HANDS-ON. Class 1 Picture composition and terminology Technical Aspects


Multi Camera Basics Theory
E N D
Presentation Transcript
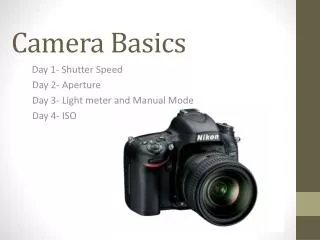
Course OutlineClass 1 THEORY Class 2 HANDS-ON Class 1 • Picture composition and terminology • Technical Aspects Picture and signal assessment Switcher basics and operation • Production Aspects Directing 101 Production Issues Class 2 • Hands-on operation with personnel rotation through various equipment stations while practicing 3 short 5 minute productions
Picture Composition • Action Safe and Title Safe Areas • Field or angle of view • Content identification • Framing
Field or Angle of View Identification • E.L.S. • Extreme long shot • Establishing shot • L.S. or W.S. • Long or wide shot • Area of action
Field or Angle of View Identification • M.L.S. • Medium long shot • Head to mid leg • M.S. • Medium shot • Head to waist shot
Field or Angle of View Identification • M.C.U. • Medium Close-up • Head and shoulders • Close-up • E.C.U. • Extreme Close-up
Content Identification • 1 Shot • 2 Shot • 3 Shot
FramingGood framing is the responsibility of the camera person • Headroom • Vertical framing • Horizontal framing • Frame cutting points • Position of subjects and objects
Headroom • Defined as the amount of picture between to the top of the subject’s head and the top of frame • Subject’s eyes placed at approx 1/2 to 2/3 up from bottom
Vertical Framing • Avoid too much or too little headroom • Place eyes at 1/2 to 2/3 up from bottom
Horizontal Framing • Place people in the frame with adequate looking room • Place objects in slightly off vertical or horizontal axis
Frame Cutting Points Correct Incorrect • Frame people at intermediate points between joints • Avoid framing at the natural joints
Positioning of Subjects and Objects • Avoid straight line arrangements • Place objects in a triangular grouping • Place subject in a setting where there are objects in the foreground, middle ground and background
Technical AspectsWhat are some of them? • Is the picture quality good and matched? • Is the audio quality clear and at a good level? • Is the lighting even, sufficient and color balanced? • Does camera placement work with the set design and action? • Ultimately, there are trade offs in many areas.
Can you believe what you are seeing? Check and adjust all monitors with good video signal -e.g. color bars (from switcher or camera) • Output picture monitor should be the guide
Matching Cameras • Camera video levels should match • White levels • Black levels • Color balance • Chroma levels
Tools: Waveform monitor Waveform monitor displays luminance levels 100 60 20 0
Tools: Waveform monitor Faces properly exposed fall between 50 and 80 units
Tools: Vectorscope Vectorscope displays chroma phase and intensity
Tools: Vectorscope Vectorscope displays chroma phase and intensity
Tools: Proc Amp (processing amplifier) • 1st: Color balance camera and set iris and gain • 2nd: Use Proc Amp
Tools: Switcher wipe • Check picture color balance,levels and timing with a switcher wipe between sources.
Switcher • Routes signals to aux, preview & output busses • Switching multiple input sources on busses: -cameras, VTRs, computer graphics, etc • Transitions: -cuts, dissolves, fades, wipes, DVEs -digital video effects • Keying: luminance key, linear key, and chroma key,
VT4 Components Switcher Input Busses • Key Bus • Main Bus • Preview Bus
VT4 Components Background transition and key control Down Stream Keyer (DSK) BG Fader Bar Auto Transition Effects for BG
Luminance Key Key source Fill source Composite • Cut/Key source: the white image • Fill source: image that fills the cut source shape
Linear Key • Alpha channel is one way to make graphics with variations of transparency Composite CG graphic with alpha channel
Chroma Key • Green background image has been cut and replaced. • Blue or green usually chosen as BG colour. Key source Composite Fill source
Production Aspects • Directing 101 • Production: general concerns • Production meetings • Pre-production • Roles and responsibilities • Showtime
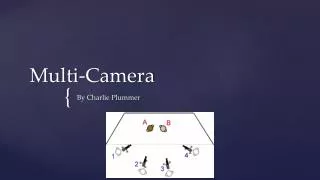
Directing 101 Choice of Camera • Cameras placed left to right: Cam 1, Cam 2, Cam 3 • Cameras truck, dolly, pedestal, zoom to get alternate shots
Directing 101Choice of Objective or Subjective Camera Cam 1 Partially subjective shot Cam 1 Subjective shot Cam 2 Objective shots
Directing 101 Choice of Field (Angle) of View Cam 1 Over the shoulder (OTS) Cam 1 Close-up (CU) Cam 1 Extreme close-up (ECU) -very dramatic Cam 2 - establishing shot -2 shot -profile shot
Directing 101 When and when not to cut • Cut on action. During, not before or after. • Don’t cut from a moving image a stationary one. Moving to moving OK. • Don’t over cut. • Cut on motivation • Don’t cut to identical shots • Don’t cut to mismatched shots • Don’t cut across the axis of action
Directing 101 Mismatched Shots • Cutting from Cam 1 to Cam 3 causes subject B to jump to the opposite side of the screen. • Insert Cam 2 shot in between Cam 1 and Cam 3
Directing 101 Axis of Action • An imaginary line of action or line of conversation
Directing 101 Axis of Action & Placement of Cameras • Cameras to be placed on one side of the line to avoid reversed shots • As direction of action reverses, viewers become disoriented and confused
Directing 101 Choice of Transition • Take or cut: Used when action is continuous in time and place. Cuts must be motivated. For music, cuts must be determined by the pace of music. • Dissolve or mix: Used for a minor discontinuity in time or place. Used to smoothly join different actions. • Fade up or down to black: Indicates a major discontinuity in time or place. Indicates a start or end in segment or program. • DVE - Digital Video Effect: Used for special effects: “page turns” to and from graphics. Not for use with people. Too often over used.