Genepix tutorial
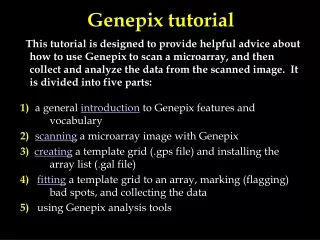
Genepix tutorial. This tutorial is designed to provide helpful advice about how to use Genepix to scan a microarray, and then collect and analyze the data from the scanned image. It is divided into five parts: 1) a general introduction to Genepix features and vocabulary

Genepix tutorial
E N D
Presentation Transcript
Genepix tutorial This tutorial is designed to provide helpful advice about how to use Genepix to scan a microarray, and then collect and analyze the data from the scanned image. It is divided into five parts: 1) a general introduction to Genepix features and vocabulary 2)scanning a microarray image with Genepix 3)creating a template grid (.gps file) and installing the array list (.gal file) 4)fitting a template grid to an array, marking (flagging) bad spots, and collecting the data 5) using Genepix analysis tools
The opening page for the Genepix program has all the features used to scan, grid (mask), and collect the data. These first slides will introduce the various buttons and corresponding hot keys.
Image Manipulation Keys 1. Align blocks (used during gridding) 2. View entire image (full scale) (Alt+F)3. Undo (limited in utility, be careful!) (Ctl+Z) 4. Zoom out (reverses zoom-ins step by step) (Alt+Z)5. Block mode (used during gridding) (B)6. Replicate block mode (gridding) (R)7. Feature mode (gridding) (F)8. Zoom mode (used during scanning and gridding) (Z) 1. 4. 3. 2. 8. 7. 6. 5.
Image Viewing Keys 1. Invert color (turns background white) (I)2. Choose from different color pairs other than red/green. (M)3. Brightness (scale goes from 1-100) 4. Contrast (scale goes from 1-100)5. Autoscale for brightness and contrast (Ctl+T) 6. Sets brightness and contrast to 50 (Ctl+R) 4. 3. 1. 5. 6. 2.
Scanning and Gridding Keys 1. Scan Area (allows the user to draw a box around the area of the slide to be scanned) (Ctl+V)2. View Blocks (places the last grid used over the image) (Ctl+B) 1. 4. 2. 3. 3. New Blocks (allows the user to define a new grid template) (Ctl+N)4. Block/Scan area Properties (summarizes characteristics of selected block(s) and allows resetting of some aspects of grid manipulation) (F10)
Feature Viewer The feature viewer provides information about a spot as the cursor is placed over it, including the X Y coordinates, the block, row and column where the feature is located, and the name of the spot, if a .gal file has been installed. If a grid is placed over the image, the data gathered for that spot for both channels is listed. Rp: ratio of pixel intensities Rm: ratio of medians mR: median of ratios rR: regression ratio P: pixel intensity F: feature intensity B: background intensity 1. 2. 3.
Preview scan (Alt+P) Scan buttons Data scan (Alt+H) Preview scan, then Data scan (Alt+B) Stop scan (Esc) Eject (Alt+E) Hardware
Analysis buttons Analyze (Alt+A) Open/Save Image Information (Alt+Enter) Find (Ctl+F) Copy (Ctl+C) Array List Generator (Alt+G) Options (Alt+I)
Scanning Turn on the scanner before opening Genepix. It’s a good idea to allow the lasers to warm up for 15 minutes or so prior to use. Open the door, place the slide in, spot-side down, with the top of the slide deepest into the machine. Make sure you put the slide in the same orientation every time. The one place that damage can occur to the scanner is the slide carrier mechanism. Be sure to place the slide in and shut the mechanism very delicately. Do not press heavily on the trap (it is not even necessary to close it until it snaps). Doing so will cause the lasers to become misaligned, resulting in decreased data quality. IMPORTANT!!
“Hardware” Button. Press this button to set the photomultiplier tubes (PMTs). Leave it open to easily adjust the PMTs as the image is being scanned. There is one PMT for each laser, 635nm (red, cy 5) and 532nm (green, cy 3). On a decent image, the PMTs usually are best between 400-800 (min 100, max 1000). This button also allows you to choose the resolution of the scan (5-10 microns is default) and the number of times each spot is scanned. If scanned more than once, the replicate intensity values for each pixel for each channel are averaged together.
Press the Preview Button. Scanning at this resolution gives a rough idea how balanced the two channels are. During the preview scan, the PMTs can be adjusted repeatedly until you are satisfied with the overall color and intensity. Don’t forget that the brightness and contrast can be adjusted manually during this time and will affect how the image looks. Aim to set the brightness and contrast at a reasonable level (ie 60-80), and then adjust the PMTs. Also, the preview scan allows you to determine the boundaries of the image for the final scan. Stop Button. Use this to stop the preview or regular scan at any time
During the preview scan, decide if you are generally satisfied with the image. If more than a few spots are white (saturated), the lasers are too strong and the PMTs should be lowered. If the image shows a red or green cast, the PMTs for one channel should be adjusted. The PMTs can be adjusted during the scan. After the preview scan is finished, press the scan area button, then use the cursor to draw the boundary around the area to be scanned. Zoom (Z) in on the four corners of the image to verify that no spots have been excluded.
Press the Data scan button. Zoom in on the top of the array to watch as the first few spots are scanned at high resolution. If you decide you are unhappy with the color balance or intensity of the final image, then the PMTs can be adjusted on the fly. After you are satisfied, stop the scan and start it over. Discard the partial image. Depending on the size of the image, a scan can take 1-5 minutes.
After scanning, zoom in sufficiently to have the entire image just fill the visible area. Press the Autoscale button to automatically adjust the contrast and brightness of the image to what Genepix considers is “best”. Record these numbers (listed under the scale bars) as an objective measure of image quality. Record the PMT setting for each channel. Increase the brightness to 100 to see scratches on the array that are not always visible at lower levels. Record the presence and approximate location of any major blemishes on the array.
Press the open/save button after scanning to save the image. In the save window, under “save as type”, choose the type of file to save the image as, either multi-image or single image tiff, depending on database requirements. A multi-image tiff is a single file with both channels included, whereas the single image tiff saves each channel as a separate file. Genepix will open two files at once, so that both channels can be seen simultaneously. After scanning, press the eject button to retrieve the slide.
Setting up a grid (.gps file) and loading an array list (.gal file) A grid is a graphic file that allows the user to specify the region encompassing each spot from which the data is to be collected. The grid consists of circles (called “features” by Genepix) arrayed in blocks. The number of features in each row and column of each block, as well as the number of blocks, are set by the user depending on how the microarray was made. The array list (.gal file) is a text tab-delimited file which serves as the key for aligning the correct gene name with its associated spot.
Basic ways to work with grids and images: Block mode: allows you to move and alter the individual grid blocks Feature mode: allows you to move and alter the individual circles within a grid Zoom mode: allows you to zoom in on the image There are three ways to switch between modes: use the Genepix button shown below, use the correct hot key on the keyboard, or right click the mouse and select the option you wish. block mode button, or press “b” on the keyboard zoom mode button, or press “z” on the keyboard replicate block mode button, or press “r” on the keyboard (not used commonly) feature mode button, or press “f” on the keyboard
Setting up a grid 1. If the previous grid is unsatisfactory, delete it before making a new one by selecting all blocks and pressing delete. Otherwise, the new grid will show up superimposed on the old one. 2. Press the new blocks button to open the window to set grid specifications.
1. Choose the correct number of columns and rows for the blocks (usually 4 x 4, or 4 x 8). 2. Choose the correct number of rows and columns for the features (circles) in each block. 1. 3. 2. 4. 3. The spacing between blocks and between features will need to be estimated and refined by viewing how the grid matches with the image. Genepix will not allow overlapping features or blocks. 4. The feature layout allows you to specify how the spots are arranged in a block (almost always rectangular with most standard arrayers).
Estimating the spacing between rows and columns in both the blocks and features takes a little patience. Zoom in on a few blocks of the image to determine if you are close. One grid can serve as a template for similar images, so it only has to be done when a new print run is being used. Once you think you are pretty close, save the grid file by pressing the open/save button, and selecting “Save settings As”. Important note: Genepix always has the last-used grid file open, even if you can’t see it, so whatever you do, don’t just press “save settings”. You will overwrite someone else’s grid file.
Press the open/save button after scanning and select Load Array List (.gal file). You can then go to the location of the .gal file and select it. After the .gal file has been selected, the gene corresponding to each spot will appear in the Feature Viewer after Name:
Adjusting a grid to an array, flagging spots and collecting data After the grid template has been made and the .gal file installed, the grid is altered to fit the spots on a specific array more exactly. A close concordance of the circles within the grid to the spots on the array will improve the quality of the data. Also, any problem spots have to be flagged. After the grid is satisfactory, Genepix collects the data and places it into a text tab delimited file.
If all the blocks are selected, they can be moved simultaneously by clicking and holding down the mouse button on one block. To select a single grid block, click and release the mouse button, then click and drag to move the block. Roughly align a grid block to each block of spots as described next. Note: As soon as you start on a grid for a specific array, save it by pressing the Open/Save button, and selecting “Save Settings As:”. Give the file a name that corresponds with the image. Save your .gps files OFTEN as you go through the blocks to avoid losing all the work you’ve done!!
In block mode, click on the upper left block to select it, and press “5” to zoom in on that block. Align the grid to correspond approximately to the spots as shown here. Systematically work your way through all the grid blocks for the image.
1. 2. There are some tricks to align the grid and block when the block is misshapen or crooked. 1. To tilt the grid onto one corner, press the + and - keys on the number pad, or grab the dot in the center of the upper and left edges of the grid with the curved arrows and move the grid on one corner. 2. To deviate from a square, hold down the Ctrl key, grab a corner of the grid with the mouse, and move it to the desired position.
After all grids and blocks are roughly aligned, select ALL blocks, and then press the “F5” key or the Align Blocks button. Genepix has a spot-finder program that attempts to fit the circles of the grid to the spots on the array. Circles that do not find a spot are automatically marked with a vertical line through the middle of the circle.
Genepix tends to make the circles a little too small around the spots, excluding some data. To make the circles a little bigger than the spots, enter feature mode. While zoomed out, select all features in ALL blocks. The features are selected when a dotted-line square surrounds each circle. Zoom in on one block and enlarge the features by holding the Control key down, and pressing the up arrow key exactly twice. All circles will be just a little bigger than the spots. (It is necessary to zoom in on one block before enlarging the circles, as doing so on an unzoomed image makes the circles very large.)
At this point, look at each block and view each spot to verify that it is okay. Select a block, then press 5 to focus on it. Each corner of the block can be zoomed in on by pressing 1 to view the upper left corner, 2 to view the upper right, 3 to view the lower left, and 4 to view the lower right. Enter feature mode, and select a feature you wish to change by clicking on it, or select several features by clicking, holding down the button, and dragging the mouse. Move a feature(s) with the arrows. Change the diameter by pressing Ctl + up/right arrow to enlarge and Ctl+down/left arrow to reduce.
To flag a spot as “bad”, select the feature(s) to be designated as such. To select multiple non-adjacent features, press Shift before clicking with the mouse. To flag a spot, press “a”. Alternatively, right click and from the resulting popup menu, choose the flag of choice: missing, bad, good, etc. A flag can be cleared by pressing “L”.
After all the features of every block have been examined and adjusted, save the .gps file for a final time. Then press the Analyze button. Genepix will collect the data for every spot in every block. Up until now, all manipulations have been on the same Genepix tab (see upper left of screen), called Image. When Genepix finishes collecting the data, it will automatically switch to the Results tab.
Shown here is an example results (.gpr) file as generated by Genepix. Save this file by clicking on the Save As button and saving the file under a name that corresponds with the image and grid file names. The file will be saved as a .gpr file, but can be opened by Excel as a text tab-delimited file. The description of the column headings, and which columns are most important for further analysis will be discussed in the next section.
Scatter Plot of Background Median vs BlockShows that background increases as one moves down the slide.