Chapter 10 continued
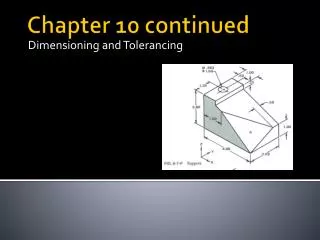
Dimensioning and Tolerancing. Chapter 10 continued. General Notes. Relate to the entire part or drawing as a whole Located next to the title block Notes: Material specs Units General tolerances Finish specs Etc. Delta Notes. Refer to a specific area of the part

Chapter 10 continued
E N D
Presentation Transcript
Dimensioning and Tolerancing Chapter 10 continued
General Notes • Relate to the entire part or drawing as a whole • Located next to the title block Notes: • Material specs • Units • General tolerances • Finish specs • Etc.
Delta Notes • Refer to a specific area of the part • Note is numbered (usually located with general notes by title block)
Local Notes • Applied to a specific area of the part by a leader All text on drawings to be capitol letters
Dimensioning Systems The manner of which dimensions are applied to drawings for different applications. • Selected based on: • How the part will be manufactured • What features of the part are important based on its function • How many features are on the part • The general shape of the part • Systems can be combined to better dimension relationships of features
Unidirectional Dimensioning • all text is horizontal and read from the bottom of the sheet.
Aligned Dimensioning • all text is aligned with the dimension lines • Horizontal dimensions are read from the bottom • Vertical dimensions are read from the right side
Rectangular Coordinate Dimensioning (10.61) • Dimensioning linear dimensions to locate features from planes, centerlines and center planes
Arrowless Dimensioning (fig 10.14) • Also called Ordinate and Rectangular Coordinate without Dimension Lines • Dimensions shown as extension lines only • Horizontal and vertical dimensions measured from common locations (origin labeled as 0.00) • Size dimensions for holes given in a table
Tabular Dimensioning (fig 10.15) • Size and locations given as x, y, z coordinates • Dimensions shown in a table • Features to be shown in table are labeled with letters
Chart Drawing (fig 10.16) • Multiple parts dimensioned on one drawing • Dims common to all parts are placed on the drawing, dims that differ are placed in a table • Used for parts that have the same shape but different dimensions • Differences between parts can be dimensional or something as minor as a color difference • Cuts down on the number of drawings • Also used in catalogs for ordering parts
Chain Dimensioning (fig 10.24) • Also called point to point • Dimensions from one feature to the next • Causes tolerance buildup
Datum Dimensioning (not in book) • Each dimension is measured from a common edge • Very commonly used on engineering drawings • Commonly combined with chain dimensioning
Polar Coordinate Dimensioning (10.62) • Use of angular dimensions to locate feature • Typically on round parts
Dimensioning Symmetrical Objects • Part must be completely symmetrical about a centerline • Can show entire view or partial view • Must show symmetry symbol on centerline
Dimensioning FeaturesAngular Surfaces Can be dimensioned by: • Dims at both end of the angled surface • Dim at one end and angular dim • Flat taper note
Chamfers Chamfer-a slight surface angle to relieve sharp corners or create lead in on a part that will be inserted into a hole. • 45 ˚ chamfers can be dimensioned with a note • 3X45˚ or 3X3 • All other angles require normal dimensioning
Conical Taper Dimensioning a cylindrical object that changes diameter • Dimensioned in a view where it appears as a triangle

