Download
1 / 61
610 likes | 1.04k Vues
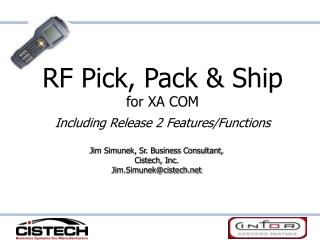
RF Pick, Pack & Ship for XA COM Including Release 2 Features/Functions. Jim Simunek, Sr. Business Consultant, Cistech, Inc. Jim.Simunek@cistech.net. Overview. Use RF gun to stage COM orders for shipment No need to key items/quantities picked on ‘green screen’ Control File for ‘tailoring’

E N D
RF Pick, Pack & Shipfor XA COMIncluding Release 2 Features/Functions Jim Simunek, Sr. Business Consultant, Cistech, Inc. Jim.Simunek@cistech.net
Overview • Use RF gun to stage COM orders for shipment • No need to key items/quantities picked on ‘green screen’ • Control File for ‘tailoring’ • Office functions to: • Assign Pick Lists to pickers • Status orders being picked • Clear RF flags (in case a signal gets dropped) • Ship non-container orders
Existing Features • Handles both regular and stock pick lists • Recognizes Discrete Allocations • Will switch to kit component pick lists from primary pick list if there are kit items on the primary pick list • Can containerize pick (Control File setting - all orders or none) • Handles consolidated pick lists
Release 2 Enhancements • Re-structure RF Environment Control Maintenance into groupings • Employee Assignment to specific pick lists (Control File setting) • Allow F5 prompt from Enter Pick List at RF – Display pick lists available for picking at RF (this will allow pick list print too) • Allow entry of item, turnaround, or UPC from RF • When displaying pick list items, display them in pick list order • Item Substitution during picking (Control File setting) • Serial number entry (Control File Setting)
List of Enhancements • Allow entry of Carrier information from RF (Control File setting) • Allow packing list print prior to shipping, from RF • Automatic shipment create for UPS, Fed Ex or DHL without requiring containerization • Allow F2 return from Location Rescan/Verify
R7 Only Enhancements • Incorporate new R7 XA user exits needed to make the product work less invasively with XA • Incorporate the XA7 ability to provide insufficient inventory messaging at the warehouse level
Under Development • Browser/PowerLink objects and actions for Office functions • Orders being picked • Orders ready for shipping • Clear RF flags • Assign Pick Lists to Pickers
Control File • Containerize shipments (must use XA screens to ship the container) • Interfaces to UPS, Fed Ex and DHL • Use the feature to assign Pick Lists to Employees • Guided Picking • Un-Guided picking will ask for enter/scan of: • Item Number • UPC Number (User Exit in case UPC not stored in ‘Alternate Item Number’ field of Item Master/Revision) • Turnaround Number • Guided Picking will display the next number to be picked on the RF gun
Control File • Separate Manager Approvals for either over pick quantity or under pick quantity • Item Re-scan verification • Item Substitutions • Default pick location to Item Balance Default Location • Block display on the RF gun of items waiting inspection or under QC quarantine • Warning or Error notification to the RF Gun when inventory in a location will go negative
Control File • Automatic print of Packing List at Pick Order Verification • Ability to print Shipping Labels at Pick Order Verification • Default Label has Ship name/address from CO and CO number, PO number and label count (i.e. ‘1 of 3’) • User Exit and API allow use of your own label • Enter Carrier information from RF gun • Pro Number • Truck/Trailer number • Weight & Cubes • Separate setting in Employee Defaults
Control File • Automatic document print at time of shipment • Packing List • Invoice • Bill of Lading • Ground Carrier defaults (UPS, Fed Ex & DHL) • Special Charge code to be used for adding freight • Shipping Label print • Carrier information entry from RF Gun
Warehouse Defaults • Manager Approval Code (for over/under pick quantities) • Serial Number Entry (if item is flagged as Serial Number Item) • Required • Not Required • Warning if not entered • No Serial Number entry • Valid Staging Locations • If Containerizing, Hold and Unpack locations • If using Item Substitutions, Error Location
Employee Defaults • Employee must be a valid Employee in the PM&C Employee Master file • Defaults • Company Number • Warehouse ID • Ability to enter Carrier information from the RF gun • Separate option for UPS, Fed Ex and DHL • Setting for all ‘other’ carriers
Carrier Master (COM File) Carrier ID . . . . . . . : UPS NDA Name . . . . . . . . . . . UPS Address line 1. . . . . . 2 . . . . . . 3 . . . . . . City . . . . . . . . . . . State . . . . . . . . . . . Postal code . . . . . . . . Country . . . . . . . . . . Telephone number . . . . . Fax number . . . . . . . . Address format . . . . . . 1 Standard carrier code . . . UPS Transport mode . . . . . . T Service level . . . . . . . Registration 1 . . . . . . Registration 2 . . . . . . F3=Exit F12=Return Std. Carrier Code used to designate Carrier as UPS, Fed Ex or DHL
Billable Sales Transport Terms • When using the program to ship UPS, Fed Ex and/or DHL orders, it determines if freight charges are to be added by the Sales Transport Term code on the CO • Separate (Cistech) Billable Sales Transport Terms file is a sub-set of the COM Sales Transport Terms • Separate Billable code files for UPS, Fed Ex and DHL • If the CO is shipped via UPS, Fed Ex or DHL and the CO has a Sales Transport Term that is billable to the customer, freight charges will be brought from the Carriers file to the shipment record
User Exits/API AMVBSDFR Activate Process Group Exits DISPLAY Application . . . . : COM Customer Order Management Active Position to group . . . . Type options; press Enter. 16=Activate 17=Deactivate 71=User exits Opt Group Description Status ITM Item maintenance Inactive MSC Miscellaneous Inactive OFL EDI/OFFLINE ENTRY Inactive PCK Pick activities Active QTD Quote detail Inactive QTH Quote header Inactive RPK RF Picking Activities Inactive SCD Special charge detail Inactive SHP Shipping Active SOD Standing order detail Inactive SOH Standing order header Inactive + F3=Exit F7=Backward F8=Forward F11=Job status F12=Return New Group in COM
User Exits/API • User Exits run in addition to the existing programs • API’s run in place of the existing program • Both allow for customization without modifying the code • Use of User Exits and API’s allow for easier upgrade to future releases
User Exits/API AMVB2DFR Activate User Exits DISPLAY Application . . . . : COM Customer Order Management Active Process Group . . . : RPK RF Picking Activities Inactive Position to code . . . . . Type options; press Enter. 16=Activate 17=Deactivate Opt Code Description Type Status Program 1 PL/TrnAround Addt'l Edits User Exit Inactive RFBRPK1R 2 Post RF Pick List Create User Exit Inactive RFBRPK2R 3 RF Pack/Vrfy Addt'l Edits User Exit Inactive RFBRPK3R 4 Post RF Pack/Verify User Exit Inactive RFBRPK4R 5 Shipping Label Print API API Inactive RFBRPK5R 6 Post Shipping Label Print User Exit Inactive RFBRPK6R 7 RF Unpack Addt'l Edits User Exit Inactive RFBRPK7R 8 Post RF Unpack User Exit Inactive RFBRPK8R 9 Crt Ofln Shpmt Adtl Edits User Exit Inactive RFBRPK9R F3=Exit F7=Backward F8=Forward F11=Job status F12=Return
User Exits/API AMVB2DFR Activate User Exits DISPLAY Application . . . . : COM Customer Order Management Active Process Group . . . : RPK RF Picking Activities Inactive Position to code . . . . . Type options; press Enter. 16=Activate 17=Deactivate Opt Code Description Type Status Program A Post Offline Shpmt Create User Exit Inactive RFBRPKAR B Post Item Pick Completed User Exit Inactive RFBRPKBR C Avail Inv Dsp Addtl Edits User Exit Inactive RFBRPKCR D Item Pick Loc Addtl Edits User Exit Inactive RFBRPKDR E Post Pick Qty Entry/Edit User Exit Inactive RFBRPKER F Itm Pck Cmplt Addtl Edits User Exit Inactive RFBRPKFR G Get Item for a UPC# API Inactive RFBRPKGR H Get UPC# for an Item API Inactive RFBRPKHR I Pre Carrier Info Entry User Exit Inactive RFBRPKIR J Post Shpmts Create-Multi User Exit Inactive RFBRPKJR + F3=Exit F7=Backward F8=Forward F11=Job status F12=Return
Staging Screens After Signing onto RF gun, screen at left is displayed Option 1 will go into the picking process Option 2 allows for additional labels to be printed Option 3 allows for maintenance to serial numbers Option 9 shifts to Cistech’s RF Inventory Transactions 2/17/08 13:37:35 1. Pick/Verify 2. Ship Addr Labels 3. Serial# Maint. 9. RF Inv Trans 99. Signoff Option:
Employee Number • After Badge Number is entered, screen at left is displayed • Defaults from Employee Master (Cistech) file are displayed and can be overridden 2/17/08 13:48:45 Pick Processing Badge: 1 James Worthington Company: 01 Warehouse: 1 F3=Exit
Pick List • Employee can enter the Pick List Number • If Employee presses F5 key, screen will change to a list of Pick Lists • If pick list has been assigned to Employee it will be at the top of the list • If Pick List was printed with Bar Code, turnaround number can be scanned 2/17/08 13:50:23 Pick Processing Pick List: -Or- Turnaround: F2=Return F3=Exit F5=View Pick Lists
Pick List Prompt • Sample screen when pressing F5 – Pick List Prompt • Allows for ‘paperless picking’ • Pick list must still be created in COM but hard copy does not need to be printed Pos to PL# 1=Select 6=Print S PL# Cust 3965 Walmart Ord 12485 St TX 3986 Walmart Ord 12481 St TX 3990 Walmart Ord 12496 St TX 4013 Walmart Ord 12497 St TX F2=Rtn RollUp/Dwn
Pick Item Screens • Un-Guided Pick Screen: • Guided Pick Screen: Pick List 3965 1104 SPEAKERS Staging Loc Reqd: 5.000 Picked: .000 Remain: 5.000 Location FG01 Qty .000 F2=Rtn F3=Ext F4=Adj F5=Avl F6=Ver F7=Sub 2/17/08 14:50:24 Pick List 4020 Item Turnaround UPC F2=Rtn F3=Exit F5=View PL Items
Un-guided Picking – Item Prompt • If using un-guided picking, the Employee can press the F5 key (when prompted for Item Number) to see a list of items on the pick list • Items will be displayed in the same sequence as printed on the pick list • Key a ‘1’ next to the item to be picked to go to the item screen 2/17/08 14:51:40 Pick List 4020 Enter "1" to Select S Item / Picked 1108 .000 1000 .000 1105 .000 F2=Rtn
Pick Item • F5 – Prompt in Location field will display a list of locations (non-staging) for item • Location can default to Item Balance Location (Control File) • When entire quantity picked, press F6 to verify item • F4 allows changes to be made to location/quantity picked Pick List 3965 1104 SPEAKERS Staging Loc Reqd: 5.000 Picked: .000 Remain: 5.000 Location FG01 Qty .000 F2=Rtn F3=Ext F4=Adj F5=Avl F6=Ver F7=Sub
Staging – Non-Container • When first quantity for item is picked, Staging location must be entered • Must be a valid stage location (Cistech Warehouse Default File) • Different items can be staged in different Staging Locations • RF PPS will create IW/RW transactions in TRDATA to move inventory from shelf to stage locations 2/17/08 13:59:36 Pick List 3965 1104 SPEAKERS Staging Location SHIP F5=View Stg Info
Staging – Container • Container ID must be a valid (COM) container • Container number, if not entered, will become the Pick List number • Item will have IW/RW transactions that move goods from shelf to hold location (as designated in Warehouse Default) • When order is verified, Container will be created in COM and items transferred from hold location to container 2/17/08 13:59:36 Pick List 3965 1104 SPEAKERS Staging Location SHIP Container ID ___ Container Number ______ F5=View Stg Info
Order Verify • When all items on Pick List have been picked (either partial or complete), screen at left will display to allow Employee to either: • Change an item (’1’ in Select field) • Press F6 to verify the order • If ‘Pack List Print’ at order verify (Control File) was set to Yes, Pack List will be printed Pick List 3965 Enter "1" to Select Sel Item 1104 Reqd: 5.000 Picked: 5.000 F3=Exit F6=Verify
Carrier Information • If Control File and Employee Default allow for entry of Carrier information from RF gun, screen at left (and on next slide will display) • Employee can enter any information • Can use F4 at Carrier to see list of valid carriers Carrier Information Pick List 3965 Carrier: ROADWAY ProBill: 1234134134 Truck: ABC - 123 Trailer: 225465467346573657 Instr's: PO Number must be on every box F2=Return F4=Prompt
Carrier Info – Screen 2 • System calculated weight & volumn will be displayed; actuals can be entered • Pack by defaults to Employee name Carrier Information Pick List 3965 Ctns: 0 Weight: .000 LB 5.000 Volume: .000 CF 5.000 Pack By: James Worthington F2=Return
Serial Number • If item is set up for Serial number and Serial number entry is enabled in the Control File, screen to the left will be displayed • Serial numbers can be entered/scanned one at a time • Will be checked for duplicate serial numbers and error issued • Press F6 to generate Serial Numbers 1000 PC, 166 MHZ, D Picked: 5.000 S# Count: 0 Pos Warranty Dt: 21708 S#: Enter "4" to Remove (No Serial #s Exist) F2=Rtn F6=Add Range
Serial Number Generation • Works exactly like XA • Must use Numeric S/N for generation • Does not check for duplicate serial numbers • Will be returned to previous screen after generation where you can select a S/N to be deleted • Cannot have more serial numbers than the quantity picked 1000 PC, 166 MHZ, D Picked: 5.000 S# Count: 0 Starting Serial#: Number to Generate: 5 Increment: 1 Warranty Dt: 21708 F2=Rtn
Shipping Labels • If Labels were requested in Control File, screen to left will be displayed • Employee will enter number of labels to be printed • Ship To name/address from CO will be printed • CO #, PO # and label count will be printed 2/17/08 14:22:09 Ship Addr Label Pick List 4019 Carrier Roadway # Labels to Print 1 F2=Return
Sample Shipping Label Ship To: Automotive Parts Customer 23456 Peachtree Road Atlanta GA 30328 United States CO 12500 PO Demo 00001 of 00003 • Sample label (above) is standard with RF PPS • Can use User Exit to create Additional Labels of your own design • Can user API to create all labels
Sample Pack List Packing List - Pro Forma Page 1 2/17/08 14:16:02 Shipped From: Company . . : 1 ABC, COMPANY Warehouse . : 1 HI-TECH COMPANY - MAIN WHSE Ship to: Walmart 8725 West Avenue Houston TX 75225 United States ----------------------------------------------------------------------------- Carrier/Pro Number Truck/trailer number Gross Weight U/M _________________________ _________________________ ___________ LB _________________________ _________________________ ----------------------------------------------------------------------------- Order information: CO 12485 11/14/07 Walmart P.O. information: Transport terms . . . . . : Prepay & Add Shipping instructions . . : PO Number must be on every box Pack Special Item number Item description Quantity U/M 1104 SPEAKERS 5.000 EA
Item Substitutions • If the Employee picking the order is allowed to substitute one item with another, substitutions must be turned on in the Control File • If Substitution is not enabled in the Control file, F7 key will not display on the RF gun • Substitute Item Number must be set up in the XA Item Substitution file • When the employee presses the F7 key to substitute the item, the following will occur: • Items already staged will be moved to ‘hold’ location • Original Pick List will be deleted • CO will be updated with substitute item (using Offline File Load programs) • New Pick List will be created with the substitute item • Items previously staged will be staged to the new pick list
Office (Green Screen) Functions • Use Office functions to: • Assign Pick Lists to Employees • See orders currently being picked (un-verified) • See orders staged but not shipped (verified) • Clear RF flags from item • Necessary if RF gun loses signal, RF lock will remain on item preventing access to the item • Ship staged orders (non-container)
Assign Employees to Pick Lists • Pick List can be assigned to a single Employee or multiple • Cannot have multiple Employees working on the same item • Can assign a priority • Pick lists will display in priority sequence when F5 key is used on the RF gun • If no priority assigned, pick lists will display in Pick List number sequence • Employee can select any pick list, even if priority assigned • F17 – Subset feature during assignment to limit number of pick lists displayed • Use F7 key to toggle between pick list number sequence and Employee Number sequence • Must use Employee Number to assign priority code
Assignment Screen SIMUNEKJA1 RF Pick List Badge Assignments 2/17/08 SFCTL01 By Pick List 15:01:04 Company: 01 ABC, COMPANY Warehouse: 1 HI-TECH COMPANY - MAIN WHSE Position to Pick List: Type Selection, Press Enter. 1=Assign 4=Remove Assignment 5=Display Items 6=Print Pick List Opt Pri Pick# Badge Employee Customer Order #Itms Mfg Date Use 3955 20 SANDRA MIERS Wal-Mart Lauren 12482 3 11/09/07 2 3956 10 JEFF EATON Walmart 12477 1 11/09/07 3956 20 SANDRA MIERS 3962 20 SANDRA MIERS Walmart 12483 2 11/13/07 3965 Walmart 12485 1 11/14/07 3 3968 10 JEFF EATON Walmart 12486 1 11/14/07 3968 20 SANDRA MIERS 3978 20 SANDRA MIERS Walmart 12491 1 11/16/07 1 3979 10 JEFF EATON Walmart 12492 1 11/16/07 3979 20 SANDRA MIERS 4 3982 10 JEFF EATON Walmart 12495 1 11/28/07 3982 20 SANDRA MIERS More... F3=Exit F5=Refresh F7=ByBadge F11=Fold/Unfold F12=Previous F17=Subset
Assign Picker • When you select a Pick List (by keying a ‘1’ next to the pick list number), the window to the left will appear • Enter a single badge number or multiple • Can have an unlimited number of employees assigned to the same pick list Assign Picker Badge: Badge: Badge: Badge: Badge: F4=Prompt F12=Previous
Assignment Subsets SIMUNEKJA1 RF Pick List Badge Assignments 2/17/08 RF320D2 Subset Pick Lists 15:09:31 Unassigned PLs Only?: Assigned PLs Only?: Carrier: Ship-To Country/State: Ranges: Customer: Mfg Ship Date: Request Date: Badge: Pick List: Order: Item: F3=Exit F4=Prompt F12=Previous
Pick Status Review • Use F7 key to toggle between Verified and Un-Verified pick lists • Picked quantity will be highlighted if Picked quantity is different from Required quantity • Status will show code if item is at RF gun, has errors, etc. • Use options to see items, locations, quantities picked, etc.
RF Pick Status Review - Unverified SIMUNEKJA1 RF Pick Status Review Unverified 2/17/08 SFCTL01 15:18:44 Company: 01 ABC, COMPANY Warehouse: 1 HI-TECH COMPANY - MAIN WHSE Position to Pick List: Type Selection, Press Enter. 1=Select 4=Remove from RF Opt Pick# Customer Customer Name Order Required Picked Status 4020 60000001 Automotive Parts C 12501 65.000 .000 Bottom F3=Exit F5=Refresh F7=Unverified/Verified F11=Fold/Unfold F12=Previous
RF Pick Status Review - Verified SIMUNEKJA1 RF Pick Status Review Verified 2/17/08 SFCTL01 15:18:44 Company: 01 ABC, COMPANY Warehouse: 1 HI-TECH COMPANY - MAIN WHSE Position to Pick List: Type Selection, Press Enter. 1=Select 4=Remove from RF Opt Pick# Customer Customer Name Order Required Picked Status 3965 701 Walmart 12485 5.000 5.000 4019 60000001 Automotive Parts C 12500 65.000 65.000 Bottom F3=Exit F5=Refresh F7=Unverified/Verified F11=Fold/Unfold F12=Previous