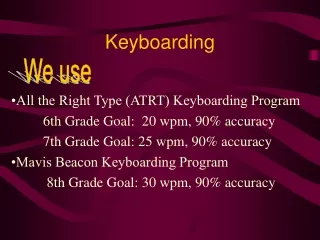
Keyboarding- Unit One
This course unit provides an introduction to the essential components of computer literacy. Students will familiarize themselves with key computer parts such as the tower, monitor, scanner, keyboard, and mouse. The focus then shifts to the standard QWERTY keyboard, emphasizing finger placement on the home row keys. Interactive links offer engaging activities, including typing drills and puzzles designed to reinforce the learning of individual keys and improve typing skills. By the end of this unit, students will have a foundational understanding of keyboarding essential for effective computer use.

Keyboarding- Unit One
E N D
Presentation Transcript
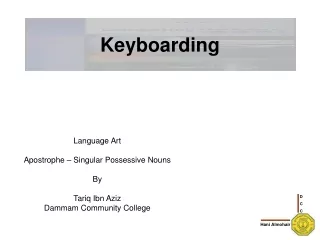
Keyboarding- Unit One Alphabet and Punctuation Keys Fall 2009
Get Familiar with your computer! • Check out the picture below, study each label so that you will be familiar with the terms for each part of the computer! Tower Monitor Scanner Keyboard Mouse
Click on the link below to try to name the different parts of a computer… Click the link below to try an interactive game! Your computer…. • http://internal.usn.org/scott/curriculum/lab/compparts/computerparts.htm • Try to put the puzzle together on this exercise. http://www.computerlabkids.com/parts.htm
THE KEYBOARD Below is a picture of a standard keyboard. Note how the keys are ordered. This is called a QWERTY keyboard….Can you figure out why?
The Keyboard The above keyboard is colored coded to show which keys are keyed by which fingers. For example, all the keys coded in pink are keyed by the pinky fingers.
Click the link below to read about the development of the QUERTY keyboard. This will be your first discussion topic. http://en.wikipedia.org/wiki/QWERTYhttp://inventors.about.com/library/inventors/bltypewriter.htm http://www.webopedia.com/TERM/Q/QWERTY_keyboard.htm
THE HOME ROW KEYS! F J D K Good fingers always go home! You will place your fingers on the home row keys before you begin typing. S L A ; Locate the middle row of your keyboard. Rest your fingers on the keys indicated below: A : Left Pinky J: Right Index S: Left Ring K: Right Middle D: Left Middle L: Right Ring F: Left Index ; Right Pinky
Click on the links below to practice Home Row Typing Drills. http://www.typingweb.com/tutor/ http://www.freetypingtutor.biz/j_applet1/WordWackerApplet.html http://webinstituteforteachers.org/~gammakeys/Lesson/Lesson1.htm http://www.typing-lessons.org/lesson_2.html http://www.typing-lessons.org/lesson_1.html
Adding the H&E Keys.. Strike the H key with the right index finger. Strike the E key with the left middle finger. **Note: when striking keys away from the home row, make quick snapping strokes and immediately return your fingers to the home row. Left Middle Finger Keys ‘E’ Right Index Finger Keys ‘H’
Click on the links below practice adding the H & E keys… http://webinstituteforteachers.org/~gammakeys/Lesson/lesson4.htm http://www.davis.k12.ut.us/cjh/appliedtech/Business/Keyboarding/d2h_and_e.html http://www.kenston.k12.oh.us/kms/8th_grade_keyboarding/H%20and%20E.htm http://www.rogueriver.k12.or.us/Page.asp?NavID=1624&Print=True http://www.freetypinggame.net/play.asp
New Keys: ‘I’ and ‘R’ The Right Middle Finger Keys ‘I’ The Left Index Finger Keys ‘R’
Click on the links below to practice the keys learned so far…. http://www.davis.k12.ut.us/cjh/appliedtech/Business/Keyboarding/d4_review.html http://www.schools.utah.gov/ate/keyboarding/Documents/drills/hw/Homework2.pdf
Add the Keys ‘ O’ & ‘T’ The Left Index finger strikes the ‘T’ The Right Ring Finger strikes the ‘O’
Click on the links below to practice the keys learned so far…. http://www.schools.utah.gov/ate/keyboarding/Documents/drills/hw/Homework3.pdf http://www.davis.k12.ut.us/cjh/appliedtech/Business/Keyboarding/d5_O_and_T.html
The Keys are ‘N’ & ‘G’ The Left Index Finger keys ‘G’ The Right Index Finger keys ‘N’
Click on the links below to practice the keys learned so far…. http://www.schools.utah.gov/ate/keyboarding/Documents/drills/hw/Homework3.pdf http://www.schools.utah.gov/ate/keyboarding/Documents/drills/hw/Homework3.pdf
Left Shift and Period are the next keys! The Left Pinky keys the Left Shift The Right Ring Finger keys the period (.) key.
Click on the links below to practice the keys learned so far…. http://www.davis.k12.ut.us/cjh/appliedtech/Business/Keyboarding/d7_Leftshift.html http://www.schools.utah.gov/ate/keyboarding/Documents/drills/hw/Homework4.pdf http://www.d91.net/keybd7.htm
New keys: ‘U’ & ‘C’ The Left Middle Finger keys ‘C’ The Right Index Finger keys ‘U’
Click on the links below to practice the keys learned so far…. http://www.davis.k12.ut.us/cjh/appliedtech/Business/Keyboarding/d9_U_and_C.htm http://www.montgomeryschoolsmd.org/schools/mvms/computer/Keyboarding/d9_U_and_C.htm http://www.nimblefingers.com/j_applet1/WordWackerApplet.html
The Next Keys are ‘W’ and Right Shift! The Left Ring finger keys the ‘W’ The Right Pinky keys Right Shift
Click on the links below to practice the keys learned so far…. http://www.schools.utah.gov/ate/keyboarding/Documents/drills/hw/Homework4.pdf http://www.davis.k12.ut.us/cjh/appliedtech/Business/Keyboarding/d9_U_and_C.htm http://www.montgomeryschoolsmd.org/schools/mvms/computer/Keyboarding/d10_W_Rt_Shft.htm http://www.d91.net/keybd9.htm
Add the keys B and Y to your list!! The Left Index Finger keys the ‘B’ The Right Index keys the ‘Y’
Click on the links below to practice the keys learned so far…. http://www.davis.k12.ut.us/cjh/appliedtech/Business/Keyboarding/d11_B_and_Y.htm http://www.schools.utah.gov/ate/keyboarding/Documents/drills/hw/Homework5.pdf
Next are the M and X keys M You key ‘M’ with your right index finger. X You key ‘X’ with your left ring finger.
Click on the links below to practice M and X http://www.kenston.k12.oh.us/kms/8th_grade_keyboarding/M_and_X.htm http://www.davis.k12.ut.us/cjh/appliedtech/business/keyboarding/d13_M_and_X.htm http://library.thinkquest.org/18709/data/Type.html http://freeonlinetypinggames.com/free-online-typing-games/keyboard-simon-game/
Cover your keyboards and try this link http://library.thinkquest.org/18709/data/Type.html
Now you are ready to add P and V P You strike the P key with your right pinky. V You strike the V key with your left index.
Click on the links to practice…. http://www.davis.k12.ut.us/cjh/appliedtech/business/keyboarding/d14_P_and_V.htm http://www.powertyping.com/qwerty/lessonsq.html http://www.sense-lang.org/typing/tutor/lessons.php?lang=EN&lesson=13 http://www.kenston.k12.oh.us/kms/8th_grade_keyboarding/P_and_V.htm http://www.nimblefingers.com/j_applet2/WordWackerApplet.html
Let’s move on to Q and , keys http://www.nimblefingers.com/j_applet2/WordWackerApplet.html http://www.nimblefingers.com/j_applet2/WordWackerApplet.html http://www.nimblefingers.com/j_applet2/WordWackerApplet.html http://www.kenston.k12.oh.us/kms/8th_grade_keyboarding/Review_4.htm
Now to Z and colon http://www.kenston.k12.oh.us/kms/8th_grade_keyboarding/Z_and_Colon.htm http://www.nimblefingers.com/j_applet3/WordWackerApplet.html http://www.powertyping.com/qwerty/lessonsq.html http://www.davis.k12.ut.us/cjh/appliedtech/business/keyboarding/d13_M_and_X.htm
Moving on to CAPS LOCK and ? http://www.kenston.k12.oh.us/kms/8th_grade_keyboarding/Caps_Question_Mark.htm http://www.nimblefingers.com/j_applet3/WordWackerApplet.html http://www.powertyping.com/baracuda/baracuda.htm