Download
1 / 36
380 likes | 640 Vues
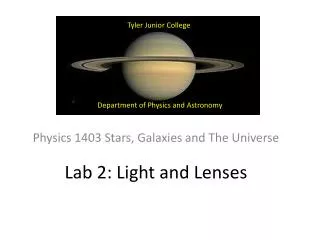
Tyler Junior College. Lab 2: Light and Lenses. Department of Physics and Astronomy. Physics 1403 Stars, Galaxies and The Universe. The Lab. The purpose of this lab to see how light passes through lens as the light travels through the telescope.

E N D
Tyler Junior College Lab 2: Light and Lenses Department of Physics and Astronomy Physics 1403 Stars, Galaxies and The Universe
The Lab • The purpose of this lab to see how light passes through lens as the light travels through the telescope. • We will see that the simple refraction telescope is designed around the focal lengths of the objective lens and the eye piece lens. • We will look at the real images that are formed in a telescope and that they can be inverted, erect, and reverse, thou not correctly oriented.
Types of LensShape determines Function • Function-Converging (Positive)-to a point –Image Diverging (Negative)-away-No Image • Shape-Convex-Converging Narrow at the top and bottom and wider in the middle. (Double or bi-Convex Lens) Concave-Diverging Narrow in the middle and wider at the top and bottom. (Double or Bi-Concave Lens)
Converging Lens d- thickness f-focal length D-diameter or Aperture D
The Lens -Refraction • Curved surface glass bents incoming light due to decrease in speed of light moving into a denser medium toward a point called a focal point where an image is formed. • There will be more on Lenses and Telescopes in Lab 2.
The Lab Task • This lab is in three main parts: • First, determine the diameter (D), thickness (d), local length (f), the F numbers (Fn) and the size, orientation and brightness of the image formed by each lens. PART 1 • Second, determine the focal length of each lens by examining the distances between the object viewed and the image formed, along with more on the size, orientation and brightness. PART 2 • Third, design a simple refractor telescope, determine the lenses needed and relationship of each lens’s focal length in the telescope
First Things First • Preliminary to doing the lab, we will: NOTE: Care should be used with the lens. • Try not to scratch, chip or break them. • It may be necessary to clean the lenses first. • Hold them by the edge only. • Place them on the paper towel or lens cloth when no in use. • First, place a very small piece of scotch tape on the edge of each lens and number them 1-4. • Second, measure the diameter (Aperture or D) and the thickness (d) of the four lenses. We will use a measuring device that measures small items, called a Vernier Caliper. Record this information in PART 1 DATA TABLE.
The Math • 1 in. (inch) = 25.4 mm (millimeters) “1/1000 meter”[0.001 m] • 10 mm = 1 cm (centimeters) “1/100 meter” [0.01 m] • 1 m (meter) = 100 cm = 1000 mm • 1m = 39.37 in.
Therefore … • Change in. to mm: X in. by 25.4 • Change mm to inches: ÷ mm by 25.4 • Change cm to mm: X cm by 10 • Change mm to cm: ÷ mm by 10 • Change m to mm: X m by 1000 • Change m to cm: X m by 100 • Change mm to m : ÷ mm by 1000 • Change cm to m: ÷ cm by 100 • Change m to in. : X m by 39.37 • Change in. to m: ÷ in. by 39.37
Aperture (Diameter) of Lens 5 cm 5.0 cm + 0.07 cm =5.07 cm
Thickness of Lens 0 cm 1 cm “0.5 cm” =0.58 cm + “0.08 cm”
PART I Setup Bright Light Lens in Lens Holder Screen and Screen Holder cm meter stick Optical Bench Accessory Supports
Support cm meter stick Measurement Mark Optical Bench 101.0 cm
Align Screen, Lens and Light to form Real Image Note: Size, Orientation (which side is the lamp holder on at the front of the room), Brightness of Real Image to Light Bulb from the same distance with you eye and…
Location of Real Image 101.0 cm 94.8 cm Focal length (f) = 101.0 cm -94.8 cm = 6.2 cm
Calculations • F Number (FN) • FN = f/D where f is the focal length and D is the Aperture (Diameter)
PART II Orientation Light Note the direction of the arrow and the ball.
PART II Setup do (Object Distance di (Image Distance)
Location of Real Image 44.1 cm 50.0 cm f = 50.0 cm – 44.1 cm =5.9 cm
Calculations • Focal Length (f ) • f = Where do is the distance (of the object) from lens to light and di is the distance (of the image) from the lens to the screen. (do)(di) do + di
PART III Simple Telescope Bright Light Objective Lens Eye Piece Lens
Objective and Eye Piece Lens Selections • See the Reading assignment or the lab instructions on how to determine which lens will be the objective and which will be the eye piece.
Looking Through Your Telescope Note Fuzzy Image!
Focused Image After Moving Eye Piece Note the orientation: Erect, Inversed, Reversed or Correct?
Calculation • Magnification (M) • M = • Where fo is the focal length of the objective lens (AND THE TELESCOPE) and fe is the focal length of the eye piece lens. fo fe