Introduction to Spreadsheets Chapter 1
Dive into the essentials of spreadsheet functionality with this guide to Microsoft Excel and Apple Numbers. Learn how to organize data, perform calculations, and create professional-looking reports with ease. Discover important concepts such as workbooks, worksheets, and the unique features of cells and data entry. This introduction covers vital tools like the formula bar, status bar, AutoSum, and chart integration. Equip yourself with the skills to generate meaningful insights from data, utilize formulas effectively, and enhance your reporting through charts and graphs.


Introduction to Spreadsheets Chapter 1
E N D
Presentation Transcript
Introduction to Spreadsheets Chapter 1 Lecture Outline
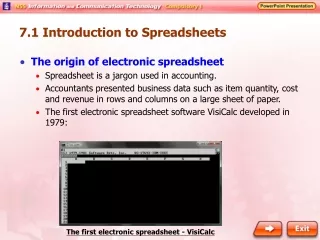
Microsoft Excel/Apple Numbers: • A powerful spreadsheet program that allows you to: • Organize data • Complete calculations • Make decisions • Graph data • Develop professional looking reports • Published organized data to web • Access real-time data from web sites
Workbook: • A collection of worksheets • Contains 3 worksheets by default
Worksheet: • A sheet where data is entered • A workbook can contain 255 worksheets in one file
Worksheet: • Column heading- labels 256 columns with letters • Row heading- labels 65,536 rows with numbers • How big is a worksheet???- 2 rooms wide by 4 rooms long • Cell- intersection of a row and column • Active cell- the one cell with the thick border where data will be entered (similar to flashing insertion point) • Cell reference- unique address of a cell; combine column letter with row number (coordinates)
15 possible mouse shapes: • Note to self: page 1 of Spreadsheet Ch1 draw top 5 most used shapes • BIG BLOCK- displays inside a cell; used to block a range of cells • LITTLE “FILL” PHIL- displays when touching the fill handle
5 Most Used Mouse Shapes: • 1-displays when outside the worksheet; used to drag and drop contents • 2-displays when inside a cell; used to block a range of cells (big block) • 3-displays when touching the fill handle (Little Phil) • 4- displays when inside a row heading; used to select an entire row • 5- displays when inside a column heading; used to select an entire column
Name Box: • Used to (1) display active cell reference; (2) navigate active cell, or (3) name a range of cells • Click once in cell you want to activate • OR: • Type column & row of desired cell then [enter]
Formula bar: • Displays data being typed and formulas keyed
Status Bar: • Displays brief description of the command selected in a menu • Displays the function of the button on which the mouse is pointing • Displays the function of the mode currently enacted.
Status Bar: • Mode indicators- display to specify current mode of Excel (enter, ready, edit) • Autocalculate area- used to view the sum, average, or other totals of a group of numbers
Fonts and Font Size: • Default: Arial, size 10pt • Font Conversions: same as Word • 1”- 72 point • 2”- 144 point • ½”- 36 point • ¼”-18 point
2 Ways to Enter Text: • [enter] • Enter box on formula bar (check inside box)
Enter/Cancel Boxes: • Displays on the formula bar when data is typed and is used to enter the data (check inside box) • Displays on the formula bar when data is typed and is used to cancel the data (x inside box)
Labels: text that identifies contents of a spreadsheet Label default alignment=left Values: numeric data in the form of [1] numbers, [2] formulas, or [3] functions Value default alignment=right 2 Types of Data:
Functions/Formulas • There are 3 rules for writing a function: • [1] always start with = • [2] type the function’s name • [3] type the argument (a range separated by a colon) • *identify by cells, not numbers addressed!
Range: • A rectangular group of adjacent cells
AutoSum: • 2 Ways to Activate Auto sum: =sum(1st cell: last cell) or…. AutoSum button on the Standard Toolbar
Auto fill: • A feature used to fill adjacent cells with the same or consecutive data. • Fill Handle- a small black square in lower right corner of active cell.
3 Steps to Auto fill: • Place active cell on cell containing data to copy • Place mouse on active cell's fill handle • Drag fill handle to adjacent cells to fill in data
Why Auto fill Works?? • Relative Reference- cell addresses that will adjust to the position to which formulas or functions are being copied or moved.
Merge & Center: • Select the individual cells to merge • Click the “merge and center” button on the formatting toolbar (not the center button)
Autoformat: • Preset customized format styles that can be applied to a table
Steps to Autoformat • Select the cells to be formatted • Format menu • Autoformat command
You MUST know your mathematical procedures!!!!! • “Please Excuse My Dear Aunt Sally”
PEMDAS • P- parentheses • E- exponents • M- multiply • D- divide • A- addition • S- subtraction
Solve this problem: • 10-4/(2*4)+6= ?
This is what you should have: • 15.5 or 15 ½
CHARTS • Embedded Chart- A chart that is placed within the same worksheet as the data • Steps to Use a Chart Wizard: • Select the range of cells to chart • Click “chart wizard” button on standard toolbar • Answer wizard questions
CHARTS: • Steps to Align Chart within Gridlines: • Select chart so that resize handles appear • Hold [alt] key on keyboard • Drag chart border with resize mouse
CHARTS • Parts of a Chart: • Y-axis or Value axis…. Derived from the values within the worksheet; sets increments automatically • X-axis or Category axis…. Excel automatically selects entries in topmost row • Legend….identifies what each chart section represents
AUTOCALCULATE: • Steps to Use AutoCalculate: • Select range of cells containing the numbers • Right click “autocalculate” area on status bar • Choose command from short-cut menu
CORRECTING ERRORS: • Edit BEFORE Entering: • [backspace] or • X or cancel button Edit AFTER Entering: -Retype new entry on top of old entry or.. -double click in cell with error or… -place active cell on cell containing error and single-click on formula bar or… -[F2] on cell containing error
CLEARING CELLS • Steps to Clear Contents but leave formatting: • Select cells • [delete] Or… -select cells -edit menu -clear command -contents
Clearing Cells: • Steps to Clear Formatting but Leave Contents: • Select cells • Edit menu • Clear command • Contents Or -Select cells - [delete]
Clearing Cells: • Steps to clear formatting but leave contents: • Select cells • Edit menu • Clear command • Formats
Clearing Cells: • Steps to clear contents and formatting: • Select cells • Edit menu • Clear command • All
SELECT ALL: • “select all” button on worksheet or… • Edit menu- select all command or… • [ctrl] + [A]