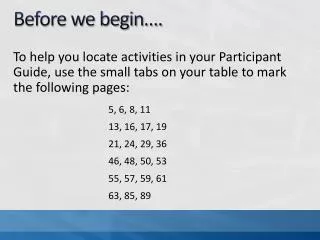
Before we Begin
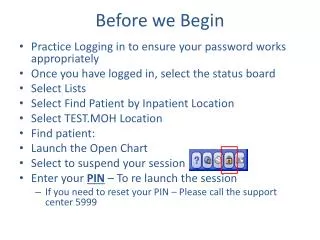
Before we Begin. Practice Logging in to ensure your password works appropriately Once you have logged in, select the status board Select Lists Select Find Patient by Inpatient Location Select Test IP Location Find patient: EMR TEST Launch the Open Chart Click MAR


Before we Begin
E N D
Presentation Transcript
Before we Begin • Practice Logging in to ensure your password works appropriately • Once you have logged in, select the status board • Select Lists • Select Find Patient by Inpatient Location • Select Test IP Location • Find patient: EMR TEST • Launch the Open Chart • Click MAR • Enter your PIN – Make sure you know your PIN • If you need to reset your PIN – Please call the support center 5999
Meditech 6.0 Upgrade RN MedSurg and ICU Session I
Acronyms • PCS: Patient Care System • Care Planning • Intervention and Outcome Documentation • Medication Documentation • Notes • MAR: Medication Administration Record • Medication Administration Documentation • BMV: Bedside Medication Verification • Scanning Medication Barcodes to verify 5 Rights • EMR: Electronic Medical Record • Review clinical documentation • OM: Order Management • Enter Orders
Agenda • PCS: Patient Care Systems • Overview • Status Board • Worklist • Care Planning • Documentation Functions • OM: Order Management • How to Enter Orders • Clinical Data Screen • EMR: Electronic Medical Record • Reviewing patient information
Video Demonstration I New Admission and Care Plan Process New Admission and Care Plan Process
Nursing Main Menu • List of Routines and Reports • PCS Status Board will provide most nursing care routines • Additional routines will be covered in more detail in Session II
PCS Status Board Patient Assignment List • Patient Assignment List/Home Page • Displays Pertinent Patient Information • Relevant to the particular patient location • ie: Psych, MedSurg, Rehab, etc • Continuously Refreshes with new information (every 5 minutes) • Launching pad to various patient care routines Status Board Function Buttons Patient Care Routines & Function Buttons
My List • Manually Add Patients to your list • Pts are Retained From One Log-on to the Next • Discharged Patients Remain on your Status Board until manually removed • Enables Care Provider to Complete Documentation even after the patient has left the facility • Manually Remove Patient from your List • Once you have Completed your Documentation and the patient has been discharged (or you are leaving for the day) • The more patients on your List the longer the status board will take to load
Adding Patients to your List • [Lists] Button provides options to search for and add patients to your List • Find Account • Search for single patient by patient name • Find Patient by Inpatient Location • Provides a list of patients admitted to each location • Provides the ability to add multiple patients to your list at one time • Preferred method • My List • Launches your patient assignment list
Video Demonstration II PCS Status Board PCS Status Board
Exercise A: Find Patient by Location • Click [Lists] • Click [Find Patient by Inpatient Location] • Select [Test MVH IP Location] • Click [Assignments] - Right hand panel • Place a checkmark to the left of the following patient’s names • EMR, TESTPATIENTA • EMR, TESTPATIENTB • Click [Add to My List] -Footer Button • Click [Lists] - Right hand panel • Select [My List] • Confirm that both patients have been added to your assignment list
Exercise B: Find Patient by Account • Click [Lists] • Click [Find Account] • Type Patient’s Name (Last Name, First Name) • Use the first Patient on your Blue Card • Click to the select the patient account • Select the Account Number with the Admin In Registration Type • The status Board will Appear • Click [Add to My List] – Footer Button • Click [Lists] • Select [My List] • Confirm this new patient has been added to your List
Open Chart • All Inclusive Nursing Care Routine • Review Patient Data • Complete Assessment, Outcome, and Medication Documentation • Enter Orders • Enter Allergies and Home Medications
Open Chart • EMR Electronic Medical Record • Review Patient Data • OM Order Entry • Enter Orders • PCS Patient Care System • MAR Medication Administration Record • Document Medications • Care Planning • Add the Care Plan • Worklist • Intervention & Outcome Documentation • Write Note • Clinical Data • Enter Allergies • Enter Home Medications • Enter/Review Patient information EMR OM PCS
Open Chart: Patient Header Medical Record Number Age, Sex DOB Height/Weight/BSA Location, Room, Bed Code Status Allergies Admit Status Account Number
Worklist Worklist • Open Chart defaults to the worklist tab • Documentation Routine • Interventions, Assessments, & Outcomes Open Chart Routines Worklist Functions
Worklist: Standard of Care • Upon registration a Standard of Care Automatically defaults • Location Specific List of Interventions • Includes Interventions that the CNA will need to document • Provides CNA the opportunity to document even before RN is able to add the Care Plan
Adding the Plan of Care • In Meditech, the first step for a new admission is to add the Care Plan • Select a location specific Care Plan • Includes Problems, Outcomes, Interventions common to any patient admitted to the particular location • Once the patient has been fully assessed the Care Plan will be individualized
Med/Surg/ICU Care Plan • Location specific Care Plan includes documentation common to any patient admitted to the particular Location • Care Plan Components • Admission, Daily, and Physical Assessments • Pain • Teaching • Discharge Admission, Physical, and Daily Assessments Pain Teaching Discharge
Worklist • Interventions and Outcomes will display on the worklist as added with the Plan of Care • Clicking the Frequency header will sort the list by frequencies • This will help to clarify which interventions are to be documented upon Admission
Video Demonstration III Open Chart/Worklist/Add Care Plan Open Chart Worklist Add Care Plan
Exercise C: Open Chart/Worklist/Care Plan • Use the first TEST Patient on your Blue Card • You will be working with the patient from your paper sheet • Click [Lists] • Select [My List] • From your Assignment list, click to the left of the patient’s name to Launch the Open Chart • Confirm the Standard of Care list automatically defaults to the worklist • Click [Plan of Care] – Right Hand Panel • Click [Add] – Footer Button • Select Care Plan: M/S/ICU or Psych • Click [Save] – Footer Button • Review the Care Plan Components • Click [Worklist] • Confirm the Interventions and Outcomes from the plan of care appear on your worklist • Click the frequency header to sort the worklist by frequencies • This will highlight which interventions should be documented on admission
Admission Documentation • The next step in the care planning process is to complete all admission documentation and physical assessments • Admission Assessments display separately on the worklist • Provides clarity as to which assessments have been documented vs. those that have not • Provides the ability to document one assessment or multiple assessments at one time • Same assessments are documented on admission as throughout the patients stay • Provides the ability to view documentation over time • Provides the ability to compare the current state to the state of the patient upon admission
Documentation Overview • Documentation mode defaults to flowsheet • Provides a view of prior documentation • Mode Button will toggle to Questionnaire mode • Similar to a paper assessment
Documentation - Flowsheet Current Date/Time Defaults Gray Background = View Mode White Column = Documentation Mode Recall is Enabled for PMH
Documentation - Questionnaire • Clicking Mode will toggle to Questionnaire Style • You may toggle between Questionnaire and Flowsheet mode at any time within documentation
Video Demonstration IV Documentation Documentation
Exercise D: Documenting PMH • Use the first TEST Patient on your Blue Card • Start from the worklist • Place a checkmark in the now column • Click [Document] • Confirm the time column displays the current date/time in the header • Review the documentation • Displaying from the last admission • Click [Mode] to toggle to Questionnaire Mode • Document PMH: Asthma, Diabetes- Insulin Dependant, Tuberculosis, Eczema, Epilepsy, Patient is not at risk for aspiration • Any Body Systems with a Negative Response should be documented as None Reported • Click [Save] • Confirm the last done column updates with the last time the intervention was documented
EMR Patient Care Panel • Displays PCS Documentation • Assessments • Interventions • Outcome • Care Plan
Exercise E: Reviewing Documentation - EMR • Use the first TEST Patient on your Blue Card • Click [Patient Care Panel] • Confirm that the [Assessment] Tab Defaults • Select to view the Past Medical History Documentation • Place a Checkmark to the left of the Assessment Name • Click [View History] • Confirm that all documentation displays • Click [Back] • Click [Plan of Care] Tab – Header • Click the [+] Symbol (in the description header) to Expand the Components of the Care Plan • Review the Care Plan Components
Break 1 Hour 30 Minutes (15 Minute Break)
MedSurg/ICU Individualized Focus of Care • The Joint Commission Requires that each Care Plan be Individualized • Once Admission Documentation and Physical Assessments have been completed - Customize the Care Plan • Individualized Focus of Care Intervention • Tool to assist with care plan customization • Documented after the admission and physical assessments have been completed • Based upon the focus of care selected, a list of problems will be suggested
Psych Individualized Focus of Care • The Joint Commission Requires that each Care Plan be Individualized • Once Admission Documentation and Physical Assessments have been completed - Customize the Care Plan • Individualized Focus of Care Intervention • Tool to assist with care plan customization • Documented after the admission and physical assessments have been completed • Based upon the focus of care selected, a list of problems will be suggested • Select ONE Primary Problem • Select the Additional Problems that Apply
Individualized Focus of Care • Upon saving the focus of care selections, a list of problems is presented • (i.e.: Cardiovascular, Glucose Metabolism, and Infection focus of care selections)
Adding Problems • Place a checkmark to the left of the Problem • Select [Add to Care Plan] • Click [Ok]
Individualized Care Plan • The newly added problems will be viewable within Care Plan Routine
Documentation Frequencies • Outcomes, Assessments and Interventions from the care plan display on the Worklist • Outcomes: required to be documented daily and upon discharge • Interventions/Assessments: vary based upon protocol and physician orders • Frequency column indicates how often to document • Last done column indicates the last time the assessment was documented • Frequencies can be edited as needed based upon a particular Order or Protocol
Video Demonstration V Individualizing the Plan of Care Individualizing the Plan of Care
Exercise F: Individualized Focus of Care • Use the first TEST Patient on your Blue Card • Start from the worklist • Find the *Individualized Focus of Care –M/S/ICU Intervention • Click in the now column • Click [Document] • Select: Infection, Glucose Metabolism, and Cardiovascular • Click [Save] • A List of Suggested Problems should display • Place a checkmark next to: Altered Glucose Metabolism, Infection, and Altered Cardiac Rhythm • Click [Add to Plan of Care – M/S/ICU] • Click [Ok] • Click [Plan of Care] – Right Hand Panel • Confirm three new problems have been added
Individualizing the Problem and Outcome • The next step in the care plan process will be to further individualize the problem and outcome • Problem • Indicate the Disease Process for which the problem relates • Outcome • Indicate specific goals that are being set to achieve the outcome
Individualizing the Problem • Once the problems have been added • Select the Problem tab • Click to edit the item detail field to indicate the disease process for which the problem is related
Exercise G: Customizing the Problem • Use the first TEST Patient on your Blue Card • From the Care Plan Routine – Click the [Problem] Tab • Click in the item detail column for the Problem: Infection • Click [Edit] to enter text for the Problem • Indicate that this problem is “Related to Urinary Tract Infection” • Click [Save] • Notice an “I” Displays in the Item detail column • Click the I to view the Item Detail • Confirm the newly documented info displays • Click [Back] to return to the plan of care
Individualize the Outcome • Next, click the outcome tab to list the goals that will be set to achieve the outcome • For each outcome, click in the item detail to indicate the specific goals will be set to achieve the outcome
Outcome Customization • The documented goals will be viewable/editable from the worklist