Engaging 4th Grade Science: Gluey Putty Experiment Training Presentation
This training presentation, tailored for 4th-grade student volunteers, outlines an exciting experiment involving gluey putty to reinforce scientific concepts. It covers the necessary pre-activity preparation, demonstration steps, and safety tips, ensuring a smooth classroom experience. Volunteers are encouraged to familiarize themselves with the kit beforehand and to guide students through the properties of solids, liquids, and polymers in an engaging manner. Remember to follow cleanup procedures and prevent mishaps with gluey putty at the end of the activity!

Engaging 4th Grade Science: Gluey Putty Experiment Training Presentation
E N D
Presentation Transcript
Gluey Putty 4th grade version Vanderbilt Student Volunteers for Science Training Presentation Spring 2006
Important! • Please use this resource to reinforce your understanding of the lesson! Make sure you have read and understand the entire lesson prior to picking up the kit! • We recommend that you work through the kit with your team prior to going into the classroom. • This presentation does not contain the entire lesson—only selected experiments that may be difficult to visualize and/or understand.
Pre-Activity • Two VSVS volunteers should conduct the Introduction section of this lesson while the other one or two volunteers prepare the cups for the slime. • Count the students and prepare 1 cup for each student in the class by placing a ziplock bag inside a 10-14 oz. cup. (This will resemble a trash can with a liner.) • Use small marked measuring cup for borax to pour 10 mL 4% borax solution into enough 3.5-oz cups for all students. • Do not add too much borax – it will make the gluey putty runny.
Pre-Activity (cont.) • Shake the glue/water mixture very well before using - if this is not done, the gluey putty will be runny. • Use marked measuring cup for glue/water to pour 50 mL of 50% glue/50% water mixture into the ziploc bags inside the cups. • Return unused supplies and used cups to the VSVS lab.
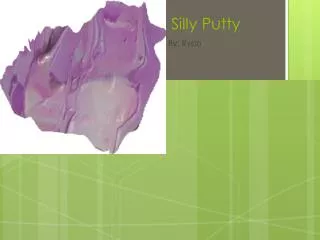
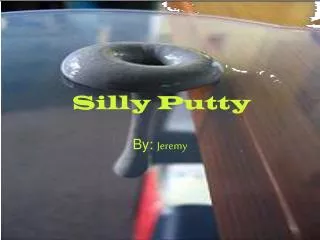
Other Important Tips • You can give these tips to the students before and after the lesson. • Do not put gluey putty in the sink! It can plug up the drain. Roll up the wax papers and toss them away after this activity. • Vinegar will help clean up any gluey putty that gets stuck in clothes or carpet. • The slime will last for several days in the ziplock bag, but if allowed to dry, it forms a dense solid.
I. Introduction • Please see the lesson for detailed instructions and explanations. • Discussion of solids, liquids and gases • Monomers and polymers • Plastic as a polymer • Human “polyethylene chain”
II. Demo—Skewering a Water-Filled Plastic Bag (pg. 5) • Fill a plastic bag about 1/4th of the way full with water. • Show the students the bag and the skewer and ask them if they think you can push the skewer through the bag without having the water leak out. • Dip the tip of the skewer into the glycerin. Wipe off the excess. • Use a gentle twisting motion to insert the skewer into the bag. • Continue pushing on the skewer until it emerges through the opposite side. • The bag should not burst. If it does, try again with another bag. • Hold the skewered bag up for all students to see.
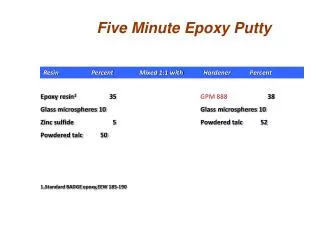
III. Making Gluey Putty (pg. 6) • Have students place the wax paper on top of the desk to protect the surface. • Give each student a sheet of wax paper to protect the work surface, 1 10-14 oz. cup containing a ziploc bag and 50 ml glue-water mixture, 1 3.5-oz. 10 ml clear 4% borax, and 1 popsicle stick
III. Making Gluey Putty • Optional: Show the students the Borax box front cutout and explain that 40g of borax was added to a liter of water to make the 4% borax solution that is in the small cup on their desks. • Have students pour the borax solution into the bag with the borax and stir with a popsicle stick.
IV. Determining the Properties of Gluey Putty (pg. 7) • When the gluey putty is finished, have students perform the observations listed in the manual. • Do as many observations as time allows.
Sample Observations (pg. 7) • Take the Gluey Putty out of the ziploc bag and squeeze the putty to form one mass. • Is it more like a solid or a liquid when it is in this mass and why? (solid; definite shape). • Break off half of the putty, squeeze it into a ball, and roll it gently between the palms of the hands to smooth the ball. Place the ball of putty on the sheet of wax paper. Observe the ball when it is first placed on the paper, then do the next step. • Squeeze the other half of the putty between your hands to form a flat pancake. Grasp one edge of the pancake and hold it in the air at eye level. • Is it more like a liquid or a solid here? (liquid - because it flows).
Wrap-Up • Have students put the gluey putty into the ziploc bag and seal it so they can take it home. • Remind them about the following: • Do not put gluey putty in the sink! It can plug up the drain. • Gluey putty will get stuck to clothes or carpet. If this happens, use vinegar to help remove it. • The gluey putty will keep about two weeks. Warn them about not eating the gluey putty and they shouldn't let little brothers or little sisters play with it.
CLEAN-UP: Roll up the wax papers with popsicle sticks and throw them away after this activity. Put all used cups in the trash bag and place it in the kit. We re-use plastic cups. Go over the observation sheet responses with students (answer sheet on p. 10) and ask: When does the slime act like a solid? Liquid? How do you know if a chemical or physical change occurs when the gluey putty is made? V. Clean-Up and Review (pg. 8)