How to setup hp officejet 6500 printer guide
30 likes | 45 Vues
How to setup hp officejet 6500 printer guidelines - simple steps

How to setup hp officejet 6500 printer guide
E N D
Presentation Transcript
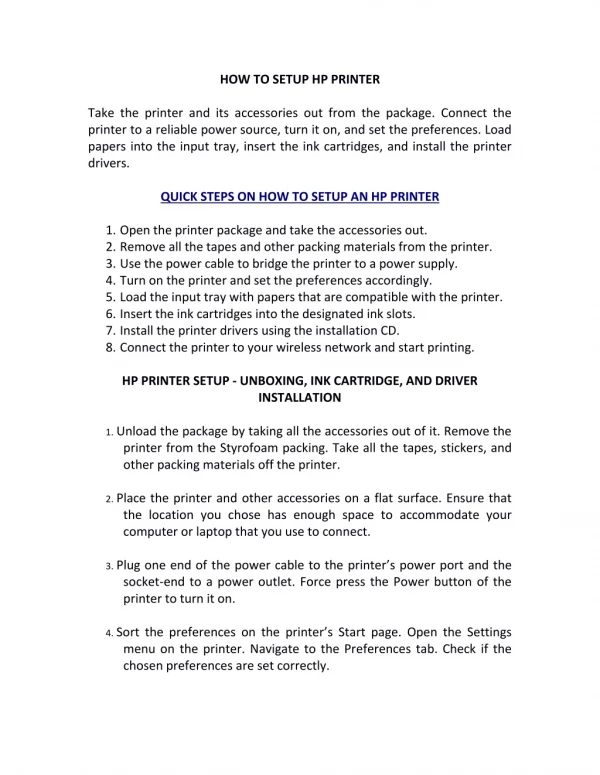
How To Setup an HP Officejet 6500 Wireless Printer To set up an HP Officejet 6500 printer, unpack the printer and provide the power connection, load papers, install the printhead and cartridges. Turn on the network router and provide a Wi-Fi network connection. Download and install the new version of driver software and updated firmware and use your printer. Steps to setup HP Officejet 6500 Wireless Printers 1.Take your HP Officejet 6500 printer out of the box and remove the packing materials. 2.Clear the packing materials and protective tapes from the printer parts. 3.Load a pile of the blank and unwrinkled sheet in the paper/photo tray. 4.Install the new ink cartridges and duplexer. 5.Link the printer power cord to a power source and press the power button. 6.Connect the printer and computer to the router network. 7.Look through a web browser and download the updated driver software.
8.Install the driver software and try to print or scan. Steps to set up an HP Officejet 6500 Wireless Printer Unpack your printer from the printer box and remove the packing materials. Clear the packing materials on the scanner glass, inside the input tray and cartridge area. Use the electrical cable that came with the printer and connects it as a medium to supply power from the electrical source to the printer. Press the power button on the printer panel to turn on the printer. Clear away the protective film from the control panel. Tap the down arrow to select your desired language. Choose the Yes option to confirm the language setting. Choose the country or region and confirm by tapping Yes option. Take out the ink cartridges that came with the printer. Open the ink cartridge access door. Remove the plastic wrapper on the cartridge and twist the orange plastic cap in a counterclockwise direction to remove it from the cartridge. Move the cartridge slowly into the slot until it snaps into the area. Match the colour code on the cartridge and the slot. Close the cartridge access door. Access to the back side of the printer.
Insert the duplexer to the left side of the printer. Push it inwards until it clicks into its place. Open the input tray and place a stack of blank paper and then close the tray. Pull the output tray and extend it outwards to hold the printed output. Turn on the network router and connect it with a broadband connection or DSL cable. Gather the network name and password of your router network. Press the Setup icon on the printer control panel and choose the Wireless Setup Wizard option in the Network settings and follow the instructions on the panel screen to select your network name and connect to it. Download the updated version of driver software and firmware that supports your printer and install it on your computer. Then open the file you want to print and tap on the print option to get the printed output.