Download
1 / 40
410 likes | 624 Vues
Toshiba Windows 8.1 Laptop Handbook for U3A Convenors. Version 1.4 30 December 2013 Mike Hender. Download this information from:. http:// www.hender.net/u3a. Topics. Switching on and connecting leads Connecting to the Projector If you need sound Getting used to Windows 8.1

E N D
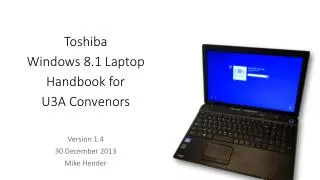
Toshiba Windows 8.1 Laptop Handbook forU3A Convenors Version 1.4 30 December 2013 Mike Hender
Download this information from: http://www.hender.net/u3a
Topics • Switching on and connecting leads • Connecting to the Projector • If you need sound • Getting used to Windows 8.1 • Accessing the programs you’ll use • Escaping the ‘Modern’ interface • The charm of ‘Charms’ • Finding the Control Panel • Linking to WiFi • Projector problems
Power On Button Power On
Right hand side of PC Two USB port here HDMI recommended but if you prefer VGA the cable goes here If you’re using the Ethernet cable rather than WiFi the cable goes in here Sound cable goes here (far left hole) HDMI cable goes here
Left hand side of PC Power cable goes here
Inserting and ejecting a DVD The DVD Eject Button is well hidden under the DVD tray on the left of the PC
To play sound through the main sound equipment in the Pottery Room 1. Connect the Pottery Room black sound cable into the far left socket on the right hand side of the PC (replacing the white cable shown here)
To play sound through the main sound equipment in the Pottery Room 2. Then make sure the switch shown below is pointing to Aux-1 (Orange)
The laptop should boot directly to a familiar desktop If not, select the Amersham U3A-user account and enter the Password shown on the label below the screen
This is the Windows 8.1 ‘Desktop View’. It’s very similar to Windows 7 Internet Explorer and Chrome Adobe Photoshop Elements 12 FastStone Image Viewer VLC DVD Player File Explorer Office 2013 Programs Picasa
Right clicking the Start Button reveals some familiar terms Butthe normal left click of the Start Button takes you to an expanded list of programs that occupy the whole screen (see next slide . . . )
The familiar Windows 7 Start Button has changed! (This slide is just to remind you how Windows 7 works) Most frequently used programs Replaced by 2 new screens . . . All other programs Windows 7
The Windows 8.1 first level Start Screen Get back to the familiar desktop by clicking here Or by touching the ‘Windows’ key Note there isn’t a ‘Taskbar’ when you’re in the ‘Modern’ half of the OS
The Windows 8.1 first level Start Screen More detailed level Start Screens
If you find yourself in a full screen, modern app – like the ‘Photo’ app shown below – here’s how to close and return to the desktop 1. First move the mouse curser to the very top of the screen until it turns into a hand. 2. Then click, and holding the left button down, drag the cursor all the way to the bottom of the screen and then release the button This will take you back to the standard desktop
To shut down, go to the traditional desktop Right click the Start Button and then click on Shut Down
Inserting a DVD into the tray on the left hand side of the PC should auto-start the VLC Player
If 2 sets of speakers appear here, make sure the IDT internal speakers are set to Default by right clicking on them Where’s the Sound?
Move the mouse pointer to either corner to reveal the ‘Charms’ • Search • Share • Start • Devices • Settings The Start Button has some differences
‘Charms’ Put the mouse cursor in the bottom or top right hand screen corner to reveal the ‘Charms’
WiFi Network Charm If you’re in the Pottery Room this will say: u3a-networkPR
You can look at the WiFi networks both through the Charms on the right or with this Network and Sharing Centre window in the Control Panel
Devices Charm It’s probably easiest to control the Projector through the Charms
Projector Charm You’d normally choose to duplicate what’s on the PC screen
Checklist for Projector Problems - 1 • The normal procedure is to connect up via HDMI and the projector and laptop should synchronise and an image appear • If there is a problem with the image check: • Projector is correctly focused for the current image • Check Projector's Aspect Ratio is on Auto* • Check Projector's Digital Zoom is on 1:1* • Press Resync* * See following pages for how to do this
Checklist for Projector Problems - 2 • Use the Projectors Manual Zoom to resize the image - refocusing as necessary • If image is still far too wide for screen i.e. in wide screen mode, adjust to 4X3 on laptop*. Press Resync if necessary. • PowerPoint presentations will usually project correctly even if the image is too wide. • If there are still problems, try connecting via the VGA lead. * See following pages for how to do this
If the projected screen goes grey . . . • Try clicking on remote control button 6 ‘Source’ and see if the picture returns • Next try clicking on remote control button 4 ‘Resync’ and see if the picture returns • If not you may have to switch the PC and Projector off and then on again
You can check the Zoom setting by repeatedly clicking the ‘Zoom’ (button 5) This will appear on the screen
To make sure you are fully zoomed out you can click on ‘Resync’ (button 4) This will appear on the screen
Make sure the Aspect Ratio (button 8) is set to ‘Auto’ This will appear on the screen
Right click on Desktop Then click on ‘Screen resolution’ This window should open For full widescreen choose 1366x768 Check this is displayed
Right click on Desktop Then click on ‘Screen resolution’ This window should open For 4x3 display choose 1024x768 Check this is displayed