Download
1 / 14
140 likes | 171 Vues
Learn how to position and move objects in Alice's world, understand directions, find centers, place objects accurately, and use zoom and undo functions effectively.

E N D
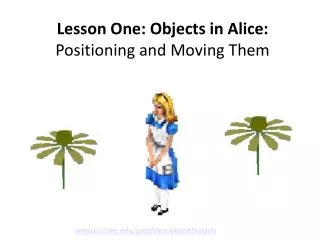
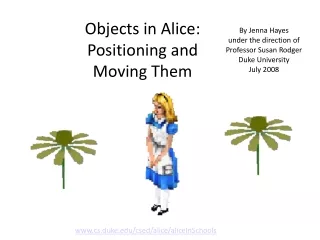
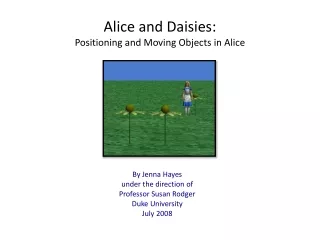
Alice and Daisies: Positioning and Moving Objects in Alice By Jenna Hayes under the direction of Professor Susan Rodger Duke University July 2008
Introduction Download the Alice World that goes along with this tutorial. You will be learning about the objects in Alice, how they are positioned in the space of the Alice world, and how to move them around the way you want to. UP BACKWARD The most basic thing to know about the movement of an object in Alice is that each object can move in six different directions: up, down, left, right, forward, and backward. Always remember that these directions are from the object’s point of view. For example, if you tell Alice to move left, she will move to HER left, not YOUR left. Alice’s RIGHT Alice’s LEFT FORWARD Note: Individual pieces of objects, like Alice’s arm for example, can move in these directions on their own too, if you command them to. DOWN
Step 1: Moving Alice Around So you can see the directions that objects can move in, use a Do in Order and tell Alice to move in each possible direction one meter. Your method editor should look something like this: Play your world to get an idea of how movement looks in each direction.
Centers There is one more very important thing to know to understand movement in the Alice world. Each object in Alice has a center. This is the point on an Alice object that determines where it is in the world, and around which the object will rotate if commanded. Every object’s center is different. center Note: Not all human characters in Alice have their centers at their feet. It varies in position. center center
Step 2: Finding Alice’s Center Let’s find Alice’s center so we know what she’ll look like when we tell her to turn or roll. Select the turn command from Alice’s method list, and drop it in your method editor. Tell her to turn forward one revolution. This will make her do one full rotation around her center. Play your world to see where Alice’s center is. You should notice that her center is somewhere between her feet, because when she rotates, she disappears into the ground!
Step 3: Placing Your Objects When placing your objects in your world, it’s hard to tell exactly where they are just by looking at the screen. Two objects that look like they’re right next to each other might actually be very far apart, and if you want them to interact with each other, you might have problems. That’s why there is something in Alice called quad view. To find quad view, click on the add objects button under your world viewing screen. In the upper right hand corner of the screen that appears, you should see single view and quad view. Select quad view.
Step 3: Placing Your Objects As you can see, the quad viewer allows you to see your scene not only from the front as usual, but also from the top and the side. From the front, it looks like Alice and the flowers are in line with each other, when they are actually scattered all over the place. Click on the flowers to move them around the screen, and position them so that they are all in a line with Alice.
Step 4: Undo and Redo If you are working with Alice, and you do something that you wish you hadn’t done, and you want to go back a step, there is a very useful button for you. It is the Undo button. It is located in the upper left corner of your screen. When you press the Undo button, whatever you last did in Alice will go back to the way it was before you did it. If you press Undo, but then you decide you actually want to keep the change you made, it’s not too late! There is a Redo button right next to the Undo button!
Step 5: Zoom What if, when you are using the quad view, you can’t find one of your objects? This is when you use the zoom button. You can also use the button next to the zoom button that looks like a little hand. When you click on that button and then click on your quad viewing screen and drag it in different directions, the camera will move in whichever direction you drag. Test this out. While you’re still in quad view, move one of your flowers far enough to the right so you can’t see it anymore. Then click on the zoom button. Click on your top right quad viewing screen with the little magnifying glass, and drag your mouse in different directions to see which way the camera will zoom. Find your flower again, and line it up with the others.
Step 6: In the Flowers Exit out of the quad viewing screen. Click on the name of each flower in your object tree to find out which flowers are which. When you click the name of an object, a yellow cube will appear around it in your Alice viewer. Note: If you are using a Mac, the yellow cube may not appear. Now we’re going to explore a few methods that position or move your object in relation to other objects. We are going to tell Alice to turn to the flowers, and move until she is standing in between the last two flowers. If you want one object to face another, you use the turn to face method. Tell Alice to turn to face whichever flower is closest to her by dropping a turn to face method in the method editor. When the menu shows you different parts of the flower to turn to, click the entire flower.
Step 6: In the Flowers Now to make Alice move in between the flowers. Figure out which flower on your object tree is furthest to the right. Now, using the move toward method in your method editor, tell Alice to move toward the flower. Try out different lengths for her to move by playing your world until she is standing in between the farthest two flowers. Now we want Alice to face forward again. Using the turn to face method in your method editor, make Alice turn to face the camera.
Step 7: Orientation The last thing we want to do is make Alice and the flower on the end move backwards together. Use a Do together statement to make Alice and the flower move backwards at the same time. You may notice that Alice and the flower move in slightly different directions when they move backwards. Depending on how you positioned the flowers earlier in the tutorial, the flower may move slightly to the right or left, while Alice just moves straight back. We want them both to move straight back.
Step 7: Orientation Since we can’t tell which way the flower is facing, because it looks the same from all angles, we can’t tell which direction is backwards for it. One way to make sure that the flower’s backwards is the same as Alice’s backwards is to use the orient to method. This method will position the flower so that it’s directions match up with Alice’s directions. Select the flower on the object tree, and tell it to orient to Alice in your method editor. Place the orient to method in your method editor right above your Do Together.
Step 8: Finished! Play your world, and Alice and the flower should move perfectly in sync with each other. Congratulations! Now you know how objects in Alice are positioned, and how to manipulate their positions and movements.