Download
1 / 46
460 likes | 666 Vues
Alice Pong Recreating Pong in Alice. By Elizabeth Liang under the direction of Professor Susan Rodger Duke University June 2010. Introduction. The goal of this tutorial is to create a two player pong game in Alice.

E N D
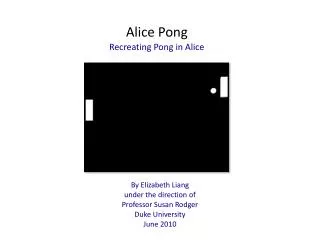
Alice Pong Recreating Pong in Alice By Elizabeth Liang under the direction of Professor Susan Rodger Duke University June 2010
Introduction The goal of this tutorial is to create a two player pong game in Alice. Two different people will be able to move paddles up and down (each player gets his/her own paddle) in order to try and keep the ball in bounds. A player wins when the other player is unable to return the ball. After the game ends, the game will reset and they can play each other again. In the process, we will show you different ways of doing collision detection in Alice as well as two different ways of using keys to interact with a world. Variables will be used to keep track of state in the game. A BDE event will be used to put together all of the methods .
Step 1: Setting Up the Game Start with a space template. In order to make the screen all black we will move the ground out of the picture. Move the ground down until you cannot see the blue and red lines. Then move the ground using the turn objects forward and backward tool and turn the ground until you can not see it. Set the ground isShowing to false.
Step 1: Adding Objects Now from the shapes folder, add in two boxes and a sphere. Use the positioning tools to move the boxes to the sides of the screen, turn them to face the screen straight on. You will need to resize the sphere and boxes to be smaller. Use quad view to make sure the sphere is in between the two boxes. Once it is in the center, move the sphere up so that it is in the middle of the main screen.
Step 1: Invisible Helpers Now from the shapes folder, add in a halfCylinder. This will make the invisible top border of our game. Resize and move it so that it forms a ceiling for the game. Make sure that it is over the sphere and near the two boxes. Set the isShowing property for the halfCylinder to false to hide it.
Step 1: Invisible Helpers Continued Add in another sphere object. We will use this as an invisible object that holds the reset point of the ball. Right click on sphere2 in the object tree and under methods, have it move to the sphere. Set the isShowing to false.
Step 1: Renaming In order to make the code less confusing, we need to rename the objects in the tree. To rename an object, right click on it and select rename. Rename sphere2 to resetPoint and sphere to ball. Rename the halfCylinder to topBorder. Click on each box to figure out if it is the leftPaddle or rightPaddle. Name each accordingly.
Step 1: Orientation In order to intuitively move the ball and paddles we will orient them to the camera. By doing this, our right becomes the ball’s right and our left becomes the ball’s left (etc.). Right click on the ball in the object tree, select methods, ball orient to, camera. Do the same for the rightPaddle and leftPaddle. Changing the orientation is helpful for objects where right and left is not obvious (like the ball and the paddles).
Step 2: BDE Review The bulk of our game will be run through a BDE event. To create a BDE event, click on create new event and select While something is true. A BDE is like a while loop for events. It will kick in every time the condition becomes true with whatever is in the Begin portion of the event. It will then do the during portion and continue until the condition is no longer true. Then it will do the code in End. For a more in depth review see the “Lights Camera Action Part 3 BDE tutorial”. The reason BDE Events are useful for games is that we can have the code run as many times as we need to until the game ends. We do not know how many times the code will need to run until the game is won or lost and a BDE takes care of that for us. We can check if the game is still going in the conditional and then as long as the game is going (no one has lost) the during code will keep playing.
Step 2: World isRunning Under world properties, click on create new variable. Name it isRunning and select Type Boolean and Value false. This variable will keep track of the state of the game (whether people are playing or not). It starts off at false because we want the players to start when they are ready. We will set it back to false after a player has lost.
Step 2: World isRunning Continued Drag the new isRunning variable into the condition of the BDE next to While. Now create a new world method called gameLoop.
Step 2: The Game Loop Drag gameLoop into the During portion of the BDE The game loop is what we want to keep repeating while the game is running. The game loop will be unique for each game. In this game we want to do three things in our game loop, each in its own method. These are the methods we will be creating next: World.CheckBounce will check if the ball needs to bounce off either the walls or the paddle. Ball.update will move the ball to it’s new place based on the velocity of the ball. World.checkEnd will check if the game ends. Basically this checks if the ball is past either of the paddles and off the screen.
Step 2: Check Bounce Create a new world method called checkBounce. This is where we will put code that checks if the ball should bounce and simulate a bounce. In to checkBounce, drag in a Do together and then drag in four separate If statements (one for each bounce situation). Adding comments like the ones shown at right will help us keep track of what we are doing.
Step 2: X & Y Velocity When the ball bounces, the direction of the ball changes. We need to keep track of the ball’s directional speed (velocity) in the game. Because this state is specific to the ball, we will create two variables in the ball object (for a review on variables, see the timer and score tutorials). Click on the ball in the object tree and click on create new variable under properties. Name the variable xVelocity, make sure it is of type Number and set the Value to 0.6. Do this again to create a yVelocity variable. A positive xVelocity means the ball is moving to the right. A positive yVelocity means the ball is moving upwards. Negative velocity means the reverse direction (left, down). Later, by changing the 0.6 value you can control how fast the ball moves in the game. Increasing the number moves the ball faster and lowering makes the ball move slower.
Step 2: Check Left Paddle The first thing we will check is if the ball is colliding with the left Paddle and therefore should bounce off. Under world’s functions, drag in a < b into the condition of the first If statement. Select 1 twice. Find the ball’s functions. Drag in a ball distance to function over the first 1 and select the leftPaddle.
Step 2: Check Left Paddle Continued Drag the ball’s width function over the second 1. Click on the arrow next to it and add 0.1 The 0.1 here gives a little buffer to our collision detection. It helps the bounce look more natural.
Step 2: Check Left Paddle Continued Drag the xVelocity found in the ball’s properties into the first part of the If statement. Select set value, expressions, ball.xVelocity.
Step 2: Check Left Paddle Continued Click on the arrow next to the second ball.xVelocity. Select math and xVelocity * -1 in order to reverse the direction of the ball. This is the final code for the first if statement in checkBounce.
Step 2: Check Right Paddle Do the same thing again in the second if statement, the one for the right paddle. This time instead of ball distance to leftPaddle use ball distance to rightPaddle. The finished code for the two statements are shown.
Step 2: Check Top To check if the ball should bounce off the topBorder of the game, we will use the ball distance below topBorder function. We will check that that is less than the ball’s width. Instead of changing the xVelocity, change the yVelocity. This is the final code for the if statement that checks for bouncing off the top.
Step 2: Check Bottom The check for the bottom is similar except we use the ball distance above ground function. The final if statement in the method is shown below. You are now done with checkBounce! After we finish the game loop and you get a chance to test the game, you can clean up the bounces by modifying checkBounce. Just like we added 0.1 to ball’s width in the left and right checks, you can add (if the bounce seems to be bouncing too late) or substract (if the bounce is coming too early) small amounts to the appropriate conditional check to make the bounces more realistic.
Step 2: Calling Check Bounce Click on the world.gameLoop tab. Click on the world in the object tree. Drag checkBounce from the world methods into world.gameLoop.
Step 2: Creating ball.update Create a new object method under ball and name it update. This is where we will move the ball around the screen. Note: ball.update is an object method because it only deals with the ball.
Step 2: Update the Ball Drag in a Do together into the method. Drag in two ball move commands into the do together. One that moves the ball right 0.25 meters and one that moves the ball up 0.25 meters. Set the duration for both commands to 0.1 seconds. Each time the ball updates the ball will move a small amount, by looping this in the game many times, the ball will look like it is moving continuously.
Step 2: Update the Ball Continued Click on more and set the style to abruptly. Click on the arrows right after 0.25 meters and select math and 0.25* and expressions, ball.xVelocity for the move right and ball.yVelocity for the move up. This will allow the velocity to influence movement. Below is the final code for ball.update. By changing the style, we will make the movement of the ball smoother
Step 2: Calling Ball Update Call ball.update in the gameLoop by clicking on the world.gameLoop tab. Drag ball.update into the code.
Step 2: Creating checkEnd The last thing we want the game loop to do is check if the players have lost. Create a new World Method called checkEnd. This is where we will check if the ball has gone out of bounds and if so, stop the game.
Step 2: Check End Drag in two If statements into world.checkEnd. One to check if the ball is to the left of the leftPaddle and one to check if the ball is to the right of the rightPaddle. You will find these functions in the ball’s functions under spatial relation. Unlike the distance functions that we used earlier in checkBounce, these functions check if the ball has passed by an object without colliding with it. We can use this to test if the ball has passed the paddle without bouncing, therefore assuming the player missed it.
Step 2: Check End Continue If the player has missed the ball, we want the game to end. Drag the isRunning variable from the world into the two If statements. Set the value to false to end the game. The method checkEnd is now finished.
Step 2: Calling Check End Call the checkEnd method in the gameLoop by dragging it in from the world’s methods. If checkEnd turns the game off, we must have a way of turning it on. Create a new When a key is typed event. Set the key to Y and drag in isRunning set the value to true. The game will turn on when the player presses Y.
Step 3: Move Paddles Create a new world level method called movePaddle. This is where we will put the code that moves the paddle when the event plays. Create two new parameters for this method. One that is of type object named paddle and the other of type Direction named direction. We use parameters so that we can avoid creating repeating code where only a couple things change. In this case the only differences are whether it is a left paddle or right paddle moving up or down. This method is a world method because it can be either paddle object being moved.
Step 3: Move Paddles Continued In move paddle we have to do three checks. We need to first check if the game is running and then we need to check that the paddles are in bounds. If we didn’t do these checks then the paddles would be able to go off the screen and players would be able to move the paddles before the game started. Drag in an if statement. Into that, drag in another two If statements nested inside the first. Into the first condition drag in the isRunning world variable. Drag the direction parameter in, setting it == to up in the second If condition and == to down in the final If condition.
Step 3: Move Paddles Continued Under the world’s functions, find the both a and b function under boolean logic. Drag them into both conditions and select true. We now need to check if the paddle is in bounds.
Step 3: Move Paddles Continued Click on the rightPaddle in the object tree and find the list of spatial relation functions. Drag in rightPaddle is above ground into the first condition and rightPaddle is below topBorder into the second condition. Drag the paddle object parameter from the top of the method over both instances of rightPaddle so that it no longer specifies which paddle is being checked in the method.
Step 3: Move Paddles Continued Drag a rightPaddle move command into each of the statements under the If. In the first block, have the rightPaddle move up 0.5 meters. In the second block, the rightPaddle should move down 0.5 meters. Set the duration to 0.25 seconds and the style to abruptly so that the movement looks smooth. Replace the rightPaddle with the object paddle from the parameters.
Step 3: While Key is Pressed Event Create four new When a key is typed events. The right player will use the up and down arrow keys and the left player will use the letters E and D. In order to make it so that the paddles will move when the player holds down the key, change the events to While a key is pressed by right clicking on the four events. You will see that this changes the When event to a While event that loops and has a BDE. The next part of this game is to create events to control the interaction. There are four controls total, Up + Down for each player
Step 3: Calling Move Paddle Drag in the movePaddle method into the During portion of each While a key is pressed event. Select rightPaddle for the first two, up then down. Select leftPaddle for the last two, up then down. Now our controls are done!
Step 3: Testing Finally we can test the game! Press Play and then Y to start the game. In addition to trying to play and move the paddles around, make sure the paddles do not go off the screen if you continue to press up and down. Make sure the game stops when someone looses, to continue testing, just press restart. You may notice that your game, while working, isn’t polished. If the paddles are stopping too early or too late, try moving the ground and top border up and down to decrease or increase the size of the screen. (Remember to set them to isShowing before you move them.) If the ball seems to be bouncing too early or too late off the borders or the paddle, add or subtract buffer from the checkBounce method. You will need to continue playing with and testing your game to make it better.
Step 4: Instructions We know that pressing Y will start the game but for those that do not know, we need an instruction that tells them to. We will do this with 3D text. Create a new 3D Text object that says “Press Y to begin”. Position the object in the center between the two paddles so it is easily readable.
Step 4: Restarting the Game Create a new world method called reset. Click on 3D Text in the object tree and drag the isShowing property into the new world.reset method. Set isShowing to false. To make replaying the game easier we will write two methods so that the players can restart the game after the game ends.
Step 4: Reset In addition to removing the Press Y instruction, we want to move the ball to the resetPoint and make it visible again. Drag a ball move to resetPoint method into the code. Drag the ball isShowing property into the code and set it to true.
Step 4: End Create a new world method called end. Into the new world.end method, drag in the isShowing property of the ball and set it to false to hide the ball. Drag the isShowing property of the 3D Text into the code and set it to true to display the instruction again.
Step 4: Finishing the BDE Now we will call the two methods reset and end in the BDE loop. In the event editor, drag the reset method into the Begin portion of the While event and the end method into the End portion of the While event.
Step 4: Instructions Continued The last thing to do is to make a billboard with the instructions for playing the game on it and have it appear when the world starts and then disappear. Make a billboard with the instructions (or download it from the tutorial site) and import it into the world. Resize and move it forward so that it covers the screen.
Step 4: Instructions Continued Click on the world.my first method tab in the method editor. Here we will put the code to have the instruction billboard we put in show and then disappear. Click on the billboard in the object tree. Drag the isShowing property into the code and set it to true. Drag in a Wait and set it to 5 seconds to give the players enough time to read the board. Then drag in another isShowing property and set it to false to make it disappear.
Congratulations! Press Play to play Pong! Congratulations! You have now finished the tutorial. Games can be difficult to do in Alice because they put together many different concepts that you have learned. You can use the techniques that you have learned from this tutorial (such as collision detection and game loops) and embellish them to create more complicated games. There are many games out there that follow a similar pattern. See if you can add a score (see the score tutorial) to keep track of how many times a player has won or lost in the session. (Hint: you will need two variables to keep track of state—one for each player—and update them in the checkEnd method). Can you make a four player pong game? For a bigger challenge, see if you can use the idea of collision detection to create a break-out game where you try to hit blocks and clear the screen. Use your imagination!