Brazos County ePollBooks Guide & Supplies List
400 likes | 475 Vues
Learn how to set up equipment, search voters, post voters, print stickers & more with detailed instructions provided.

Brazos County ePollBooks Guide & Supplies List
E N D
Presentation Transcript
Brazos County ePollBooks Your guide and list of supplies
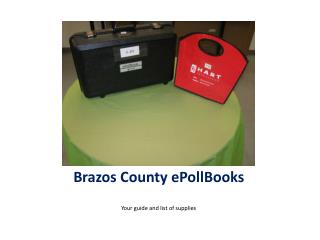
Supplies Each polling place will receive one or two sets of a numbered pollbook case and a red bag. The case and bag should have the same number. In the bag you should find a power strip and your printer stickers.
The ePollBook All electronics will be packed in the case. A diagram of how to set up and pack the case will be on top of the electronic workbook. We have added two items to the equipment.
The ePollBook unpacked. In the case you should find, the workbook, the two part power cord for the workbook, a USB hub, a card reader, a barcode reader and stand, the packing instructions, the printer with power cord and connection cord, and a mouse.
Equipment additions The two additional pieces of equipment are pictured here. The USB hub gives you more places to plug the various items into the workbook, and the mouse is the reason we included the hub. The workbook is small, and although it has a touch screen, we felt a mouse would help make the process easier.
The ePollBook setup #1 Use the two part power cord to connect the workbook to the power strip. If you lose power the workbook will work on batteries, but only for approximately 6 hours. Keeping the workbook plugged in is important.
ePollbook setup… #2 Plug the USB hub into one of the 3 USB ports in the workbook. Any of the ports is fine – set up the equipment in a configuration that works best for your polling location.
ePollbook setup… #3 Plug the printer into the power strip, and plug the connector cable into the hub or one of the other USB ports. Turn the printer on now.
ePollBook setup… #4 Plug the mouse into the USB hub or any available USB port.
ePollBook setup… #5 Plug the card reader into the USB hub, or any available USB port.
ePollBook setup… #6 Plug the scanner into the USB hub or any available USB port, and set it in the stand.
ePollBook setup… #7 Make sure the sticker paper is inserted into the printer.
ePollBook setup… #8 Make sure the top is closed on the printer – the green light should be on.
ePollBook setup… #9 Open the workbook and turn the unit on.
Start the program #10 Double click on the ePollBook Client icon.
Enter the program #11 The software will load and ask for a password. The password will be provided in the case with the equipment. Passwords will be different for each election.
Verify your polling place The first screen will list several pieces of information. You should verify that the polling place and precincts listed are correct for your location. If it is, click on the accept button. If not, call the Voter Registrar’s Office immediately. 361-4470
Enter the program After you have accepted the polling place, click on the Pollworker button to enter the program.
The search screen You can search for a voter with the VUID number, name, and date of birth. Make sure the search area is hi-lighted in yellow.
Simple name search Search of a last name will bring up all voters for that polling place with that last name or with part of that name. The same will work with a birthdate. When searching, it is often best to enter the first part of a name to provide the widest search.
Choosing a voter From a list of voters, use the mouse or the touch screen to hi-light a voter, then click or touch the “Go to Voter” button.
Verify the voter Verify the voter’s name and physical address. If correct, click on or touch the “Post Voter” button.
Answer the question Once you decide to post a voter, the software will ask you to confirm this. This is the last opportunity to make sure you have chosen the correct voter – if so, answer yes.
The software posts the voter A moving bar will appear as the software posts the voter.
Successful posting notice You will see a message telling you that the voter has been successfully posted. A strip should be printed at this point. If not, there is an opportunity to reprint on this screen. If so, choose the “New Search” button.
Printing complete The printer will print and cut a double sticker.
Time to signup and vote The stickers both include the voters name, address, year of birth and correct precinct. One should be placed on the poll list for the voter to sign, and the other should be handed to the voter to take to the JBC for a ballot code.
Barcoding The barcode reader can be used if the voter brings in their complete voter card. Simply pass the card under the barcode reader until you hear it beep.
Barcoding The barcode reader enters the VUID number. If the voter is at the correct polling place, the record is pulled up. In this case, the voter is not at the correct polling location. At this point you should choose “Expanded Search”.
Expanded search results Note that the record is available, even though the voter is not eligible to vote at this location. The red hi-light notes that the voter is not eligible to vote in the election at this time. Hi-light the voter and choose “Go to Voter” to get the information needed for this voter.
Expanded search This screen shows just some of the information that is available for voters. This voter has already voted. If the voter had not voted early, they would still not be eligible to vote at this polling location. The correct location with address is provided.
Search List This screen shows a list of voters from a simple name search where several voters have already voted in the election. All voters are available to you whether they are eligible to vote or not. Choosing the voter will give you the reason that voter is not eligible to vote at your location.
Suspended Voter This screen shows the messages you see when the voter is on suspense. There is a notice in yellow notifying you of the voter’s status. To post the voter, you must check the box under “Special Actions” that verifies that you have received a Statement of Residence from the voter. You cannot move forward until this action is taken.
ID Required This screen shows the message and action needed when the voter must show an ID prior to voting. Please note that you must check the ID Accepted box before the ePollBook will post the voter.
Card reader search The card reader can be used to swipe the voter’s driver’s license. Please note that the magnetic strip must face the side that has the arrow and the words “Magnetic Strip”. If no record is pulled, an expanded search should be tried. If that does not provide a record, a name or birth date search should be used.
To exit the program This shows a DL card reader result. The name of the voter shows. Expanded search is available at this point. To exit the program, pollworkers should choose the “Main Menu” button.
Exit This is the same screen shown when you first started the program. To exit the program, simply choose the “Exit” button.
Closing down the workbook Go to the START button in the lower left corner of the screen. Then choose the red “Turn off Computer” button.
Shut down Again, choose the red button to turn off the computer. Place the electronic equipment in the computer case. Place the power strip and any remaining unopened printer strips in the red HART bag, and bring both to Central Count.
Brazos County Voter Registrar • The Voter Registration office will be staffed at all times that the polls are open. For assistance with voter questions, or assistance with the electronic poll books, please call the Tax Office main telephone number: • 361-4470 • Kristeen Roe, Voter Registrar • Bea Westbrook, Chief Deputy • Kathy Schuetze, Voter Registration Administrator • Denise Eimann - Regina White - Mary Rodriguez