III- Lithography Winter 2008
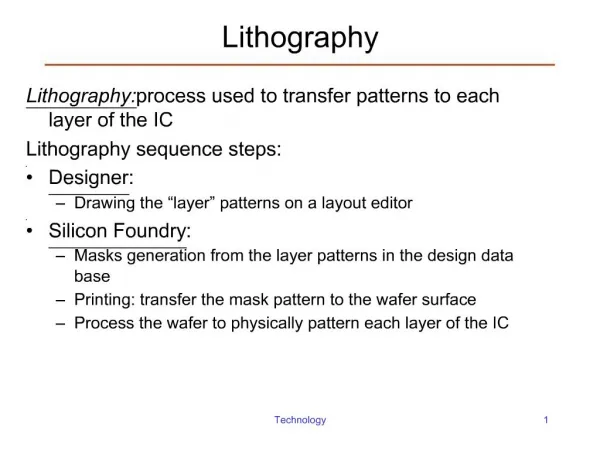
III- Lithography Winter 2008. Lithography definitions Resist tone Introduction to the lithography process Surface Preparation Photoresist Application Soft Bake Align & Expose Develop Hard Bake Inspection Etch Layer or Add Layer Resist Strip Final Inspection

III- Lithography Winter 2008
E N D
Presentation Transcript
Lithography definitions Resist tone Introduction to the lithography process Surface Preparation Photoresist Application Soft Bake Align & Expose Develop Hard Bake Inspection Etch Layer or Add Layer Resist Strip Final Inspection Clean- Room, Wafer Cleaning Content • CD and Tg • Making a Mask • Moore’s ‘Law’
Photolithography -- Definitions • Photolithography is used to produce 2 1/2-D images using light sensitive photoresist and controlled exposure to light. • Microlithography is the technique used to print ultra-miniature patterns -- used primarily in the semiconductor industry.
Thin Films Polish Patterned wafer Etch Photo Diffusion Test/Sort Implant * Photolithography is at the Center of the Wafer Fabrication Process Photolithography -- Definitions
Resist Tone Negative: Prints a pattern that is opposite of the pattern that is on the mask. Positive: Prints a pattern that is the same as the pattern on the mask.
Ultraviolet Light Chrome island on glass mask Exposed area of photoresist Window photoresist Shadow on photoresist photoresist oxide oxide silicon substrate silicon substrate Negative Lithography Resist Tone Areas exposed to light become polymerized and resist the develop chemical. Island Resulting pattern after the resist is developed.
Ultraviolet Light Chrome island on glass mask Shadow on photoresist photoresist Exposed area of photoresist photoresist oxide silicon substrate Resist Tone Positive Lithography Areas exposed to light become photosoluble. Island Window oxide silicon substrate Resulting pattern after the resist is developed.
Resist Tone • Photoresist profiles • Overcut (LIFT-OFF) • Vertical • Undercut
Resist Tone • Photoresist profiles • Overcut (LIFT-OFF) • Vertical • Undercut Dose : High Developer: Low Dose : Medium Developer: Moderate Dose : Low Developer: Dominant
Introduction to the Lithography Process 1. Surface Preparation 2. Photoresist Application 3. Soft Bake 4. Align & Expose* 5. Develop 6. Hard Bake 7. Inspection 8. Etch 9. Resist Strip 10. Final Inspection Ten Basic Steps of Photolithography * Some processes may include a Post-exposure Bake
Dehydration bake in enclosed chamber with exhaust Clean and dry wafer surface (hydrophobic) Hexamethyldisilazane (HMDS) Temp ~ 200 - 250°C Time ~ 60 sec. HMDS 1. Surface Preparation (HMDS vapor prime)
Wafer held onto vacuum chuck Dispense ~5ml of photoresist Slow spin ~ 500 rpm Ramp up to ~ 3000 - 5000 rpm Quality measures: time speed thickness uniformity particles & defects photoresist dispenser vacuum chuck to vacuum pump spindle 2. Photoresist Application
2. Photoresist Application • Resist spinning thickness T depends on: • Spin speed • Solution concentration • Molecular weight (measured by intrinsic viscosity) • In the equation for T, K is a calibration constant, C the polymer concentration in grams per 100 ml solution, h the intrinsic viscosity, and w the number of rotations per minute (rpm) • Once the various exponential factors (a,b and g) have been determined the equation can be used to predict the thickness of the film that can be spun for various molecular weights and solution concentrations of a given polymer and solvent system
Partial evaporation of photo-resist solvents Improves adhesion Improves uniformity Improves etch resistance Improves linewidth control Optimizes light absorbance characteristics of photoresist 3. Soft Bake
Transfers the mask image to the resist-coated wafer Activates photo-sensitive components of photoresist Quality measures: linewidth resolution overlay accuracy particles & defects UV Light Source Mask l Resist 4. Alignment and Exposure
4. Alignment and Exposure • Alignment errors (many different types) • Mask aligner equipment • Double sided alignment especially important in micromachines
~ ~ 4. Alignment and Exposure • Contact printing • Proximity printing • Self-aligned (see next) • Projection printing : R = 2bmin = 0.6/NA
4. Alignment and Exposure • The defocus tolerance (DOF) • Much bigger issue in miniaturization science than in ICs http://www.newport.com/tutornew/optics/ Optics_Reference_Guide.html
Soluble areas of photoresist are dissolved by developer chemical Visible patterns appear on wafer windows islands Quality measures: line resolution uniformity particles & defects developer dispenser vacuum chuck to vacuum pump spindle 5. Develop
6. Hard Bake • Evaporate remaining photoresist • Improve adhesion • Higher temperature than soft bake
Optical or SEM metrology Quality issues: particles defects critical dimensions linewidth resolution overlay accuracy 7. Development Inspection
Selective removal of upper layer of wafer through windows in photoresist: subtractive Two basic methods: wet acid etch dry plasma etch Quality measures: defects and particles step height selectivity critical dimensions Adding materials (additive) Two main techniques: Sputtering evaporation CF4 Plasma 8. Plasma Etch-Or Add Layer
No need for photoresist following etch process Two common methods: wet acid strip dry plasma strip Followed by wet clean to remove remaining resist and strip byproducts O2 Plasma 9. Photoresist Removal (strip)
Photoresist has been completely removed Pattern on wafer matches mask pattern (positive resist) Quality issues: defects particles step height critical dimensions 10. Final Inspection
Clean-rooms, Wafer Cleaning • Yellow light and low particle size/density curves • Cleaning steps • RCA1-peroxides and NH3-removes organics • RCA2-peroxide and HCl-removes metals • Dry vs. wet cleaning • Supercritical cleaning-no liquid phase
Clean-rooms, Wafer cleaning • Yield is the reason for the clean-rooms-the smaller the features the more important the cleanroom • In the future people will work outside the cleanroom and only wafers will be inside the clean environment • At universities, modularity (many different materials and processes) is more important than yield
CD and Tg • CD (e.g. 90 nm) i.e. critical dimension (the smallest feature made in a certain process) • Glass transition temperature, above Tg the resist picks up dirt quite readily and the profile might get degraded
Making a Mask • Software Mask
Moore’s ‘Law’ • Observation and self fulfilling prophecy --not a physical law • Is it running out of steam?