Download
1 / 1
10 likes | 195 Vues
TITLE SHOULD BE ALL CAPS AND AROUND 75 FONT Author’s names should be around 62 pt font Emporia State University, Department of [enter department name here]. Results. Introduction. Results.

E N D
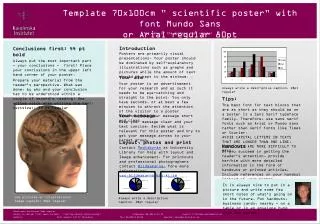
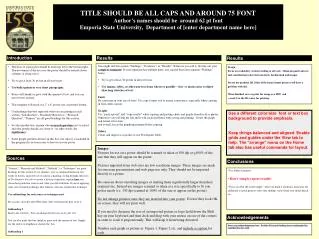
TITLE SHOULD BE ALL CAPS AND AROUND 75 FONT Author’s names should be around 62 pt font Emporia State University, Department of [enter department name here] Results Introduction Results • You might call this section “Findings”, “Evidence”, or “Results”. Whatever you call it, first lay out your complete argument. If your argument has multiple parts, you can put them into separate “Findings” boxes. • Try to get at least 36 pt font in all text boxes. • Use images, tables, or other non-text items wherever possible—they’re much easier to digest than long stretches of text. • Fonts • Be consistent in your use of fonts! Use copy format tool to ensure consistency, especially when copying in from other sources. • Graphs • Use “paste special” and “copy results” when copying and pasting charts and graphs from Excel as photos. Otherwise you will link the file and it will create problems with saving and printing. Create the graph and format it for fonts • and overall size in the graphing program before copying. • Tables • Create and import as a picture or use Powerpoint Table. • The flow of your poster should be from top left to the bottom right. The movement of the eye over the poster should be natural (down columns or along rows). • Try to get at least 36 pt font in all text boxes. • Use bullet points or very short paragraphs. • Boxes will shrink or grow with the amount of text, and you can move boxes around. • This template will result in a 3’ x 4’ poster size, in portrait format. • Use headings that best represent what you are putting in each section. “Introduction”, “Research Objectives”, “Research Question”, “Purpose” are all good headings for this section. • For the introduction, explain what research question you’ve asked and why people should care about it—in other words, the significance. • Some people put their abstract in this box, but since it is included in the program it is not necessary to have it on your poster. Design Focus on readability. Avoid crowding at all costs. Maintain good contrast and coordinating colors between fonts, background and images. Do not use gradient fill. Most of the large format printers will have a problem with this. When finished, save or print the image as a PDF and e-mail it to the ID center for printing. Use a different color/size font or text box background to provide emphasis. Keep things balanced and aligned. Enable grids and guides under the View tab to help. The “arrange” menu on the Home tab also has useful commands for layout. Images Pictures for use on a poster should be scanned or taken at 300 dpi at >100% of the size that they will appear on the poster. Pictures imported from web sites are low resolution images. These images are made for onscreen presentations and web page use only. They should not be imported directly to a poster. Be cautious about stretching images or making them significantly larger than their original size. Instead use images scanned or taken at a size specifically to fit you poster needs (i.e. 150 dpi scanned at 100% of the size to appear on the poster). Do not enlarge pictures once they are inserted into your poster. Even if they look OK on screen, they will not print well. If you need to decrease the size of an imported picture or logo, hold down the Shift key on your keyboard and then click and drag with your mouse on one of the corners in order to scale it proportionally. This will keep it from being distorted. Number each graph or picture as Figure 1, Figure 2 etc. and include a caption for each. Sources Conclusions “Sources”, “Materials and Methods”, “Methods”, or “Techniques” are good headings for this section. If, for instance, you’ve compared themes in two works of fiction, analyzed use of color in a painting, or dug through old issues of The Emporia Gazette to answer a historical question, explain how you chose these particular sources and what you did with them. If you’re applying some sort of named technique, like feminist criticism, explain that technique. Use subheadings for each source or technique used. Be succinct: describe what WAS done. Don’t tell someone how to do it. Subheading 2 Insert your text here. You can change the font size to fit your text. You can also make this box shrink or grow with the amount of text. Simply use the sliders to lengthen or shorten the box Subheading 3 • Use bullet statements • Don’t simply repeat results! • Focus on what the results imply—what you think it all means, directions for additional research projects, how your findings varied from your initial hunch, etc. Acknowledgements Insert your acknowledgements here. Include all research funding sources and people that contributed to this work.