Download
1 / 9
90 likes | 239 Vues
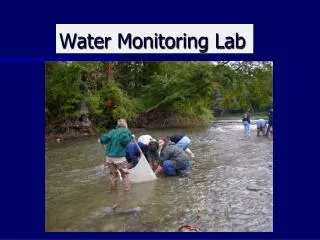
Foul water lab. Your objective--------- is to clean up a sample of foul water, producing as much “clean water” as possible, to a point where it could be used for hand-washing. (Caution: Do not test any water samples by drinking or. Materials. Measuring cylinder Erlenmeyer flask Ring stand

E N D
Foul water lab Your objective--------- is to clean up a sample of foul water, producing as much “clean water” as possible, to a point where it could be used for hand-washing. (Caution: Do not test any water samples by drinking or
Materials • Measuring cylinder • Erlenmeyer flask • Ring stand • Funnel • Filter paper • Glass rod • Pipette • Disposable cup • Paper clip • Sand • gravel
Precautions foul water lab • Follow all lab safety rules • Protect eyes and skin • No horse play • Know the procedure for the lab before starting • Report accidents and broken glass will be disposed off by the teacher • Wash the graduated or measuring cylinder after each purification
Precautions foul water lab continued • Check for any broken or chipped equipment. If any of your equipment is dirty please clean it with soap and water. • Do not pour any sand or gravel into the sink!) • Waft to smell • Do not taste the cleaned and purified water • Wash your hands with soap and water at the end of the experiment
Oil separation • Allow the sample of water to sit in the graduated cylinder for a minute before removing the oil • Dispose of the oil in the container provided by the teacher
Sand Filtration • Add pre-moistened gravel and sand layers to the cup as shown in Figure 1.6 in your textbook • Gently pour the sample to be filtered into the cup. Catch the filtrate in a beaker as it drains through. • Dispose of the used sand and gravel in the trash can (Caution: Do not pour any sand or gravel into the sink!) • Observe the properties of the filtered water sample and measure its volume. • Record your results. Save the filtered water sample for the next procedure.
Gravel ss Moistened Sand Gravel Use a paper clip to make a hole
Charcoal Adsorption • Teacher will add charcoal to the filtered water • Stir • filter • 1.