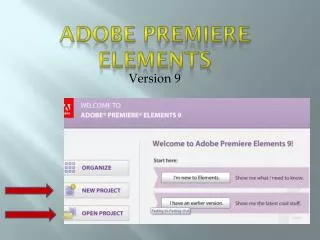
Adobe Premiere Elements 8
Adobe Premiere Elements 8. Session1: Basics; Adding titles and logos. Why Adobe Premiere Elements?. It’s not great, but it’s the best compromise between features, price, ease of use Other options: Adobe Premiere Industry standard Expensive, steep learning curve Final Cut Express/Pro

Adobe Premiere Elements 8
E N D
Presentation Transcript
Adobe Premiere Elements 8 Session1: Basics; Adding titles and logos
Why Adobe Premiere Elements? • It’s not great, but it’s the best compromise between features, price, ease of use • Other options: • Adobe Premiere • Industry standard • Expensive, steep learning curve • Final Cut Express/Pro • Industry standard • Mac only • Windows Movie Maker • Easy and fun • Too basic • TechsmithCamtasia • Designed with screen capture in mind, video editing secondary • If you already own it, it’s not bad…
Adobe Premiere Elements • Think of it as Adobe Premiere Lite • $70 at RAMtech • HUGE resource hog • Takes a full minute to load • Kind of “buggy”: random crashes, vague error messages • Minimum System Requirements • 2GHz or faster processor, Windows Vista or Windows 7 • 2GB of RAM • 12GB of available hard‐disk space to install • 1024x768 display resolution • Microsoft DirectX 9/10 compatible sound and display driver • Windows Media Player
Formats • AVI • Uncompressed, huge file sizes • Very flexible, plays on anything • Lossless, good working format, NOT suitable for web • MP4 • Kodak Touchplay uses MP4 (we’ll use it as our working format) • Compressed, file sizes still large • Will play on most players (Windows, Quicktime, Real Player) • Lossless, good working format, NOT suitable for web • WMV • Windows media, compressed, needs Windows Media player (nearly universal) • Good quality • Good choice for final product (we’ll use this) • FLV, SWF • Flash, compressed, needs Flash player (very common) • Good choice for final product; compression sometimes shows • Plays well with Connect • MOV • Quicktime, compressed, needs Quicktime player
Premiere Workspace Preview pane Tasks pane Project pane
Adding Still Images • Tasks pane>Organize>Get Media>PC files and folders>browse to images • Drag them into timeline (5 second preset)
Adding Crossfade • Go from Timeline to Sceneline view • Only reason to use Sceneline view • Right-click the small box between the clips • Choose your transition • Simple dissolve is effective • Be consistent with transitions
Adding Titles • Titles>New Title>Choose type (still, roll, crawl) • Type in text, use tools at right to choose font style, size, color, alignment, etc. • CSU approved fonts: Minion, Swiss 721, Garamond, Ariel, Helvetica
Adding Title Fade • Choose titles in timeline • Right-click>Choose Fade In, Fade Out • Timing can be adjusted by click/drag of the little diamonds
Final Product • I made a .flv (Flash) of the 10 second clip we built today • Flash and Connect are both Adobe, so they are built to play well together • Let’s take a look!
Resource Page • All materials will be linked from this page • Today’s graphics and PowerPoints are there now • We’ll add materials as they are introduced in the Connect sessions http://www.ext.colostate.edu/vid-pod/