Download

1 / 30
300 likes | 442 Vues
Implementing the 7 th Grade GPS: Constructions, Transformations, and Three-Dimensional Figures. Presented by Judy O’Neal ( joneal@ngcsu.edu ) North Georgia College & State University. Basic constructions Copying a segment Copying an angle Bisecting a segment Bisecting an angle

E N D
Implementing the 7th Grade GPS: Constructions, Transformations, and Three-Dimensional Figures Presented by Judy O’Neal (joneal@ngcsu.edu) North Georgia College & State University
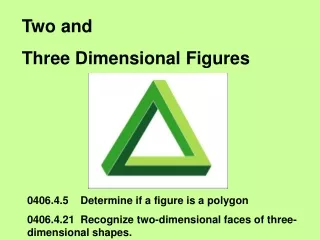
Basic constructions Copying a segment Copying an angle Bisecting a segment Bisecting an angle Perpendicular lines including perpendicular bisector of a line segment Line parallel to a given line through a point not on the line Midpoint – A point that divides a line segment into two congruent () segments. Perpendicular bisector – A line that is perpendicular (⊥) to a line segment and also divides the segment into two congruent () segments. Angle bisector – A ray that divides an angle into two congruent () angles. Transformations Translations Reflections Rotations Three-dimensional figures formed by translations and rotations of plane figures through space Cross sections Cones Cylinders Pyramids Prisms Spheres Mathematics Topics Addressed
Duplicating a Line Segment with Compass and Straightedge • Begin with a line segment PQ. • Draw a line with a straightedge. • Place a starting point on the line and label it R • Place the compass point on point P. • Stretch the compass so that the pencil is exactly on point Q. • Without adjusting the compass span, place the compass point on point R and swing the pencil so that it intersects the line. • Label the intersection point S. S
Duplicating an Angle with Compass and Straightedge • Begin with CAB. • Draw a reference line and place a point A’ near the left end. • With the compass on point A, stretch its width to point B. • Without adjusting the compass, place the compass point on A’ and draw a wide arc across the line. This establishes a new point B’. • Place the compass point on B and stretch its width to point C. • Without changing the compass span, place the compass point on point B’ and draw an arc across the previously drawn arc. • The intersection of these two arcs becomes point C’. • Using a straightedge, draw a line from point A’ to C’ where the arcs intersect. • ∠C’A’B’ is (equal in measure) to ∠CAB.
Perpendicular Bisector with Compass and Straightedge • Begin with a line segment AB. • Place the compass point on point A. • Stretch the compass along segment AB to a length greater than half the segment length. • Construct a circle (or wide arc) with center at point A. • Without adjusting the compass span, place the compass point on point B. • Construct a circle (or wide arc) with center at point B. • Mark and label the intersection points of the two circles as points C and D. • Using a straightedge, draw a line through points C and D. • Line CD intersects line AB at the midpoint, M. C M D
Segment Bisector with Patty Paper • Draw a line segment on patty paper using a straightedge. • Fold the paper over so that one endpoint lies on top of the other and pinch the line segment. • Open the patty paper and place a point at the pinch. Questions for Students: • What is true about the distances from the point at the pinch to each segment endpoint? [Equal] • What is the point at the pinch called? [Midpoint]
Perpendicular Bisector with Patty Paper • Use the segment bisector patty paper and fold the paper to align the segment endpoints. • Crease the paper forming a fold line and then open the paper. • Use a corner of another patty paper to determine if the angles formed by the crease and the line segment are right angles.
Perpendicular Bisector Student Investigation • Draw a point on the folded perpendicular bisector. • Place a second patty paper on top and measure the distance between the point on the perpendicular bisector and one endpoint of the segment. • Compare this distance to the distance between the point on the perpendicular bisector and the other segment endpoint. Question for Students: • What is true about the distances from a point on the perpendicular bisector to each endpoint of a segment? [Equal]
Perpendicular to a Line Through a Point on a Line with Compass and Straightedge • Begin by drawing a line. • Draw and label point C. • Construct a circle (wide arc) with center at point C that intersects the line. • Where the circle intersects the line, label the intersection points as A and B. • Place the compass point on point A and stretch the compass to a distance greater than AC. • Draw an arc above the line. • Without adjusting the compass span, place the compass point on B and draw an arc above the line, generating intersecting arcs. • Label the point D. • Construct the perpendicular bisector of segment AB. D A C B
Perpendicular to a Line Through an External Point with Compass and Straightedge • Begin with a line and a point C not on the line. • Construct a circle (or wide arc) with center at point C and radius greater than the distance from C to the line. • Where the circle intersects the line, label the intersection points as A and B. • Place the compass point on A and draw an arc below the line. • Without adjusting the compass span, place the compass point on B and draw an arc, generating intersecting arcs. • Label the intersecting point D. • Construct a perpendicular bisector of segment AB. C A B D
Angle Bisection with Compass and Straightedge • Begin with an angle. • Draw a circle (or wide arc) at point O with an arbitrary radius, making certain the circle intersects both angle sides. • Label the points on the angle sides as A and B. • Draw a circle (or wide arc) at point A such that its radius is more than half the distance between A and B. • Without adjusting the compass span, place the compass point on B and draw a circle (or wide arc). • Mark and label the intersection point of the two arcs as point C. • Using a straightedge, draw a line through points O and C. A C O B
Angle Bisection with Patty Paper • Draw an angle on a piece of patty paper using a straightedge. • Fold one side of the angle on top of the other. • Unfold and draw a point on the angle bisector (fold line).
Angle Bisector Student Investigation • Place a second piece of patty paper on top of the folded angle bisector with a corner of the top piece sitting on one angle side and the adjacent perpendicular side passing through the marked point on the angle bisector. • Mark the distance between the point on the angle bisector and the side of the angle on the patty paper. • Repeat the process with the other angle side. Question for Students: • What is true about the distances from a point on an angle bisector to each side of the angle? [Equal]
Parallel Line through a Given Point with Compass and Straightedge • Begin with line AB and a point C not on the line. • Connect points A and C. • Construct a circle with center at point A and passing through point C. • Where the circle intersects line AB, label the intersection point as F. • Construct a circle with center C and radius AC. • Construct a circle with center F and radius AF. • Label the circle intersection point I. • Using a straightedge, connect points C and I with a line.
Parallel Line through a Given Point with Patty Paper • Draw a line on patty paper using a straightedge. • Draw a point on the patty paper that is not on the given line. • Fold the given line onto itself (forming perpendicular lines) so that the fold passes through the point not on the line. • Unfold the paper and fold the new line onto itself so that it passes through the given point to form another line perpendicular to the folded line. • Unfold and view the parallel lines.
Translations with Patty Paper • Draw a figure on patty paper and place a point in its interior. • Draw a ray from the interior point to the edge of the patty paper (translation direction). • Draw a second point on the ray. • Place a second piece of patty paper on top of the first piece and trace the figure, the interior point, and the ray. • Slide the top patty paper along the ray’s path until the point on the top patty paper coincides with the second point on the bottom patty paper (translation distance). • Measure the distance between corresponding points of the pre-image and image figures using another piece of patty paper. Question for Students: • What can be said about the distance between a pre-image (original) point and its corresponding image point? [Always equals the translation distance]
Reflections with Patty Paper • Draw a figure on patty paper. • Draw a line on the patty paper that does not intersect the drawn figure (line of reflection). • Fold the patty paper along the reflection line. • Trace the figure onto the folded portion of your patty paper and unfold. • Image is on the reverse side of the patty paper. • Draw a segment connecting a point in the pre-image figure and the corresponding point in the reflected image. • Repeat for a second set of corresponding points. • Measure the distance between corresponding points of the pre-image and image figures using another piece of patty paper. Tasks/Questions for Students: • Investigate the distance between any pre-image (original) point and its corresponding image point. [Not always equal] • What type of angle is formed by each segment and the line of reflection? [Right] • How does the line of reflection divide each segment connecting a point and its image? [Bisects it]
Rotations with Patty Paper • Draw a figure on patty paper. • Draw a point on the figure or in its interior. • Draw a second point on the patty paper to create a center of rotation. • Draw a ray from the second point (center of rotation) that passes through the first point. • Draw a second ray from the center or rotation to create an angle of rotation. • Place a second piece of patty paper on top of the first piece and trace the figure, the points, and the first ray. • Place a pencil tip on the center of rotation and turn the top patty paper through the angle of rotation. Investigations/Questions for Students: • Measure the distance between corresponding points of the pre-image and image figures using another piece of patty paper. • Is the distance between any pre-image (original) point and its corresponding image point always the same? • Use another piece of patty paper to trace the angle with the point of rotation as its vertex, one ray passing through a point in the original figure, and the other ray passing through the corresponding point in the rotated image. • Compare the resulting angle to the original angle of rotation.
Rotation of a Triangle Through Space • Rotating ABC about line d2 (axis of symmetry) produces a cone whose base diameter is equal to the length of side AC. • Beginning with the cone and slicing it vertically provides a cross-section view, which is shown as ABC.
Rotation of a Circle Through Space • Rotating O about point O produces a sphere whose radius is equal to the radius of O. • Beginning with the sphere and slicing it through its center provides a cross-section view (green), which is shown as O.
Translating a Circle Through Space • Translating Aby translation distance BC produces a (slinky-like) cylinder. • Slicing the cylinder perpendicular to the axis of symmetry AD generates many circles congruent to A. * Cabri 3D rendering created by Stephen F. West, State University College, Geneseo, NY C D A B
Translating a Triangle Through Space • Translating ABC by translation vector CD produces a triangular prism. • Recall that a prism is a geometric solid whose bases (green) are congruent, parallel polygons and whose lateral faces (white) are parallelograms. • Slicing the triangular prism generates many triangles (gray) congruent to ABC. * Cabri 3D renderings created by Stephen F. West, State University College, Geneseo, NY A B C D
Translating a Square Through Space • Consider the square CEDB and the translation segment HK. • Translating CEDB in the direction and length of HK produces the green rectangular prism. • Beginning with the rectangular prism and slicing it perpendicular to segment AD provides a cross-section view, which is a square congruent to CEDB. Task for Students: • Investigate and describe how a rectangular cross-section view could be generated from this rectangular prism. E E K D H
Translating an OctagonThrough Space • Consider the blue octagon and the translation segment HK. • Translating the blue octagon in the direction and length of HK produces an octagonal prism. Task for Students: • Describe how the octagonal prism must be sliced to produce a cross-sectional view of many congruent octagons. * Cabri 3D rendering created by Stephen F. West, State University College, Geneseo, NY K H H E
Transforming a Hexagon in Space Task for Students: • Describe how hexagon A’ can be transformed into the hexagonal prism at the right.
Cross Sections of a Pyramid • Beginning with a pyramid and slicing it horizontally provides a cross-section view of concentric squares. * Graphics animation available from Demos with Positive Impact - Volumes by Section Demo Gallery
Applications of Transformations and Cross Sections • Hurricane creation - http://observe.arc.nasa.gov/nasa/earth/hurricane/creation.html • Interior of the earth - http://pubs.usgs.gov/gip/interior/ • Earthquakes – Mt. St. Helens http://www.geophys.washington.edu/SEIS/PNSN/HELENS/helenscs_yr.html
GPS Addressed • M7G1 • Perform basic constructions using both compass and straightedge. Constructions include copying a segment; copying an angle; bisecting a segment; bisecting an angle; constructing perpendicular lines, including the perpendicular bisector of a lines segment; and constructing a line parallel to a given line through a point not on the line. • Recognize that many constructions are based on the creation of congruent triangles. • M7G2 • Demonstrate understanding of translations, rotations, and reflections and relate symmetry to appropriate transformations. • M7G4 • Describe three-dimensional figures formed by translations and rotations of plane figures through space. • Sketch, model, and describe cross sections of cones, cylinders, pyramids, and prisms.
GPS Addressed • M7P3 • Communicate their mathematical thinking coherently and clearly to peers, teachers, and others. • Use the language of mathematics to express mathematical ideas precisely. • M7P4 • Recognize and use connections among mathematical ideas. • Understand how mathematical ideas interconnect and build on one another to produce a coherent whole. • Recognize and apply mathematics in contexts outside of mathematics.
Websites for Additional Exploration • Math Open Reference – Constructions http://www.mathopenref.com/tocs/constructionstoc.html • National Library of Virtual Manipulatives – Geometry (Translations, Rotations, Reflections) http://nlvm.usu.edu/en/nav/topic_t_3.html • Demos with Positive Impact – Cross Sections http://mathdemos.gcsu.edu/mathdemos/sectionmethod/pyramidcross.gif • Estimating the Circumference of the Earth - http://www.k12science.org/~jkoen/rwlo/Eratosthenes/Content%20Material/PartA.shtml