Chapter 2 Program Design and Development
Chapter 2 Program Design and Development. 2.1 Procedural Programming. Program - specific set of structured (or ordered) operations to be performed by a computer Programming paradigms - approaches used to conceptualize how to solve a specific problem or design and structure a program


Chapter 2 Program Design and Development
E N D
Presentation Transcript
2.1 Procedural Programming • Program - specific set of structured (or ordered) operations to be performed by a computer • Programming paradigms - approaches used to conceptualize how to solve a specific problem or design and structure a program • One paradigm - procedural programming - performs the steps needed to solve a problem in sequential and logical manner
2.1 Procedural Programming • Example - A recipe to bake a cake Outlines the steps needed to be followed in the order presented Deviating from those steps could lead to disastrous results • Procedural programming - lends itself well to various aspects of learning about problem solving, program design, and algorithm development
2.2 Problem Solving Overview • Crucial to clearly understand the problem • Do first • Not always easy • Not always obvious • Takes practice • Having a problem solving strategy is helpful • Think about how you solve problems (i.e., getting registered for classes, planning a party, going to school, etc.)
2.2.1 Development Process – Step 1 • One approach:Step 1: Define the Problem • Determine what needs to be accomplished • Can be very challenging to do • Crucial to get this right
2.2.1 Development Process – Step 2 • Step 2: Requirement Specification • Remove ambiguities from the problem definition • Determine output or results • Determine input needed, along with its source – keyboard, file, etc.
2.2.1 Development Process • Carefully consider need for one activity to be completed before beginning another • Before adding (processing) two numbers together need to input the numbers • Before displaying (outputting) the results, must first do the necessary processing • Consider each of the three stages below Input -> Process -> Output (IPO)
2.2.1 Development Process – Step 3 Step 3: Design • Develop an algorithm for a small piece of the problem or program • Algorithm - finite set of instructions that leads to a solution • Desk checking– verifying logic of proposed solution • Use sample data to validate or desk check results by hand
2.2.1 Development Process – Step 3 Goal of Step 3 (Design):Guarantee you have sufficient detail to: • Account for all required input • Complete necessary processing steps • Generate the output or solution identified in the Requirement Specification (Step 2)
2.2.1 Development Process – Step 4 Step 4: Implementation • Write the source code based upon algorithm (pseudocode) developed in Step 3 • Avoid temptation to write code before the pseudocode
2.2.1 Development Process – Step 5 Step 5: Testing and Verification • Make sure the program works • Double check output for correctness • Not as easy as it sounds • Crucial step
2.2.1 Development Process – Step 6/7 Step 6: Repeat Steps 3 - 5 • Now that one piece is working, repeat the process on the next step Step 7: Maintenance • Revise and enhance the program • As crucial as any of the other steps
2.2.1 Development Process Development Process Summary Step 1: Define the problem Step 2: Requirements specification Step 3: Design Step 4: Implementation Step 5: Testing and verification Step 6: Repeat Steps 3 – 5 Step 7: Maintenance
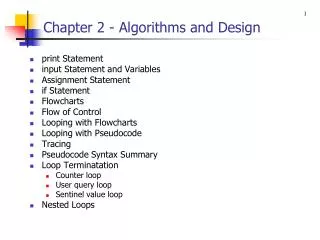
2.3. Algorithm Representation Two main options for representing algorithms: 1. Flowchart Uses standardized symbols including: Termination – marks the start or the end of the flowchart Process –any activity associated with manipulating the data Termination Process
2.3.1 Flowchart Decision Decision – direction of flow based upon either true or false condition Input/Output (I/O) – reading data (input) or displaying results (output) Arrow –flow of control Input Output
2.3.1 Flowchart Flow is top down Diamond indicates a choice or conditional pathUsed to demonstrate flow of any system
2.3.2 Pseudocode 2. Pseudocode (another option for representing algorithms) • Textual representation of an algorithm • Doesn’t use predefined symbols • Not based upon any programming language • Example: Display Prompt “Enter Score: ” Read Score from keyboard If Score > 90 Display “Excellent job” Else Display “Try a little harder”
2.3.2 Pseudocode Hints for developing pseudocode: • Provide a significant level of detail • Find gross_wages too vague • Better: Multiply hours * rate giving gross_wages • Explains HOW to accomplish a task and WHAT tasks to perform • Once developed, convert or translate into a specific programming language
2.3.2 Translation Process Translate algorithm to desired language (in our case C++) – Step 4 of Development Process
2.4 Algorithm Development • Important to identify all necessary steps and place them in the right order • Need Input before Processing • Need Processing before Output I P O
2.4.1 Value of Algorithm Development • Do algorithms BEFORE you write your codeSaves you time in long run
2.4.2 Stepwise Refinement • Breaking program down to smaller, more manageable and detailed pieces (Step 6 in Development Process) • Take the first piece - design, implement and test it • If correct, move on to next piece • If not correct, fix before continuing
2.4.2 Stepwise Refinement • Advantages: • Saves time • Confines errors in smaller area making them easier to find
2.5 Compilation Process • Turning source code into a form the computer can understand • Three options:Compilation, interpretation or combination of both
2.5 Compilation Process • 1.Compilation • Translates entire program to machine language • Completed only once (unless changes made to source code) • Must be recompiled to run on different OS’s • Runs faster than interpreted language • Examples: C and C++
2.5 Compilation Process • 2.Interpretation • Each line of source code is translated and then executed it immediately • Takes place while programming is running (slow) • Program reinterpreted whenever run • Examples: HTML, LISP, Forth usually interpreted
2.5 Compilation Process • 3.Combination or hybrid • Includes parts of both interpretation and compilation • Program compiled into an intermediate form and then interpreted when executed • Example: Java
2.5.1 Editor • Used to enter in source code to create a text file with a .cpp extension • IDE - Integrated Development Environment • Includes a number of development tools, including an editor • Editor often includes color coding keywords and automatic text formatting
2.5.2 Preprocessor • First step in translation process after entering source code • Identifies special commands within your code (preprocessor directives) and performs the tasks specified by the directives • Preprocessor directives begin with pound (#) sign • Examples: #include, #define
2.5.3 Language Translator (Compiler) • Follows preprocessor stage • Translates or converts the source code into objectcode • Object code - mostly machine code understandable by CPU • Stored in an object file • Binary file - extension .obj
2.5.4 Linker • Combines object files into one executable file • File extension (under Windows) - .exe • EXEcutable file can be run
File Extension File Format Input Component Output Keyboard Editor Source Code .cpp Text Source Code without directives Source Code Pre-processor N/A N/A Source Code without directives Compiler Object Code .obj Binary Object Code Linker Executable .exe Binary 2.5.4 Compilation Process
2.6 Program Development in VS • Suite of tools to facilitate programming activities • Support for writing programs in C++, Visual Basic, C#, J# • Builds apps for Windows, mobile devices, and WWW • Example of an IDE Includes editor Language translator Debugger
2.6.1 Using an IDE • ComponentsSolution - includes one or more projects • Project - encapsulate one or more source code filesEach project represents one complete program Solution Project Grade Calculator Project Admissions Process Project FreeCell Source Code Source Code Source Code Source Code Source Code Source Code
2.7 Running the Program • Run .exe file from OS • Double-click on the file from Windows Explorer • Run from the Command Prompt – under All Programs – Accessories • Run from within IDE (easiest method)
2.8.1 Syntax Error • Syntax error –problem with mechanics of the statement(s) • Examples – spelling a keyword wrong, missing a semicolon, etc. • Executable can’t be created until all syntax errors are corrected • Found during the compilation process • Identified and displayed by the compiler
2.8.1 Syntax Error • Compiler determines severity of the syntax error • Includes minor errors - compiler flags error as a warning • Program still compiles, but may or may not run correctly Tips: • Remove all warnings as well as errors before running your program • Correct the first error or warning in the compiler generated list and re-compile before going on to next error
2.8.2 Linker Error • Linker error - identified by the linker during the build process • Error messages often cryptic and hard to understand • Show up when you start writing your own functions • Can’t create an executable file until corrected
2.8.3 Run-Time Error • Run-time error – program suddenly terminates during execution • Wide range of causes - including dividing by zero • Debugger can help find or isolate the error • Debugger - set of tools programmer usesto locate errors (or bugs) • Bug - another term used for a program error
2.8.4 Logic Error • Logic error – program compiles, links, and runs to completion but doesn’t produce correct results • Most difficult type of error to find • Debugger helpful to locate logic errors • Stepwise refinement helpful in finding place where the error was introduced
2.9 Desk Checking • Draw out by hand (on paper) overall flow and results of the program BEFORE running it • Aids in finding various bugs and problems in the source code BEFORE they enter into the compilation of your program • Excellent tool to use in locating errors Always verify your results
2.10.1 Getting Started • Launching Visual Studio Start -> All Programs -> Microsoft Visual Studio 2008 Select Microsoft Visual Studio 2008 Select File -> New -> Project -> and click on ‘+’ sign to the left of Visual C++ Projects (under Project Types)
2.10.1 Getting Started Click on Win32 under Project typesUnder Templates - select Win32 Console Application Enter the name of your new project in the Name field Click OK button
2.10.1 Getting Started Click on the link called Application Settings on the left side of the Win32 Application Wizard Under Application Settings / Additional Options check Empty project box Verify that the Console Application radio button has been selected Click the Finish button - creating your Solution
2.10.1 Getting Started Under File -> select New File. A new file dialog box will appear similar to the one on the right Under Categories click on Visual C++ Under Templates select C++ File (.cpp)Press the Open button
2.10.1 Getting Started The name of the new file defaults to Source1.cpp Immediately save this file to the same directory as your Solution but give it a new name (i.e., Sample1.cpp) VS should now appear as shown on the right
2.10.1 Getting Started Go to the File menu option and select the Move Sample1.cpp into -> Sample1 project (directly above the Exit menu option)
2.10.1 Getting Started You are now in the editor and the file Sample1.cpp has been added to this project Enter in the program as shown on the right The asterisk to the right of the filename (Sample1.cpp) indicates the file has not yet been saved
2.10.1 Getting Started Under the Debug menu option, select Start without Debugging If changes were made, the dialog box shown on the left appears and you will be asked if you would like to ‘build’ your application – click Yes
2.10.1 Getting Started Once the build process starts, the Output window (shown below) appears at the bottom of Visual Studio providing status information