Download

1 / 9
90 likes | 234 Vues
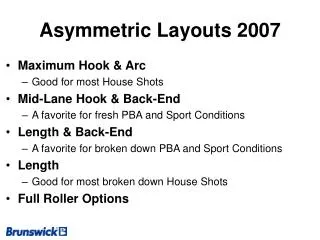
Symmetric Layouts 2007. Maximum Hook & Arc Good for most House Shots Mid-Lane Hook & Back-End A favorite for fresh PBA and Sport Conditions Length & Back-End A favorite for broken down PBA and Sport Conditions Length Good for most broken down House Shots Full Roller Options. High Track.

E N D
Symmetric Layouts 2007 • Maximum Hook & Arc • Good for most House Shots • Mid-Lane Hook & Back-End • A favorite for fresh PBA and Sport Conditions • Length & Back-End • A favorite for broken down PBA and Sport Conditions • Length • Good for most broken down House Shots • Full Roller Options
High Track Maximum Hook & ArcSymmetric Core - RGdiff - 0.040 or greater P P 4 ½ A A • Best pin out distance to use: 0 – 2 inches • Pin from axis : 4 – 4 ½ inches • Before drilling, the ball should balance around ¾ positive side so that you can fine tune with an X - hole if needed. • To fine tune with an X – hole please see our attached drilling instructions. • Rev’s up early for maximum hook with a continuous back-end. • 1. is the larger circle or pin on the ball that marks the top of the core. 2. For left-handed bowlers use the mirror images of these layouts. • Note: Finger, thumb and X-holes must have at least a moderate bevel and the riser Pin must be at least one inch from any drilled hole to comply with the Brunswick warranty. CG Area A Medium Track 4 ½ P P A A CG Area Low Track P 4” P P A A CG Area P
High Track Mid-Lane Hook & Back-End Symmetric Core - RGdiff - 0.040 or greater P P 5 ½ • Best pin out distance to use: 2 – 4 inches • Pin from axis : 5 – 5 ½ inches • Before drilling, the ball should balance between ¾ and 1 ½ thumb and positive side. Both thumb and side should weigh close to the same amount. • X-hole size should be 1 1/8 X 2 ½ deep. • This layout helps bowlers open up the mid-lane and recover on heavy carry down. • 1. is the larger circle or pin on the ball that marks the top of the core. 2. is where to drill the X-hole on the ball. 3. For left-handed bowlers use the mirror images of these layouts. • Note: Finger, thumb and X-holes must have at least a moderate bevel and the riser Pin must be at least one inch from any drilled hole to comply with the Brunswick warranty. A A 45º CG Area A Medium Track 3 3/8 6 3/4 X X P P 5 ½ A CG Area 45º Low Track 3 3/8 6 3/4 X X P 5” P P A A X CG Area 3 3/8 45º 5 3/4 P X X
High Track Length & Back-EndSymmetric Core - RGdiff - 0.040 or greater P P 5 ½ • Best pin out distance to use: 3 ½ – 5 ½ inches • Pin from axis : 5 – 5 ½ inches • Before drilling, the ball should balance between ¾ and 1 ½ thumb and positive side. Both thumb and side should weigh close to the same amount. • X-hole size should be 1 1/8 X 2 ½ deep. • This layout helps bowlers create length with a strong back-end • 1. is the larger circle or pin on the ball that marks the top of the core. 2. is where to drill the X-hole on the ball. 3. For left-handed bowlers use the mirror images of these layouts. • Note: Finger, thumb and X-holes must have at least a moderate bevel and the riser Pin must be at least one inch from any drilled hole to comply with the Brunswick warranty. A A 45º CG Area A Medium Track 3 3/8 6 3/4 X X P P 5 ½ A A CG Area 45º Low Track 3 3/8 6 3/4 X X P P 5” P A A X 3 3/8 CG Area 45º 5 3/4 P X X
High Track LengthSymmetric Core - RGdiff - 0.040 or greater P P 5 ½ A A • Best pin out distance to use: 3 – 5 ½ inches • Pin from axis : 5 – 5 ½ inches • Before drilling, the ball should balance around ¾ positive side so that you can fine tune with an X - hole if needed. • To fine tune with an X – hole please see our attached drilling instructions. • Length drilling with arcing back-end • 1. is the larger circle or pin on the ball that marks the top of the core. 2. For left-handed bowlers use the mirror images of these layouts. • Note: Finger, thumb and X-holes must have at least a moderate bevel and the riser Pin must be at least one inch from any drilled hole to comply with the Brunswick warranty. CG Area A Medium Track P P 5 ½ A A CG Area Low Track P P 5” P A A CG Area P
A P Maximum Hook & Arc – Full RollerSymmetric Core - RGdiff - 0.040 or greater • Best pin out distance to use: 2 – 3 ½ inches • Pin from grip center : 3 inches @ 60° • The Basic Full Roller Drilling that won’t over flare for most Bowlers. • This layout will give the bowler maximum hook with a smooth back-end. • 1. is the larger circle or pin on the ball that marks the top of the core. 2. For left-handed bowlers use the mirror images of these layouts. • Note: Finger, thumb and X-holes must have at least a moderate bevel and the riser Pin must be at least one inch from any drilled hole to comply with the Brunswick warranty. • Best pin out distance to use: 2 – 3 ½ inches • Pin from grip center : 3 inches @ 60° • The Basic Full Roller Drilling that won’t over flare for most Bowlers. • This layout will give the bowler maximum hook with a smooth back-end. • 1. is the larger circle or pin on the ball that marks the top of the core. 2. For left-handed bowlers use the mirror images of these layouts. • Note: Finger, thumb and X-holes must have at least a moderate bevel and the riser Pin must be at least one inch from any drilled hole to comply with the Brunswick warranty. • Best pin out distance to use: 2 – 3 ½ inches • Pin from grip center : 3 inches @ 60° • The Basic Full Roller Drilling that won’t over flare for most Bowlers. • This layout will give the bowler maximum hook with a smooth back-end. • 1. is the larger circle or pin on the ball that marks the top of the core. 2. For left-handed bowlers use the mirror images of these layouts. • Note: Finger, thumb and X-holes must have at least a moderate bevel and the riser Pin must be at least one inch from any drilled hole to comply with the Brunswick warranty. 0º CG Area 60º P P P P P P 90º
A P X Mid-Lane Hook & Back-End – Full RollerSymmetric Core - RGdiff - 0.040 or greater • Best pin out distance to use: 4 – 5 ½ inches • Pin from grip center : 3 inches @ 60° • Before drilling, the ball should balance between 1½ and 2 ½ ounces of Finger weight. • X-hole size should be 1 1/8 X 2 ½ deep. • Rev’s up early for maximum hook with and strong arcing back-end. • 1. is the larger circle or pin on the ball that marks the top of the core. 2. is where to drill the X-hole on the ball. 3. For left-handed bowlers use the mirror images of these layouts. • Note: Finger, thumb and X-holes must have at least a moderate bevel and the riser Pin must be at least one inch from any drilled hole to comply with the Brunswick warranty. 6 3/4 CG Area 0º 60º P X P 90º
A X P Length & Back-End – Full RollerSymmetric Core - RGdiff - 0.040 or greater • Best pin out distance to use: 3 – 5 ½ inches • Pin from grip center : 1 ½ inches @ 60° • Before drilling, the ball should balance between 1 and 2 ounces of Finger weight. • X-hole size should be 31/32 X 2 ½ deep. • This layout helps bowlers create length with a strong arcing back-end. • 1. is the larger circle or pin on the ball that marks the top of the core. 2. is where to drill the X-hole on the ball. 3. For left-handed bowlers use the mirror images of these layouts. • Note: Finger, thumb and X-holes must have at least a moderate bevel and the riser Pin must be at least one inch from any drilled hole to comply with the Brunswick warranty. 6 3/4 CG Area 0º 60º P X P 90º
Over Flaring - RG Differential - RPM Rates To prevent “Over Flaring” (early hook with weak back-end reaction), Brunswick recommends the combinations of RGdiff. & RPM rates listed below as the strongest layout to be used. Lower track players should stay to the smaller end of each range to avoid “Under Flaring”. RG DiffRPM rateStrong drilling .035 & below All rates Leverage – 3 3/8 .036 - .044 Less than 300 Leverage – 3 3/8 .036 - .044 Greater than 300 4 – 4 ½ from PAP .045 - .050 Less than 300 4 – 4 ½ from PAP .045 - .050 Greater than 300 4 ½ - 5 from PAP .050 - .060 Less than 300 4 ½ - 5 from PAP .050 - .060 Greater than 300 5 – 5 ½ from PAP