Asymmetric Layouts 2007
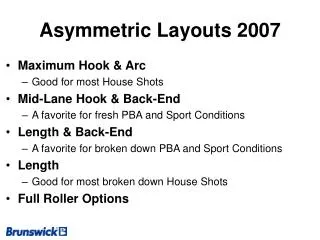
Asymmetric Layouts 2007. Maximum Hook & Arc Good for most House Shots Mid-Lane Hook & Back-End A favorite for fresh PBA and Sport Conditions Length & Back-End A favorite for broken down PBA and Sport Conditions Length Good for most broken down House Shots Full Roller Options. P. P.

Asymmetric Layouts 2007
E N D
Presentation Transcript
Asymmetric Layouts 2007 • Maximum Hook & Arc • Good for most House Shots • Mid-Lane Hook & Back-End • A favorite for fresh PBA and Sport Conditions • Length & Back-End • A favorite for broken down PBA and Sport Conditions • Length • Good for most broken down House Shots • Full Roller Options
P P 4 ½ CG Area A A VAL L L 4” P P A A CG Area VAL L L High Track Maximum Hook & ArcAsymmetric Core RGdiff - 0.040 or greaterAsy RGdiff - 0.015 - 0.030 • Best pin out distance to use: 0 - 2 inches • Pin from axis : 4 - 4 ½ inches • Locator Pin set at 60º • Rev’s up early for maximum hook with a continuous back-end. • Note: If an X-hole is necessary to make the ball USBC legal, draw a line from the grip center through the CG and place the X-hole where it hits the VAL. 1. is the larger circle or pin on the ball that marks the top of the core. 2. is a smaller circle or pin that marks the Preferential Spin Axis (PSA) of the ball. 3. For left-handed bowlers use the mirror images of these layouts. • Note: Finger, thumb and X-holes must have at least a moderate bevel and the riser Pin must be at least one inch from any drilled hole to comply with the Brunswick warranty. 60º Medium Track A P P 4 ½ A A CG Area 60º VAL Low Track L L P 60º L P
P P 5 ½ CG Area A A VAL L L P P 5 ½ A A CG Area VAL L L High Track Mid-Lane Hook & Back-EndAsymmetric Core RGdiff - 0.040 or greaterAsy RGdiff - 0.015 - 0.030 • Best pin out distance to use: 0 - 2 inches • Pin from axis : 5 - 5 ½ inches • Locator Pin set at 45º • This layout helps bowlers open up the mid-lane and recover on the heavy carry down. • Note: If an X-hole is necessary to make the ball USBC legal, draw a line from the grip center through the CG and place the X-hole where it hits the VAL. 1. is the larger circle or pin on the ball that marks the top of the core. 2. is a smaller circle or pin that marks the Preferential Spin Axis (PSA) of the ball. 3. For left-handed bowlers use the mirror images of these layouts. • Note: Finger, thumb and X-holes must have at least a moderate bevel and the riser Pin must be at least one inch from any drilled hole to comply with the Brunswick warranty. 45º Medium Track A 45º Low Track 5” P P P A A CG Area 45º L VAL L L P
P P 5 ½ CG Area A A VAL L L P P 5 ½ CG Area A A VAL L L P P 5” A A CG Area VAL L L High Track Length & Back-EndAsymmetric Core RGdiff - 0.040 or greaterAsy RGdiff - 0.015 - 0.030 • Best pin out distance to use: 3 ½ - 5 ½ inches • Pin from axis : 5 - 5 ½ inches • Locator Pin set at 45º • This layout helps bowlers create length with a strong back-end. • Note: If an X-hole is necessary to make the ball USBC legal, draw a line from the grip center through the CG and place the X-hole where it hits the VAL. 1. is the larger circle or pin on the ball that marks the top of the core. 2. is a smaller circle or pin that marks the Preferential Spin Axis (PSA) of the ball. 3. For left-handed bowlers use the mirror images of these layouts. • Note: Finger, thumb and X-holes must have at least a moderate bevel and the riser Pin must be at least one inch from any drilled hole to comply with the Brunswick warranty. 45º Medium Track A 45º Low Track P 45º L P
P P 5 ½ CG Area A A VAL L L High Track LengthAsymmetric Core RGdiff - 0.040 or greaterAsy RGdiff - 0.015 - 0.030 • Best pin out distance to use: 3 - 5 ½ inches • Pin from axis : 5 - 5 ½ inches • Locator Pin set at 60º • Length drilling with arcing back-end. • Note: If an X-hole is necessary to make the ball USBC legal, draw a line from the grip center through the CG and place the X-hole where it hits the VAL. 1. is the larger circle or pin on the ball that marks the top of the core. 2. is a smaller circle or pin that marks the Preferential Spin Axis (PSA) of the ball. 3. For left-handed bowlers use the mirror images of these layouts. • Note: Finger, thumb and X-holes must have at least a moderate bevel and the riser Pin must be at least one inch from any drilled hole to comply with the Brunswick warranty. 60º Medium Track A P P 5 ½ CG Area A A 60º VAL Low Track L L P 5” P CG Area A 60º L VAL L P
A P L Maximum Hook and Arc – Full RollerAsymmetric Core RGdiff - 0.040 or greaterAsy RGdiff - 0.015 - 0.030 45º • Best pin out distance to use: 2 - 4 inches • Pin from grip center : 3 inches • Locator Pin set at 45º • Rev’s up early for maximum hook with and strong arcing back-end. • Note: If an X-hole is needed place it in the X-hole safe zone 6” from center of grip to avoid contact with the track. 1. is the larger circle or pin on the ball that marks the top of the core. 2. is a smaller circle or pin that marks the Preferential Spin Axis (PSA) of the ball. 3. For left-handed bowlers use the mirror images of these layouts. • Note: Finger, thumb and X-holes must have at least a moderate bevel and the riser Pin must be at least one inch from any drilled hole to comply with the Brunswick warranty. 90º X-hole Safe zone 0º CG Area P L X-hole Safe zone P
L A P Length & Back-End – Full RollerAsymmetric Core RGdiff - 0.040 or greaterAsy RGdiff - 0.015 - 0.030 60º • Best pin out distance to use: 0 - 3 inches • Pin from grip center : 2 inches • Locator Pin set at 60º • This layout helps bowlers create length with a strong back-end. • Note: If an X-hole is needed place it in the X-hole safe zone 6” from center of grip to avoid contact with the track. 1. is the larger circle or pin on the ball that marks the top of the core. 2. is a smaller circle or pin that marks the Preferential Spin Axis (PSA) of the ball. 3. For left-handed bowlers use the mirror images of these layouts. • Note: Finger, thumb and X-holes must have at least a moderate bevel and the riser Pin must be at least one inch from any drilled hole to comply with the Brunswick warranty. 90º X-hole Safe zone 0º CG Area P L X-hole Safe zone P
L A P Length – Full RollerAsymmetric Core RGdiff - 0.040 or greaterAsy RGdiff - 0.015 - 0.030 • Best pin out distance to use: 0 - 3 inches • Pin from grip center : 2 inches • Locator Pin set at 0º • Length drilling with arcing back-end. • Note: If an X-hole is needed place it in the X-hole safe zone 6” from center of grip to avoid contact with the track. 1. is the larger circle or pin on the ball that marks the top of the core. 2. is a smaller circle or pin that marks the Preferential Spin Axis (PSA) of the ball. 3. For left-handed bowlers use the mirror images of these layouts. • Note: Finger, thumb and X-holes must have at least a moderate bevel and the riser Pin must be at least one inch from any drilled hole to comply with the Brunswick warranty. 90º X-hole Safe zone 0º CG Area P L X-hole Safe zone P
Over Flaring - RG Differential - RPM Rates To prevent “Over Flaring” (early hook with weak back-end reaction), Brunswick recommends the combinations of RGdiff. & RPM rates listed below as the strongest layout to be used. Lower track players should stay to the smaller end of each range to avoid “Under Flaring”. RG DiffRPM rateStrong drilling .035 & below All rates Leverage – 3 3/8 .036 - .044 Less than 300 Leverage – 3 3/8 .036 - .044 Greater than 300 4 – 4 ½ from PAP .045 - .050 Less than 300 4 – 4 ½ from PAP .045 - .050 Greater than 300 4 ½ - 5 from PAP .050 - .060 Less than 300 4 ½ - 5 from PAP .050 - .060 Greater than 300 5 – 5 ½ from PAP