Download
1 / 27
390 likes | 748 Vues
TROJAN BATTALION TACSOP STRENGTH AND HONOR MARCH 2003. INDEX Reports page 1. Battle Drill 1A/ SQD ATTK 2. Recon 6.

E N D
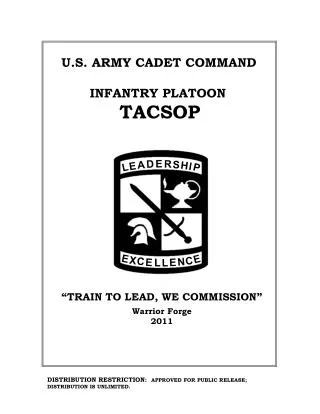
TROJAN BATTALION TACSOP STRENGTH AND HONOR MARCH 2003
INDEX Reports page 1. Battle Drill 1A/ SQD ATTK 2. Recon 6. Movement to Contact 9. Movement Techniques 12. Battle Drill 5/ Knock Out A Bunker 17. Ambush 20. Objective Rally Point 23. Abbreviations 25.
REPORTS • SALUTE • S- size of the enemy element/ number of personnel or vehicles. • A- activity, stationary (oriented north/south etc), moving (direction). • L- location, always given in grid format. Never use friendly control measures. • U- uniform, be descriptive (camo pattern top/bottom etc) anything distinctive. • T- time of observation, NOT time of report. • E- equipment, (weapons, headgear, LCE etc) be descriptive. • SITREP- Situation Report • Identification • Current position/ location • Current activity (stationary/ moving) • Example: T16 this is C31, Phase Line Blue, continuing mission north, • negative contact, over. • ACE REPORT • A- ammunition status (green, amber, red, black) or # of magazines remaining • C- casualties (number and type by severity), (followed by 9 line MEDEVAC) • E- equipment (anything lost) • SUBMITTED after all contact and immediately after an OBJ is secured 1
Battle Drill 1A:Squad Attack Task: Conduct hasty, deliberate or movement to contact squad attack. Purpose: Suppress or destroy enemy. Task Organization: Two Teams (Alpha & Bravo) Sub Elements: Assault, Support, Aid & Litter, EPW, grenadier team (METT-T-C dependent). 2
Battle Drill 1A: Squad Attack Phase 1 -From LD to OBJ, SQD Column, fire team wedge. -Traveling over watch to “contact line”, then bounding over watch. Phase 2 - Upon contact, lead team gets on-line and returns fire (Support). - SL assess situation. Plan A= SQD ATTK, Plan B= PLT ATTK. - Plan A= Trail TM becomes assault element. - Support team shifts or lifts fire on SL’s command. - Plan B= Both TMs come on line, become support for PLT Phase 3 - Assault element sweeps through OBJ, secures far side. - On order, support element secures near side of OBJ. - immediately prepare for counter attack. - Gather ACE report, initiate EPW search, Aid and Litter if necessary 3
SQUAD ATTACK OBJ • Squad Column, Fire Team Wedge Formation • -Bounding Over watch as distance to enemy • Decreases. • Provides SL with greater freedom to • maneuver trail element. • Place most casualty producing weapon with • The lead fire team. ATL SL BTL 4
OBJECTIVE SECURITY ATL Far Side Near Side SL BTL • Priorities on the OBJ • Security • EPW/ Reduce Threat • Aid/ Litter if necessary 5
RECON MISSION Task: Conduct an Area Reconnaissance as a Squad Purpose: Gather all information concerning enemy composition, disposition, strength and likely courses of action in order to confirm or deny the commander’s plan. Task Organization: Two Team (A & B). Sub elements; Recon and Surveillance (R/S). Release Point Security, ORP Security 6
RECON Planning Considerations Generally the RECON mission consists of three phases. Phase 1- Cross Line of Departure, move to and occupy Objective rally Point (ORP) - ORP is occupied either deliberately (Ldrs Recon) or by force (no Ldrs Recon) - Security- A-tm 9-12-3 o’clock, B-tm 3-6-9 o’clock. - Once security is established team leaders link with SL in center of perimeter. - Based on METT-T-C execute plan A or B. - Use A-team for recon (total of six personnel to include SL) - B-team will secure ORP during mission - Issue five point contingency plan prior to leaving ORP and at release point Phase 2- From ORP to Release Point, (plan to conduct a leader’s recon of OBJ (plan A), however, time may not be available to conduct the leader’s recon (plan B). Plan, brief and rehearse both options, conduct RECON. - Rehearse movement plan/ formation of recon party from ORP to RP - file formation from ORP to RP, it will provide better stealth - Headcount taken by B-tm LDR on exit and return - recon party, look back at the ORP as you leave so that you can find it on the way back. - Establish RP, confirm OBJ location, maintain eyes on from RP throughout recon Phase 3- Consolidate, submit SALUTE REPORT, disseminate information - Upon completion of RECON, consolidate at the RP, collect data, if possible submit SALUTE Report from the RP, or return to ORP then submit report. - Disseminate Intel to all elements within ORP 7
Recon Scheme of Maneuver OBJ Left Flank R/S Right Flank R/S RP ORP • R/S Teams • -conduct Cloverleaf • R/S = two personnel per flank • RP= two personnel • Six personnel total • Time Hack= move out, recon, • move back OBJ Rally Point -Cover and Concealment -avoid natural lines of drift -identifiable position -easily defended for a short time -100-400m or one terrain feature from OBJ (METT-T) LD LD AA 8
Movement to Contact Task: Conduct a Squad Movement to Contact as part of a Platoon Movement Purpose: To gain or regain contact with the enemy IOT find and fix the enemy and if possible destroy enemy elements Task Organization: Two Teams (A & B) Sub-elements: Assault Team/Support Team 9
Phase I: Cross LD Move in Traveling Over watch Set RP every 100 m Phase II: Transition Bounding Overwatch when: Contact with enemy is expected METT-T dependent Halfway between LD and OBJ Set RP every 100 m Phase III: Contact with enemy Execute Battle Drill 2 – React to Contact, Continue with either Battle Drill 1a – Squad Attack, or Est. Support POS for PLT Size of enemy element (3:1 rule) Prevent detection of elements not engaged with enemy Maintain 360o security at all times Gain initiative and advantage ASAP Attack enemy at weakest point RP’s are METT-T Dependent and should be readily identifiable terrain features Establish buddy teams for bounding Review Hand/Arm signals Review movement techniques and formations MTC Planning Considerations 10
Movement Techniques • Traveling • Contact with the enemy is not likely and speed is needed. • Traveling Over watch • Contact with the enemy is possible. • Bounding Over watch • Contact with the enemy is expected, or enemy is near, or when crossing a large open danger area. 12
Traveling 13
Bounding Overwatch • Bound as teams or squads • The Overwatch team is responsible for covering the Bounding team • Use alternate or successive bounding techniques 15
Battle Drill 5: Assault on a Bunker • Task: Knock out an enemy bunker as a Squad • Purpose: Destroy an enemy threat and secure the area for friendly forces • Task Organization: Two Teams (Alpha and Bravo). • Sub Elements: EPW, Aid and Litter, and Grenadier Team 17
Battle Drill 5: Knock out Bunkers • Phase I: Squad will travel in squad column fire-team wedge until contact is made. • During movement, the lead fire-team should carry the most casualty-producing weapon, as this team is likely to be the support element. • Phase II: Squad leader must determine if squad is capable of handling the threat. If not, SQD should lay down suppressive fire until the rest of the platoon arrives, or break contact if necessary. SQD should outnumber enemy forces, 3 to 1. • Squad leader must assess which fire-team will be assaulting and which will be supporting. • Upon contact, supporting team will come online and direct suppressive fire at bunker. • Phase III: Assaulting fire-team will flank around to the left or right, depending on available cover and concealment provided by terrain feature. Flanking movement must be wide to ensure enemy remains unaware of assaulting team’s location and direction of movement. • Rifleman and grenadier low-crawl along until they reach the blindside of the bunker. Before they reach side of bunker, SQD leader will direct supporting team to lift or shift fire. 18
Grenadier low-crawls until directly alongside the bunker, within arm’s reach of an aperture. • Grenadier will check aperture for obstructions, mines, wires and booby-traps, pull grenade pin, cook off grenade (no more than 2 seconds). Grenadier then tosses grenade into aperture. • Upon tossing grenade into bunker, grenadier rolls away and shouts “FRAG OUT!”. • Upon explosion of grenade, riflemen directs fire at entrance to bunker, shooting anyone who comes out, and then proceeds to fire into the bunker until threat is neutralized. • Phase IV: The rest of the assaulting team will assault through the bunker, establish fare-side security. Supporting team moves in and establishes near-side security. • Special team such as EPW and Aid & Litter perform necessary tasks. • The SL then inspects and assesses the situation of the bunker to ensure the threat is neutralized. The SL then calls higher and reports (SITREP, ACE, SALUTE), reorganizes as necessary, and continues mission. 19
AmbushSOP • Task: Conduct deliberate point ambush as a squad • Purpose: Engage and destroy enemy forces within a zone in order to prevent or impede enemy access to friendly AO. • Task Organization: Two Team (Alpha team, Bravo team) • Sub-elements: Assault element, Support element, Security • Squad Ambush planning considerations (4 phases) • Phase 1: • Cross LD, move to and occupy ORP • ORP is occupied deliberately or by force (Plan A or B, METT-T-C dependent) • Set up security, Alpha (9,12,3), Bravo (3,6,9) • Team leaders link up with SL in center of ORP once security is established • Phase 2: • Movement from ORP to OBJ (Plan A= LDRs Recon, Plan B= no LDRs Recon) • Confirm OBJ location, Set up RP, establish KILL ZONE • Set security on flanks, set assault and support • Assign sectors of fire • Remind every element of the initiation plan (Plan A, Plan B) • Phase 3: • Execute ambush • Sustain rates of fire for 30 seconds, or until enemy movement ceases (Repeat if necessary) • Secure OBJ, assault secures far side, support secures near side (in necessary) • TL consolidate ACE report • EPW (reduce the threat) • Aid/ Litter teams • Demolition Team (METT-T-C dependent) • Withdraw from OBJ NLT 3-5 minutes from initiating the ambush (TIME NAZI) • Phase 4: • Move back to ORP • Give SITREP and LACE 20
Ambush SOP • Squad Responsibilities • Alpha team, the Assault element, first in the order of movement, primary pace and compass, primary Aid/Litter, alternate EPW, one security • Bravo team, the Support element, second in the order of movement, secondary pace and compass, primary EPW, alternate Aid/Litter, one security • Conducting Leaders Recon (4 Personnel) • SL takes Bravo TL, and two security (GOTWA) • Alpha TL counts soldiers in and out of ORP • SL establishes RP, set security elements on the flanks • SL and TM LDR returns to ORP for rest of squad • Notification of approaching enemy • Security will use upside down rifle signal pointed in direction of the enemy, while also indicating number of enemy. • Initiation of Ambush • Initiated with most casualty-causing weapon • Depending on availability: use AT-4, claymore, SAW, (as last resort) SL’s rifle (Plan A and B) • Sustained rates of fire • In buddy teams, one will fire on burst, the other on semi-automatic • Withdraw Method (“fire in the hole”) (Technique) • “Fire in the hole one” = Support element moves off of the OBJ (if necessary) • “Fire in the hole two” = Assault element moves off of the OBJ • “Fire in the hole three” = Demo is lit, SL and security move off of the OBJ 21
KILL ZONE/ OBJ SUPPORT ASSAULT SECURITY SECURITY RP • SECURITY • one person minimum • oriented to the flanks ORP OBJ Rally Point -Cover and Concealment -avoid natural lines of drift -identifiable position -easily defended for a short time -100-400m or one terrain feature from OBJ (METT-T) LD LD AA 22
THE OBJECTIVE RALLY POINT (ORP) TASK:Occupy an Objective Rally Point as a Squad in order to prepare/ support future operations. PURPOSE:Occupy and secure an area in order to prepare for mission completion. TASK ORGANIZATION:Two Team (A & B) SUB ELEMENTS: None 23
OBJ Rally Point • Avoid natural lines of drift • Avoid trails/ Roads • Seek covered and concealed position • Secure enough to defend for a short time. • Large enough for entire squad. Direction of Enemy ATL SL BTL • Occupy ORP By Force • Lead team simply stops • Trail team inverts their wedge • and ties in with the lead team 24
ABBREVIATONS AA- Assembly Area ACE- Ammunition, Casualties, Equipment AO- Area of Operations ATM- A Team ATL- A team leader BMNT- Before Morning Nautical Twilight BP- Battle Position BTM- B Team BTL- B team leader CCP- Casualty Collection Point DOA- Direction of Attack EA- Engagement Area EENT- Early Evening Nautical Twilight EPW- Enemy Prisoner of War FEBA- Forward Edge of Battle Area FLOT- Forward Line of Troops FO- Forward Observer GSR- Ground Surveillance Radar LOA- Limit of Advance MEDEVAC- Medical Evacuation METT-T-C- Mission, Enemy, Time, Terrain and Troops, Civilian NLT- No Later Than OBJ- Objective OCCOKA- Observation, Cover, Concealment, Obstacles, Key Terrain, Avenues of Approach ORP- Objective Rally Point O/O- On Order OPORD- Operations Order PIR- Priority Intelligence Requirement SIR- Specific Intelligence Requirement SL- Squad Leader TBD- To Be Determined