GPSMAP 295: Efficient Navigation Guide
Learn the basics of using the GPSMAP 295 with this presentation. Topics include operations, main pages, user waypoints, menu navigation, and quick tips. Understand keypad functions, turning the unit on and off, backlighting, and contrast adjustment. Discover main page navigation, satellite coverage, land and aviation modes, user waypoints, and detailed map actions. Enhance your navigation skills with this comprehensive guide.

GPSMAP 295: Efficient Navigation Guide
E N D
Presentation Transcript
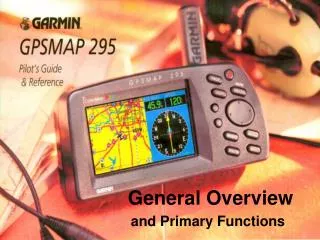
General Overview and Primary Functions
Introduction • This presentation will help you quickly find some of the features of the GPSMAP295 and the procedure steps that guide you through these features.
Topics • Basic Operation • Main Pages • User Waypoints • Main Menu • Quick Tips
Basic Operation Includes • Keypad usage • Turning the Unit On & Off • Main Page Sequence • Screen Backlighting & Contrast
Keypad Usage • Red Power Key Press and hold to turn unit on and off. • Enter/Mark Key Activates highlighted fields and confirms menu options. Press and hold this key to mark present position as a user-created waypiont • D WPT Key Allows you to select a destination waypoint. Press and hold this key to display the Favorite Waypoints List • Rocker Keypad Controls the movement of the cursor, its used to select options and positions, and to enter data. • Menu Key Displays a menu of available options for the current page. Press twice to display the Main Menu • In & Out KeysZoom the map in and out • Quit Key Returns the display to a previous page or restores a data field’s previous value. • Route Key Displays a list of stored routes and allows you to create new routes • NRST Key Displays nine nearest airports, navaids, airspace, user waypoints ARTCC & FSS frequencies, cities, highway exits and points of interest. • Page Key Scrolls through the main page sequence
Turning the Unit On / Off • Press and hold the red power key. • Once the testing is complete, • Welcome page is replaced with a database page. • Press enter to acknowledge the database page. • Press the enter key again to acknowledge the map source page.
Screen Back Lighting & Contrast • Press the Red Power Key momentarily to display a pop-up window • Then use the Rocker Keypad to make any desired screen backlight or contrast adjustments
Main Pages • Main Page sequence • Satellite Page • Aviation vs. Land Mode • Position Page • Map Page • RMI Page
Main Page Sequence • Satellite Page • Position Page • Map Page • HIS or RMI Page • Active Route Page Use the Page and Quit keys to scroll through the five main pages
Satellite Page • The Satellite Page provides a visual reference of receiver functions, including • Current Satellite Coverage • Receiver Status • Battery Level • Position Accuracy
Aviation vs. Land Mode • Press Menu, with the Satellite Status Page displayed, to show the page options. • Enter Land Mode or Enter Aviation Mode will appear (as appropriate) allowing you to select whichever mode is not currently being used
Land Mode • Uses a Pointer symbol on the map to indicate current position • Pointer symbol is aligned to the nearest Road (where practical) • RMI Page is displayed for navigation • GOTO navigation is from Present Position • All Vertical Navigation (VNAV) messages, are disabled
Position Page • The Position Page shows • Where you are (Current Position) • What Direction you are heading (compass Track) • How fast you are going (Speed) • Current Time and Date • User Selectable Data fields
Map Page • There are three main actions you can perform on the Map page • Zooming • Panning • Pointing
Zooming • Press the In key to see a smaller area with more detail • Press the Out key to see a larger area with less detail
Panning • Panning allows you to move the map in order to view areas beyond the current map area • As you begin to pan the map, a pointer will appear • This pointer will serve as a target marker for the map • To activate the pan function, use the ROCKER KEYPAD to move the map in any direction, including diagonally.
Pointing • To select an on-screen airport, navaid or user waypoint with the panning pointer • Use the ROCKER KEYPAD to highlight the desired item • To view database Information for the selected item, press ENTER • Use THE ROCKER KEYPAD to highlight the Various file tabs across the top of the page • To Exit the information pages verify the on-screen ‘OK’ button is highlighted and press ENTER
RMI Page • The RMI Page appears only when the GPS is in Land Mode • The pointer indicates bearing to the destination waypoint • The rotating compass card indicates your current ground track at the top of the page • By default eight user-selectable data fields appear along the right hand side of the page • Each data field my be configured to display any one of twenty-one data options
User Waypoints Includes • Waypoint Information • GOTO Waypoint • Address search • Crossroad Search
Waypoint Information & GOTO Waypoint • Press D WPT key to display the waypoint information page • Use the Rocker Keypad to select the “USER” file tab at the top of the page • Use the Rocker Keypad to highlight the IDENTIFIER field and press ENTER • Use the Rocker Keypad to highlight the destination Waypoint press Enter • Use the Rocker Keypad to highlight the on-screen GOTO button and press ENTER
Address Search • Press D WPT key to display the waypoint information page • Use the Rocker Keypad to select the address file tab at the top of the page • Press the down portion of the Rocker keypad to highlight the address number field and press enter • Use the Rocker keypad to enter the address number and press enter • Press Enter and use the Rocker Keypad to enter the street name
Address Search • Use the Rocker Keypad to scan through additional street names once the desired name is highlighted press Enter • Use the Rocker keypad to highlight the on-screen Search button and press enter • Once you enter the street name and number select the on-screen search button and the GPS will display any matches it finds • To select the address as your destination verify the GOTO is highlighted and press Enter
Crossroad Search • Press D WPT key to display the waypoint information page • Use the Rocker Keypad to select the Crossroad file tab at the top of the page • Press the down portion of the Rocker keypad to highlight the First Street name field and press enter • Use the Rocker keypad to enter the Street name and press enter • Press Enter and use the Rocker Keypad to enter the Second street name • Use the Rocker Keypad to highlight the on-screen search button and press enter • To select a matching street intersection as your destination, verify the on-screen GOTO button is highlighted and press enter
Main Menu • Press the Menu key twice from any page to display the Main Menu • The Main Menu is organized using a series of file tabs • Use the Rocker Keypad to select the desired file tab at the top of the page and press Enter • Use the Rocker Keypad to highlight the desired field and press Menu • A pop-up window will show the available setting for the selected field • Use the Rocker Keypad to select the desired setting and press Enter
Main Menu • The System file tab allows you to select between Aviation and Land Mode • Turn the Keypad beeper On or OFF • Change Time Settings and Format
Quick Tips • If you press any keys while the unit is acquiring satellites, the automatic sequencing from Satellite Status Page to Map Page will not occur • On warm days you may find it necessary to decrease the contrast for optimal screen clarity • While panning the map, press NRST to display a list of cities, Highway exits and points of interest nearest to the map pointer NOT YOUR PRESENT POSITION • In Land Mode the GOTO line appearing on the map is constantly updated to your present position