Download
1 / 74
740 likes | 780 Vues
Learn how to use Alice 3.1 to make animations. Start by choosing the MOON background, adding objects like humvees and astronauts, positioning them in your scene. Step-by-step guide with practical tips.

E N D
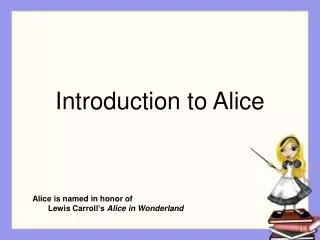
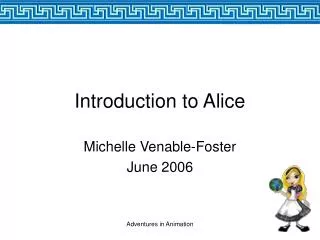
An Introduction to Alice 3.1 From the Alice v. 2.4 By Jenna Hayes Modified for Alice v. 3.1 by Lori Fuller under the direction of Professor Susan Rodger Duke University, June 2014
Hello! I’m Alice, and I’m going to teach you how to use the Alice 3.1 program. With Alice, you can make your own animations, using tons of different characters.
Starting Off • Our first step is to choose a background. • When you open Alice 3, a box will pop up that has different choices of background. It looks like the box to the right. • Select the MOON background, because our world will be in space. • Click on MOON and then click OK.
Saving your world • Before we do anything else, let’s save our world. You should also always do this before you close out of Alice. • Click on File at the top left-hand corner of your screen, and then click on Save As.
Saving your world • In the box that pops up, name your world spaceWorld, and save it in a place that you will be able to find again, such as in a MyProjects folder on your Desktop.
Adding objects to your world • Now, we will add some objects to the world. • In the Scene View, click on the Setup Scene button.
Adding objects to your world A new screen will appear, on which there is a selection of objects below the MOON screen that you can add into your world. This is called the Gallery.
Adding objects to your world • In the list provided, select the Transport classes • Select the Automobile classes. • Click on the new Humvee.
Adding objects to your world • On the box that pops up, you may change the name. Be sure to use unique names if you are going to add more than one instance of the same object. • Click OK to add the instance to the MOON scene. • The humveewill appear in the center of the MOON scene. Yes, humvees can drive on the MOON.
Adding objects to your world The humvee takes up most of your screen, but we will re-size it.
Adding objects to your world • The humvee takes up most of your screen, but we will re-size it. • Select the RESIZE button on the right-hand side of the screen. • Move the cursor to the humvee and click and drag to make it larger or smaller. In this case, make it smaller, we need more space on the MOON.
Adding objects to your world • The humvee is not facing in the direction we need it to face. • Select the ROTATION button on the right-hand side of the screen. • Move the cursor to the humvee and click and drag to turn the vehicle from the bottom circle..
Adding objects to your world • Next, we are going to add an astronaut. • Click on the All Classes button on the Gallery section. • Select Biped classes.
Adding objects to your world • In the window that appears, you will need to build your astronaut. You may even make it look like you… • Adjust life stage, gender, skin color, outfit should be astronaut suit, hair and face. • One issue, which has been mentioned to the creators of Alice 3 , is that there is no space helmet for the astronaut outfit. Let’s pretend you can now breath on the MOON. • Click OK button when done.
Adding objects to your world This window will appear, and you may rename the instance. Remember, if you are using more than one (maybe you’ve been cloned), name each with a unique name. Click OK when done.
Adding objects to your world You will need to resize the astronaut to fit the window and have size continuity with the humvee. Just as you did with the humvee, select the RESIZE button and click and drag to the size desired. And then, if necessary, select the ROTATION button and rotate the astronaut as needed. Use the DEFAULT button to move the object around the screen. Should look similar to the image below.
Now we have added two objects to our world. The next step is to position them!
Review on positioning and adjusting instances in the scene • Within the scene, select the object you want to position or adjust. • The DEFAULT handle style allows you to move the instance on the screen. • The ROTATION handle style allows you to rotate the instance on the given axis. • The TRANSLATION handle style allows movement up or down and forward or backward in the scene. • The RESIZE handle style allows you to make the instance larger or smaller.
Review on positioning and adjusting instances in the scene • You may also Position the instance by setting the X, Y, and Z points. • Reminder, on the Mac, all three points needed to be set before click on Enter/Return button. • You may also adjust the size of the instance by adjusting the Size: Width, Height, and Depth. • Again, on the Mac, I had to remain in the size field selected and press the Enter/Return key.
The Undo button is your friend! • What if you make a mistake, like accidentally clicking on something and moving it or resizing it? • You can click on the Undo button above the Code Editor to undo the last thing you did. • Use this button whenever you mess up, or want to get rid of something you just did. I think this is redundant.
We have finished positioning our characters, so now we can move on and start to move our camera around!
The Camera Markers • A Camera marker is a bookmark location to save the location of your camera view. This way, if you move your camera around, you can always get back to a certain position by moving to the Camera marker location. • Look to the right side of your screen, and find the Camera Markers arrow. Click the arrow to reveal the Add Camera Marker button.
The Camera Markers • Alice has only one camera in a scene. The camera is moved around and repositioned for close-up views and special effects. Because moving the camera is a common action when setting up a scene in the Scene editor, Alice provides a way to mark a camera position so as to create known camera positions in the scene. • Each scene and camera angle is setup and rehearsed until you are happy with the arrangements. The camera positions (location and orientation angle) are marked before any actual filming begins.Below is an example of the camera position as set for the initial scene.
The Camera Markers • It is highly recommended marking the starting location of the camera before moving the camera around in the scene. The camera can then be moved freely around the scene and can always be returned to its original position, using the marker. • To create a starting location camera marker click on the Add Camera Marker button. A dialog box will pop up. Enter a meaningful name for the marker, for example startView. • When a name is entered, press OK and Alice will automatically create a camera marker object at the current location of the camera. The marker remembers not only the location but also the camera’s orientation (the direction and angle at which it is pointed). This information is commonly known as the camera’s viewpoint. Also, color coded.
Moving the Camera • Let’s try moving the camera to get a close up of the astronaut. • Under your viewing screen, you should see a bunch of blue arrows. • If you click on the arrows and drag your mouse in different directions, the camera will move in different ways. Use small adjustments. I found that the trackpad on the Mac works also…
The Camera Marker • Move your camera until it is close to the astronaut’s face. Use the Undo button if you make any mistakes or don’t like the result. Not too close… • Let’s drop another Camera marker at the camera’s new position, using the same steps as before, and label it Astronaut HeadShot.
The Camera Marker • Add another Camera Marker for the humvee. • Move the cameras so you can only see the humvee in the camera. • Add another Camera Marker and name it humveeView.
The Camera Markers • To move from one camera view to the next using the Camera Marker Window… • As you can see they are color coded. • Click on the view you want to go to and click on the left camera button at the top left of the window. Then, click on the color of the camera view. Practice a few times and then return to the startView.
Camera Marker Conclusion • Now, right click on camera in the object list and set its view back to startView. Yes, that was mentioned on the previous slide. • As the camera moves back into the start position, you can see the other camera placements. And they are color coded as they are in the Camera Marker window.
Now that we are done setting up our cameras, we can start to animate the characters in the world!
Methods/Procedures • Click on the Edit Code button. • It should bring you to the main windows.
Methods/Procedures • The Code Editor panel is where you will add the coding to animate the objects. • The Methods panel is where you will find the pre-existing Procedures and Functions for the objects. • And the Scene View is where you will see the animation evolve.
Selecting the object • The method editor is where you can get the pre-existing procedures and functions to make your characters do things. • Your characters already know how to do certain things. • To select an object to animate, either click on the instance in the Scene View, or use the drop down menu next to ‘this’ (in this case) to select it.
Adding Methods/Procedures • To tell your astronaut to do something, click on one of these methods, hold down your mouse button, and drag and drop the procedure into your Coding Editor. • Click and drag the astronaut (this.adultPerson) ‘say’ procedure to the drop statement here position. Select ‘hello’ as the default. • Add a move and set it for up 1 meter. • Add a turn right 1. • Add a move down 1 meter. • Press the Run button. See the sample programming statements in the Code Editor
Adding an astronautWave Procedure • Click on the Class Tab. • From the list, select the AdultPerson, which in this case is the astronaut. • Click on the Add AdultPerson Procedure. Class Tab
Adding an astronautWave Procedure • In the window, name this astronautWave. • Click OK. • This should bring you to the window now named astronautWave. See tabs at the top of the Code Editor.
Adding an astronautWave Procedure code • From the Procedure tab under the Methods panel, click and drag ‘this turn…’ to the Code Editor • From the ‘this’ click and locate the getRightShoulder, and • set the direction to Left at .4 meters. • Set the duration to 1 second and • set the animation style to Begin and End Gently. • 2. From the Procedure tab under the Methods panel, click and drag ‘this turn…’ to the Code Editor • From the ‘this’ click and locate the getRightWrist, and • set the direction to Forward to .25 meters. • Set the duration to 1 second and • set the animation style to Begin and End Gently.
Adding an astronautWave Procedure code • 3. From the Procedure tab under the Methods panel, click and drag ‘this turn…’ to the Code Editor • From the ‘this’ click and locate the getRightWrist, and • set the direction to Backward at .25 meters. • Set the duration to 1 second and • set the animation style to Begin and End Gently. • 4. From the Procedure tab under the Methods panel, click and drag ‘this turn…’ to the Code Editor • From the ‘this’ click and locate the getRightShoulder, and • set the direction to Right at .4 meters. • Set the duration to 1 second and • set the animation style to Begin and End Gently.
Adding an astronautWave Procedure code You should now have 4 programming statements in the Code Editor. Select the myFirstMethod tab at the top of the Code Editor panel.
Adding an astronautWave Procedure • Above the Methods panel, you should see the panel with ‘this’ in it. • Click on the down arrow and select this.adultperson from the list. • You should now see the astronautWave method now listed under the Procedure tab.
Adding an astronautWave Procedure • Click and drag the astronautWave procedure to the Code Editor, and place it under the existing code. • It should look like this… press the run button to try it out.
Adding Keyboard Controls • Now we want to add keyboard controls to control the action in the animation. • The first keyboard to add is for when the SPACE bar is pressed, the astronaut will perform the astronautWave procedure. • To start, click on the intializeEventListeners tab at the top of the Code Editor panel. • Click on the Add Event Listener tab.
Adding Keyboard Controls • Select Keyboard and then addKeyPressListener.
Adding Keyboard Controls • The window should look like the one below.
Adding Keyboard Controls • Click and drag an If statement to the Drop Statement Here area. • Select true as the placeholder.
Adding Keyboard Controls • Click and drag onto the true to replace it. • Select the Custom Key… and then press the SPACE bar to add it. • The SPACE bar will be pressed for the astronaut to wave.
Adding Keyboard Controls • Click on the ‘this’ just above the Methods Panel and click the drop down arrow to select this.adultPerson.
Adding Keyboard Controls • You should now see the astronautWave procedure listed. • Click and drag the astronautWave procedure into the spot in the If (top) drop statement here area. • Should look like the image to the right. Test your program. Click Run and then press the SPACE bar.