Mastering Web Forms Creation: Comprehensive Tutorial
Discover how to create interactive web forms that collect data effectively. Learn to design input boxes, checkboxes, selection lists, and apply styles with CSS. Explore HTML5 and server-based form handling languages.

Mastering Web Forms Creation: Comprehensive Tutorial
E N D
Presentation Transcript
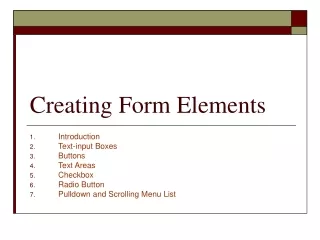
Objectives Explore how Web forms interact with Web servers Create form elements Create field sets and legends Create input boxes and form labels Create selection lists Creation option buttons Create text area boxes Create check boxes New Perspectives on HTML and XHTML, Comprehensive
Objectives Apply styles to Web forms Explore HTML5 data types Create spinners and range sliders Create form buttons Validate form data New Perspectives on HTML and XHTML, Comprehensive
Parts of a Web Form New Perspectives on HTML and CSS, Comprehensive
Introducing Web Forms • Web forms collect information from Web site visitors. • HTML supports the following control elements: • Input boxes • Option buttons • Selection lists • Check boxes • Text areas • Color pickers • Calendar pickers • Spin boxes • Sliders New Perspectives on HTML and XHTML, Comprehensive
Forms and Server-Based Programs New Perspectives on HTML and XHTML, Comprehensive
Forms and Server-Based Programs • Server-based programs are written in many languages • The earliest and most commonly used are Common Gateway Interface (CGI) scripts that are written in Perl. • Other popular languages include: • ASP/ASP.NET • ColdFusion • C/C++ • Java • PHP • Python • Ruby New Perspectives on HTML and XHTML, Comprehensive
Creating a Web Form • Forms are created using the form element, structured as follows: <form attributes> content </form> • Whereattributesare the attributes that control how the form is processed andcontent is the content of the form. New Perspectives on HTML and XHTML, Comprehensive
Creating a Web Form • Form attributes tell the browser the location of the server-based program to be applied to the form’s data. • Always specify an id or name for the form. • Two attributes are available to identify the form: id and name. New Perspectives on HTML and XHTML, Comprehensive
Creating a Web Form • The syntax of the id and name attributes are as follows: <form id=“id” name=“name”>… </form> • Where idis the id of the form andnameis the name of the form. New Perspectives on HTML and XHTML, Comprehensive
Creating a Field Set • HTML and XHTML allow you to organize a form into a group of fields called field sets. <fieldset id=“id”> controls </fieldset> where id identifies the field set and controls are the control elements associated with fields within the field set New Perspectives on HTML and XHTML, Comprehensive
Creating a Field Set • To add a legend to a field set, add the following tag after the opening <fieldset> tag: <legend>text</legend> Where text is the text of the field set caption. New Perspectives on HTML and XHTML, Comprehensive
Creating Input Boxes The general syntax of input elements is as follows:<input type=“type” name=“name” id=“id” /> Where type specifies the type of input control, and the name and id attributes provide the control’s name and id. New Perspectives on HTML and XHTML, Comprehensive
Creating Input Boxes New Perspectives on HTML and XHTML, Comprehensive
Adding Field Labels • You can also expressly link text with a control element. • The syntax for creating a form label is as follows: <label for=“id”>label text</label> Where id is the value of the id attribute for a field’s control element, and label text is the text of the label. New Perspectives on HTML and XHTML, Comprehensive
Applying a Style Sheet to a Web Form New Perspectives on HTML and CSS, Comprehensive
Applying a Style Sheet to a Web Form New Perspectives on HTML and CSS, Comprehensive
Defining Default Values and Placeholders • To define the default value of a field, add the attribute value=”value” to the control element, where value is the default value assumed by a browser unless a user enters a different value • Starting with HTML5, you can also populate your input boxes with placeholders. A placeholder is a text string that appears within the control element and provides users with information about the kind of information accepted by the field New Perspectives on HTML and CSS, Comprehensive
Defining Default Values and Placeholders New Perspectives on HTML and CSS, Comprehensive
Selection Lists and Option Buttons New Perspectives on HTML and CSS, Comprehensive
Creating a Selection List • A selection list is a list box from which a user selects a particular field value or set of field values. • Selection lists are useful when there are a fixed set of possible responses from the user. • You can create a selection list using the <select> element. • You can specify each individual selection item using the <option> element. New Perspectives on HTML and XHTML, Comprehensive
Creating a Selection List • You can change the number of options displayed in the selection list by modifying the size attribute. The syntax is as follows: <select size= “value”>… </select> Where value is the number of items that the selection list displays in the form. New Perspectives on HTML and XHTML, Comprehensive
Creating a Selection List • Add the multiple attribute to the select element to create multiple selections: <select multiple=“multiple”>… </select> New Perspectives on HTML and XHTML, Comprehensive
Creating a Selection List New Perspectives on HTML and CSS, Comprehensive
Grouping Selection Options New Perspectives on HTML and CSS, Comprehensive
Creating Option Buttons Option buttons, or radio buttons allow users to make selections. Unlike selection lists, option buttons only allow the user to select one option at a time. New Perspectives on HTML and XHTML, Comprehensive
Creating a Group of Option Buttons New Perspectives on HTML and XHTML, Comprehensive • To create a group of option buttons associated with a single field, add the elements: <input type="radio" name="name" value="value1" /> <input type="radio" name="name" value="value2" /> <input type="radio" name="name" value="value3" /> where name is the name of the data field, and value1, value2, value3, etc. are the field values associated with each option. • To specify the default option, add the checked attribute to the input element as follows: checked=”checked”
Creating a Text Area Box Text area boxes allow users to enter comments. An input box would be too small to accommodate the length of text for this use. New Perspectives on HTML and XHTML, Comprehensive
Creating a Text Area Box To create a text area box, use the textarea element: <textarea rows="value" cols="value"> ... </textarea> Where the rows and cols attributes define the dimensions of the input box and the rows attribute indicates the number of lines in the input box. New Perspectives on HTML and XHTML, Comprehensive
Creating a Text Area Box • As you type text into a text area box, the text automatically wraps to a new line as it extends beyond the box’s width • You can determine whether the locations of line wrapping are included in the field value by using the wrap attribute • Hard • Soft New Perspectives on HTML and XHTML, Comprehensive
Creating Check Boxes To create a check box, use: <input type=“checkbox” name=“name” value=“value” /> Where the name attribute identifies the check box controls and the value attribute specifies the value sent to the server if the check box is selected. To specify that a check box be selected by default, use the checked attribute as follows: <input type=“checkbox” checked=“checked” /> New Perspectives on HTML and XHTML, Comprehensive
HTML5 Data Types New Perspectives on HTML and CSS, Comprehensive
Exploring HTML5 Data Types New Perspectives on HTML and CSS, Comprehensive
Exploring HTML5 Data Types • The email, tel, and url data types are used for storing e-mail addresses, telephone numbers, and Web addresses, respectively • For browsers that support the date type, this will bring up a calendar widget from which users can select a date New Perspectives on HTML and CSS, Comprehensive
Exploring HTML5 Data Types New Perspectives on HTML and CSS, Comprehensive
Creating Spinner Controls and Range Sliders • To create a spinner control for numeric data, enter the input element <input name=”name” type=”number” value=”value” step=”value” min=”value” max=”value” /> where the value attribute provides the default field value, the step attribute indicates the amount by which the field value changes when a user clicks the spin arrow, the min attribute defines the minimum possible value, and the max attribute defines the maximum possible value of the field • To create a range slider control for numeric data, use the following input element: <input name=”name” type=”range” value=”value” step=”value” min=”value” max=”value” /> New Perspectives on HTML and CSS, Comprehensive
Creating Spinner Controls and Range Sliders New Perspectives on HTML and CSS, Comprehensive
Specifying a Numeric Range with the range Data Type New Perspectives on HTML and CSS, Comprehensive
Creating and Applying a Data List • To create a data list of possible values, enter the HTML code <datalist id=”id”> <option value=”value” /> <option value=”value” /> … </datalist> where the value attribute provides the text of the possible values in the data list. New Perspectives on HTML and CSS, Comprehensive
Creating and Applying a Data List • To reference the data list from an input control, add the list attribute <input name=”name” list=”id” /> where id references the id of the data list structure. New Perspectives on HTML and CSS, Comprehensive
Creating Form Buttons • Form buttons are a type of control element that performs an action. • Types of buttons: • Command button • Submit button • Reset button New Perspectives on HTML and XHTML, Comprehensive
Creating a Command button • Command buttons are created using the <input> tag: <input type=“button” value=“text” /> • Submit buttons submit forms to the server for processing when clicked. Syntax is as follows: <input type=“submit” value=“text” /> • Reset buttons reset forms to their original (default) values. Syntax is as follows: <input type=“reset” value=“text” /> New Perspectives on HTML and XHTML, Comprehensive
Designing a Custom Button • Use the button element for greater artistic control over the appearance of a button. <button name=“name” type=“text”> content </button> where the type attribute specifies the button type (submit, reset, or button—for creating a command button) and content is page elements displayed within the button New Perspectives on HTML and XHTML, Comprehensive
Designing a Custom Button New Perspectives on HTML and CSS, Comprehensive
Validating a Web Form • Data values often need to be tested or validated before they can be used. • Server-side validation • Client-side validation New Perspectives on HTML and CSS, Comprehensive
Validating Field Values • To indicate that a field is required, add the required=”required” attribute to the control element • To validate an e-mail address, set the data type to email. To validate a Web address, set the data type to url • To validate that a text input box follows a character pattern, add the attribute pattern=”regex” where regex is a regular expression that defines the character pattern. New Perspectives on HTML and CSS, Comprehensive
Validating Field Values New Perspectives on HTML and CSS, Comprehensive
Validating Based on Data Type • The new data types supported by HTML5 also can be used for data validation. • A data field with the number data type will be rejected if non-numeric data is entered. • Similarly, fields marked using the email and url fields will be rejected if a user provides an invalid e-mail address or Web site URL New Perspectives on HTML and CSS, Comprehensive
Testing for a Valid Pattern New Perspectives on HTML and CSS, Comprehensive
Applying Inline Validation • One disadvantage with the current validation checks is that they all occur after a user has completed and submitted the form • The technique of immediate data validation and reporting of errors is known as inline validation • One way of integrating inline validation into a Web form is to create style rules that change the appearance of each control element based on the validity of the data it contains • This can be done using some of the CSS3 pseudo-classes New Perspectives on HTML and CSS, Comprehensive