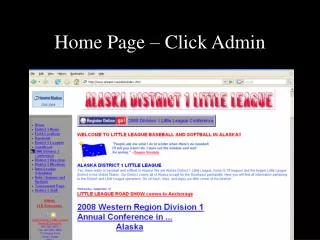
Step 1: Create Login Page –
Step 1: Create Login Page – Copy an existing page and create a page that will house the login form. Save and go back to Page Management. Do not export at this time.
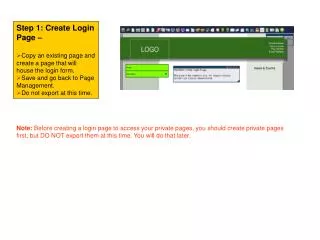

Step 1: Create Login Page –
E N D
Presentation Transcript
Step 1: Create Login Page – • Copy an existing page and create a page that will house the login form. • Save and go back to Page Management. • Do not export at this time. Note: Before creating a login page to access your private pages, you should create private pages first, but DO NOT export them at this time. You will do that later.
Step 2: Create Default Page After Login – • Copy an existing page and create a page that will be the default page after someone logs in. • Save and go back to Page Management. • Do not export at this time.
Step 3: Create an Additional Page that Will be Private – • Copy an existing page and create an additional page that will be viewed once someone has logged in. • Save and go back to Page Management. • Do not export at this time.
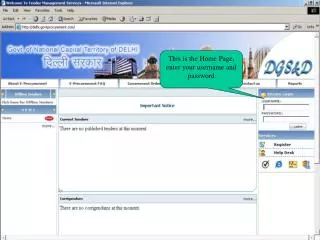
Step 4: Add Login Form Through Wizard • Now back at Page Management screen, edit your newly created Login page that will house the Login Form. • Select Secure Login from menu bar. Also a "lock" icon at top • Select Layout of the login form. • Enter Settings and design of login form. You will need to enter the File Name of the login page you created. This is the name you give it when you export, i.e. memberonlyloginform.aspx. • Note: A file extention of .aspx must be used since this page is verified by login creditials.
Step 4: Add Login Form Through Wizard (cont’d) • Select Layout of the login form. • Enter Settings and design of login form. You will need to enter the File Name of the login page you created. This is the name you give it when you export, i.e. memberonlyloginform.aspx. • Note: A file extention of .aspx must be used since this page is verified by login creditials.
Step 4: Add Login Form Through Wizard (cont’d) • Enter Settings and design of login form. You will need to enter the File Name of the login page you created. This is the name you give it when you export, i.e. memberonlyloginform.aspx. • Note: A file extention of .aspx must be used since this page is verified by login creditials.
Step 4: Add Login Form Through Wizard (cont’d) • Create Access Groups. Here you will add types of groups you may want to have access to areas that use the same form where you want employees to login to access HR documents, etc. • Here you will also enter the File Name of the default page your created that someone will see after they login, i.e. membersonlydefaultpage.aspx. • Note: A file extention of .aspx must be used since this page is verified by login creditials.
Step 4: Add Login Form Through Wizard • Adding Users: • Once Groups are set up, you can start adding Users. • Here you add users and assign them to a specific group. • You enter name, user name and password. • Once you add Users, you can either click Finish to add your login form to your login page or you can continue to next step to assign pages to specified groups.
Step 4: Add Login Form Through Wizard (cont’d) • Adding Pages: • To add Pages to your private area, select Group from drop down box to choose the group that you want to assign pages to. • Click Next. • Choose Pages that you want to add to the private Group. • Click Save & Finish when done. Note: It is a good idea to create your private pages first, that way they will show up in this list.
Step 4: Add Login Form Through Wizard (cont’d) • You will now be taken back to the Login Wizard home screen. • Here you will click Select to add your login form to your new login page if you haven't already. • Save and go back to Page Management. Step 5: Export New Login Page – Now you will export your new login page, default page and any other pages that you have that are private pages. Note: You will notice that when you export, the file extension is .aspx vs. what you are used to as .html. This is becuase the page will need to verify login creditials.