Download

1 / 3
30 likes | 63 Vues
A step by step guide on how to build a shed including necessary tools, estimated costs, time frames, best techniques and what not to do.

E N D
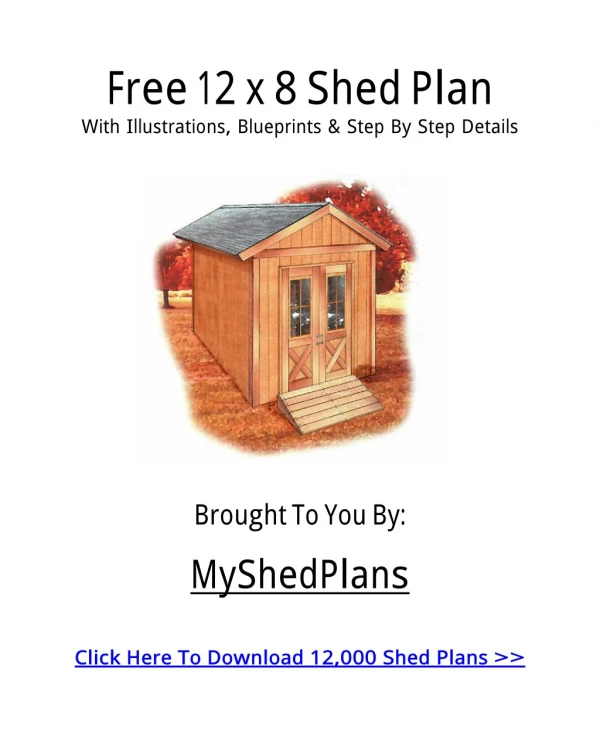
Assembling a wooden garden shed is a simple process and once constructed it provides you with additional storage, a personal space for you to sit and relax in your own garden or to enjoy your hobbies without any disturbances. Our step-by-step guide would teach you on how to construct a long-lasting wooden shed. Before proceeding with construction, ensure that the hardstanding is hard and level. This will ensure that your shed retains its shape and not warp causing damage. A solid hardstanding can be obtained through the use of a levelled concrete, patio slab or timber/plastic shed base kits which can be purchased from DIY stores. If you proceed with concrete or a slab, the dimensions of the slab should exceed the dimensions of the shed by 50 mm. This tutorial would demonstrate the construction of a shed having a single door and a window. You will require the following items to build a shed
●Drill and bits ●Spirit level ●craft knife ●Deck piers (foundation) ●Floor joists ●Plywood sheets ●Step ladder ●Screws and nails ●Hammer ●Tar paper roof It is our recommendation that you should start the project with additional assistance from several other helpers, or one assistant with a timber prop. Ensure that you are protected at all times by the use of appropriate protective and safety gear. Step 1 Discard the travel blocks. They are timber pieces which enclose the panels of the shed during transport to avoid any damage. Place the floor of the shed on the centre of your base. Measure the centre point of each edge and mark it with a pencil. This process should be done to the bottom batten of all the side panels. Lift the back panel of the shed to position by the use of a long timber prop or with the help of an assistant. Then proceed to lift one of the side panels of the shed on to the floor of the shed. Avoid using the panel consisting of the doors and windows for this purpose, as it is the last panel to be erected. Step 2 Fix the side panel and the back panel together at the meeting point of the framing battens. Using the drill, make three pilot hole and insert three countersunk screws at three positions, one on each end and one at the middle. Step 3 Follow the instructions of step 2 to fix the side panel.
Now to erect the panel with the door. Avoid fixing the frame of the shed to the floor, first ensure that all panels are in alignment and properly fixed together (follow these instructions unless advised otherwise). Step 4 Now place the roof support beams by placing them in the grooves made at the highest points of the shed panels referred to as the gable ends. Now look closely to see if the shed is firmly placed on the base. Open the door to see if it opens without any issue (if the door already fixed to the panel). Use the L-shaped bracket to bolster the beam to the gables at each end. Use the screws provided in the set. Step 5 Arrange the roof panels on the ground one by one with the eave sections (wooden strips) placing the ground and firmly in contact with the lower edge of the panel. As stated in the instructions, measure and then mark fixing position at even distances. Proceed to drill the pilot holes and hammer the nails in. You have the option of using the screws provided to fix the eave sections to the under surface of the roof panels. Step 6 Now transfer the roof panels into place individually. Pay close attention to ensure that these panels are aligned properly. Use the fixings provided to attach the roof panels onto the shed and the inner side of the support beam. Ensure once more that the shed is in alignment with the floor before proceeding to screw (or nail) the base, sides and gable to the hardstanding. For walkthrough diagrams of the above steps and a video walkthrough of the steps, read the How to Build a Shed guide on the Moderniser blog.