Creating Three-Bloom Bud Vase
Learn how to artfully arrange flowers in a three-bloom bud vase step by step, including selecting materials, preparing flowers, inserting stems, and finishing with a bow. Enhance your floral design skills with this presentation.


Creating Three-Bloom Bud Vase
E N D
Presentation Transcript
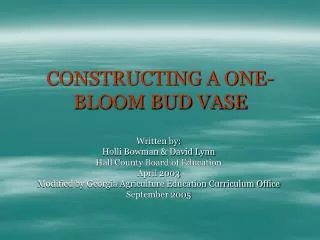
CONSTRUCTING A THREE-BLOOM BUD VASE Written by: Holli Bowman & David Lynn Hall County Board of Education April 2003 Modified by Georgia Agriculture Education Curriculum Office September 2005
This presentation is designed to supplement the textbook, Floriculture: Designing & Merchandising, Unit 9, “Bud Vases”. The author is Charles Griner and it is published by Delmar Publishers.
Step 1: Selecting Materials • 3 long-stemmed roses or carnations • 5 stems of leatherleaf fern • 1 ½ yards of #3 satin ribbon • 2 20-22 gauge florist wires • 1 stem of baby’s breath • Leaf polish • A large-necked bud vase • Floral preservative
Step 2: Preparing the Flowers • Fill the bud vase with preservative water to within two inches of the top. • Wire the carnations using the straight wire method. • Select the smallest carnation and cut it to twice the height of the container. • Select the medium-sized bloom and cut it one to two inches shorter than the tallest flower. • Cut the largest flower one to two inches shorter than the middle flower. • Remove all foliage that will be below the water line.
Step 3: Inserting the Flowers • Insert the flowers in the bud vase. • Place the smallest flower in the center, facing up. • Stagger the medium flower off to one side of the smallest flower. • Stagger the largest flower off to the opposite side of the medium flower. • Gradually face the middle and bottom flowers toward the viewer.
Step 4: Preparing the Fern • Select two pieces of fern and hold them so that the backs of the fern face each other (image #1). • Bring the two pieces of fern together so that the curves are straightened out (image #2). • Spray the best piece of fern with the leaf polish. • The best piece of fern should be an inch or two longer than the other. #1 #2
Step 5: Inserting the Fern • Place the fern behind the carnations with the best piece acting as a back-drop. • Insert shorter pieces of leatherleaf on each side at a 450 angle and in front of all the other stems. • An optional piece may be inserted vertically in front of the tallest stem. • Be sure to spray the additional pieces with leaf polish.
Step 6: Insert the Filler Flowers • Insert the baby’s breath so that it surrounds the carnation. • It shouldn’t overwhelm the carnation. • One full piece of baby’s breath may not be required.
Step 7: Finishing the Vase • Make a bow using the #3 satin ribbon. • Attach the bow to a wooden pick and insert the pick into the vase so that the bow will be located centrally above the rim of the vase. • Add a cardette if desired and refrigerate.