Download

1 / 12
120 likes | 127 Vues
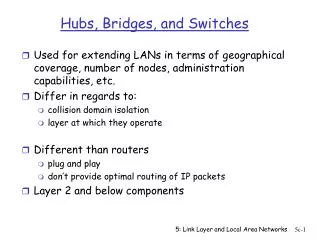
Data Hubs and Wires. Begin by adding a basic Move block, 5 rotations 75% power. In the lower left corner of a Move block you can see a thin notched area where the cursor changes to a pull down icon. Click in this corner to open the Move Block’s data hub. Left Motor. Right Motor.

E N D
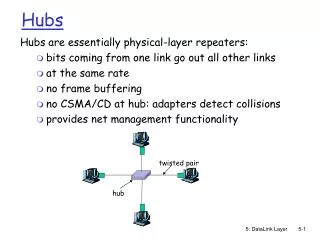
In the lower left corner of a Move block you can see a thin notched area where the cursor changes to a pull down icon. Click in this corner to open the Move Block’s data hub
Left Motor Right Motor Other Motor Direction Steering Power Duration Next Action The data hub is like the manual override area for all the controls you have on the block. In the configuration panel you normally have power set to 75%. The data hub allows you to use a different data source to override the configuration panel setting
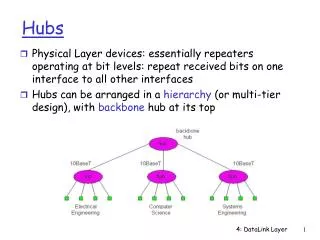
From the data palette add a random block to the left of the move block The random block opens with its data hub already open.
Use the random block to override the “Power” setting on the Motor block with a random number generated by the Random block. Click the plug on the left side of power, a wire will attach itself to that plug. Click on the right side of the number plug on the random block to complete the link between the two blocks
? When the program reaches the random block, it will generate a number between 0 and 100. That number (example 46) will come out the Number output plug on the Random block, travel over to the Power input plug on the Motor block, where it will override the typed in value for power (75). The move block will move using the randomly generated power.
Download and try the program. Then try it again. The program generates a different random number each time, and uses that number as a power level of the motor for the robot’s movement.
Set the minimum and maximum values on the random block. The random block will then choose a number between the two. Add a sound block to the end of your program so that when your robot finishes the 5 rotations it will announce Fantastic!
Blocks with Data Hubs • Many blocks especially the yellow sensor and red orange data blocks come with their most frequently-used plugs already showing. • Remember clicking on the left corner opens additional data hubs.
Place the random block and Motor block in a loop that changes the “Power” setting on the Motor block with a random number every 2 seconds of a 10 second long run.
NASCAR INDY 500 Line your robots up on the NASCAR race course to see which robot will be the fastest. In this race it’s all random luck, not who the best driver/programmer is, or is it?