Download

1 / 23
460 likes | 4.78k Vues
Accu-Chek Inform II Blood Glucose Meter. Link Trainer Documentation. Why Training?. . .

E N D
Accu-Chek Inform II Blood Glucose Meter Link Trainer Documentation
Why Training? . Due to adverse incidents arising using Blood Glucose Monitoring equipment the Department of Health & the Medication & Healthcare Products Regulation Agency issued Hazard & Safety Notices, both of which highlighted the need for all staff to be trained properly in their use. All nursing staff are accountable for ensuring they keep up to date with their personal training needs.Department of HealthIn 1987 the DoH issued a Hazard Notice: Blood Glucose Measurements: Reliability of Results Produced in Extra Laboratory Areas, HN(Hazard)(87)13. They stated: “The use of blood glucose meters by untrained staff, without adequate management, supervision of the equipment and without the use of quality control procedures, can lead to misleading results, adversely affecting the treatment of patients”.Medicines & Healthcare Products Regulatory Agency (MHRA)In 1996 the MHRA issued a Safety Notice: Extra Laboratory use of Blood Glucose Meters & test strips: Contra-indications, training & advice to the users. MDA SN 9616 June 1996. They stated “Staff who are responsible for extra-laboratory glucose testing, including near-patient testing & for training self-monitoring diabetic patients, need to be aware that the clinical condition of the patient may be associated with the production of misleading results. Contra-indications & interpretation of results should be covered in staff training sessions”.Nursing & Midwifery Council (NMC)Code of Conduct (NMC 2002). They State: “Maintain your professional knowledge & competence”.TrustBlood Glucose Monitoring Policy/Guidelines (Show staff the policy)RCNThe Diabetes Nursing Forum of the RCN issued guidelines on the use of Blood Glucose Monitoring equipment by nurses in clinical areas. They stated: “No nurse should use blood glucose monitoring equipment without complete training”. The RCN also advised that the training should be mandatory.
Contraindications for use of Blood Glucose Meters • Due to the Hazard Notices being issued the MHRA recommend that therapeutic decisions should not be based on a capillary sample in these circumstances: • Severe Dehydration • Hypotension • Shock • Peripheral Circulatory Failure • Hyperosmolar Non-Ketotic Coma • Diabetic Ketoacidosis • Unconscious Patients. Venous Sample should be sent to the Lab for verification of blood glucose level
Test Interferences • Due to treatments: • Icodextrin/Maltose >0.38 mmol/L (13 mg/dL) • Peritoneal Dialysis and Intravenous Solutions containing Icodextrin, ie; extraneal, Octogam • Galactose >0.44 mmol/L (8 mg/dL) • Do not use with Xylose absorption testing. • Due to medical conditions: • Trigylcerides (Trigs) > 39.6 mmol/L (3500 mg/dL) • Haematocrit <10% or >70% For further information refer to Test Strip Information Leaflet, Workstation insert or Ward Manual
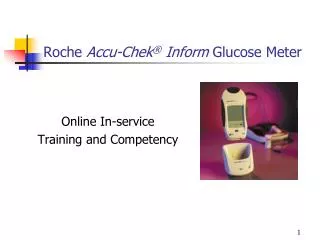
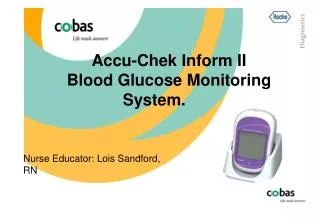
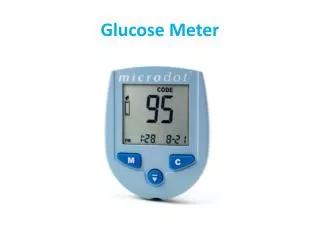
Accu-Chek Inform II • A Blood Glucose Meter that is connected to your hospital laboratory system. All data held is on a computer database within the Laboratory. This allows for a complete audit trail of the test being performed. • Operator & Patient ID may be Mandatory – Operator ID is unique to each person & is issued following training. IT MUST NEVER be shared with colleagues. Always use scanner where barcodes are available to prevent transcription errors. • Instrument can hold: • 2000 results. • 5000 operator and 4000 patient ID’s. • 20 test strip lots.
Accu-Chek Inform II • Demonstrate:- • On/Off Button to power the meter. Demonstrate what is displayed on the screen when the meter is switched on. • Touchscreen– Light sensitive, use fingertip only , DO NOT press hard, or use sharp objects such as pens or scissors. Software responds when finger is removed. • Docking Station – Recharges the battery & for down/uploading data. Always keep meter in docking station so batteries remain fully charged. • Scanner – Laser scanner for barcodes. Prevents transcribing errors. Avoid pointing the scanner at the face. • Strip Port – Where to insert test strip. • Reading Range – 0.6 – 33.3 mmol/L • Explain who the contact is for any problems with the meter.
Code Key Port LED Infra Red Port Accu-Chek Inform II Code Key Reader – If Applicable
Test StripsIf coding is done Centrally • Calibration – The code chip is unique to the pot of test strips. The code chip information is loaded by the Point of Care Co-ordinator (POCC) and then downloaded into every Inform II. This calibrates the meter to the strips. • Test Strip – Is robust and can be handled as long as hands are clean, dry and free from alcohol gel. They are end dosing at the tip of the strip. You must ensure when applying blood/QC solution that the yellow test pad is completely filled for accurate results. • To keep the test strips patent, the lid of the pot of test strips must be firmly on the pot. Prolonged exposure to heat and humidity will result in an error code on the meter. If this occurs perform a quality control test, which if out of range dispose of the test strips.
Test StripsIf coding is done Centrally (2) • Validation before use – When prompted by the Inform meter you must validate that the strip lot code displayed on the screen matches the strip lot code on the pot of test strips by pressing tick or cross or scanning the barcode on the test-strip pot. • If you select the cross you will be given a list of available strip lot codes – select one by pressing it. • If the code you require is not on the meter contact your Point of care Coordinator.
Test StripsIf coding is done at the Instrument • Calibration – The code chip is unique to the lot of test strips. This calibrates the meter to the strips. • Press the “strip lot” button in Main Menu 2. And press Add. • Align the meter IR and code key IR windows and insert the code chip. • The code file is ready for transmission as long as the LED on the code key reader is flashing, even if the code key is removed. After the LED stops flashing, remove/re-insert the code key for another transmission. • Press the right arrow. • Communication occurs and the screen display indicates as on the top right. • If successful the screen to the right appears. • If unsuccessful repeat the process.
Test StripsIf coding is done at the Instrument (2) • Test Strip – Is robust and can be handled as long as hands are clean, dry and free from alcohol gel. They are end dosing at the tip of the strip. You must ensure when applying blood/QC solution that the yellow test pad is completely filled for accurate results. • To keep the test strips patent, the lid of the pot of test strips must be firmly on the pot. Prolonged exposure to heat and humidity will result in an error code on the meter. If this occurs perform a quality control test, which if out of range dispose of the test strips • Validation before use – When prompted by the Inform meter you must validate that the strip lot code displayed on the screen matches the strip lot code on the pot of test strips by pressing tick or cross or scanning the barcode on the test-strip pot. • If you select the cross you will be given a list of available strip lot codes – select one by pressing it. • If the code you require is not on the meter follow the coding procedure described above.
Quality Control Testing • Why Quality Control? This is the only way to ensure the meter is working properly. The Inform meter should not be used to perform a patient test unless the meter has had a quality control test performed. If a clinical incident occurred, the quality Control result is used as evidence of maintenance for the nurse’s defence that the result being acted upon was accurate. • When to Quality Control? The Trust Policy states the frequency of quality control testing and this frequency is uploaded to the Inform meter via the hospital network. You should also quality control test every time you change the test strips, drop the meter or if you have unexplained results versus the clinical appearance. • Quality Control Lockout – If the Inform has not had the quality control test performed it will automatically lockout therefore preventing any further patient testing. The quality control test has to be performed before it can be used for patient testing (unless STAT tests are permitted).. • How to perform a Quality Control Test – Demonstrate the correct procedure for performing a quality control test. Staff being trained must perform a quality control test. Explain about changing the expiry date to 3 months from the date of opening on the quality control solutions. Explain every nurse is accountable for ensuring the quality control test is carried out. No logbook is necessary as the Inform will download the quality control test results into the database. • Failed Quality Control Test - Initially repeat the test, making sure it is done correctly, then troubleshoot by changing first the quality control solutions & repeat the test, then change the test strips & repeat the test. Remember to always add the appropriate ‘comment’ to every step of this process (if applicable). If the meter continues to ‘Fail’ you must contact the laboratory as the Inform will lockout preventing further testing. • EQA (External Quality Assurance Test)– Explain this is a sample sent from the Laboratory. Inform them of the frequency it is sent to the clinical areas. It is processed like a patient sample. Every nurse should perform EQA . Add a comment that it is EQA.
Touch Glucose Control Test How To Perform A Quality Control TestSwitch on Inform & enter your operator ID. Main Menu appears. Confirm the current strip lot is being used. Touch Control Test Apply correct Control Solution only when prompted Or pick the correct one from the list or scan strip pot Test Processing The result is displayed as Pass/Fail/Value The Inform automatically downloads the QC result into the database Remember to add a comment if the QC fails. Select your level and the current QC lot will be suggested or use scan button Insert a strip when prompted
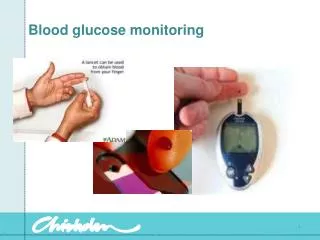
Patient Preparation.The factors you need to consider in preparing a patient to perform a test. • Gain Consent – Informed consent is required for this procedure. • Handwashing – To prevent contamination of the blood sample, thoroughly clean the patients hands with soap and water, ensure they are well rinsed to remove all traces of soap – Dry Thoroughly. Do not use alcohol swabs on the lancing site, such as sterets or mediswabs as they can affect the results. • Infection Control – This is an invasive procedure – Gloves must be worn. • Sites for lancing - avoid using the forefinger and thumb. Lance the outer aspect of the finger pad only, no lower than the nail bed avoiding the nail. Alternatively, one could use the fleshy part under the thumb (thenar) or little finger (hypothenar). • Obtaining a blood sample – Lance the finger, keep the hand below heart level, wait for 4-5 seconds for the capilaries to relax & milk from the palm towards the tip of the finger. Apply sample promptly – only squeeze gently. • Health & Safety – You must use the lancing device provided by the trust and lancet and strips must be disposed of as per trust guidelines (clinical sharps waste). Ensure the device and workstation are kept clean also. The ulcerated finger on the left was caused by someone using a sterile needle but not a lancing device. Repeatedly lancing the same are of skin can also cause this type of ulceration.
How To Perform A Patient TestSwitch on Inform & enter your operator ID. Main Menu appears. Confirm the current strip lot is being used. Touch Patient Test Apply patient blood only when prompted Or pick the correct one from the list or scan strip pot Test Processing Touch Glucose Test Result displayed – Document as per trust policy. Add a comment for out of range results. Type the patient ID or scan patient barcode. You might also pick from the patient list (if available). Insert a strip when prompted
STAT Tests • At your institution, your Inform II instruments may be configured to allow STAT tests to be run on the instrument. • STAT tests are tests allowed on the instrument when a QC request is outstanding. The number of these STAT tests which can be performed before the QC is analysed is set by the Point of Care group in your laboratory. • If the QC is outstanding and you press “patient test” the instrument will offer you the option of Analysing a STAT or analysing the QC (see screenshot). • If you decide to analyse a STAT the screens that follow are the same as a patient test process. • If you decide to analyse the QC the screens that follow are the same as a Glucose QC process.
Result Review • Press the Review Results button in the Main Menu. • Scroll the list using the arrow buttons on the right side of the screen. • Select specific results to view details (e.g. comments, flags, date & time) • View all results for a specific patient by pressing Patient in the main list, and afterwards entering a Patient ID, or selecting a specific result for this patient in the main list, and then pressing Patient. • Select only QC results by pressing the respective button.
Adding New Quality Control Solutions • Switch the Inform ON and input your operator ID. • Press the “Control lot” button in Main Menu 2. And press Add. • Select which level you are adding. • Scan the barcode on the QC vial using the scan button or type the lot number in. • Type the expiry date as DD/MM/YY. • You may also add new QC lots when performing a QC test – the same screens appear when doing it this way. It may be the case that the QC lots are automatically loaded onto the meter. • REMEMBER ALWAYS TO WRITE THE 3 MONTH EXPIRY DATE FROM THE DAY OF OPENING ON BOTH VIALS OF THE QUALITY CONTROL SOLUTIONS
Cleaning the Meter • Follow hospital policy for decontamination and cleaning of devices. • Remove from Base unit and turn off meter to clean it. • A damp cloth & mild soapy water may be used. • Ensure the cleaning cloth is damp not wet.
Adverse Incident Reporting • Report to Clinical Advisor/Manager, Diabetic Specialist Nurses or Biochemistry Department • Quarantine the Meter, Test Strips, Quality Control Solutions • Note the serial number of the meter, test strips & quality control solution • Complete the Trust documentation for reporting a clinical/adverse incident. DO NOT USE THE METER
Important Error CodesMeter Reading Range: 0.6 mmol/l – 33.3 mmol/l • According to your Trust’s Policy/Guidelines for Blood Glucose Monitoring you may be required to send a venous sample to the laboratory if the result is <3 mmol/l or >20mmol/l. Please refer to your local guidelines for confirmation. • Error codes are displayed on the screen of the Inform meter, perform what the error display requests and if necessary contact your Point of Care Co-ordinator (POCC).. • Error codes which MUST be acted upon immediately are shown below, these codes indicate the result is potentially outside of the meter reading range.