Download
1 / 29
450 likes | 1.88k Vues
Accu-Chek Inform II Blood Glucose Monitoring System. Nurse Educator: Lois Sandford, RN. Training Objectives. By the end of this session you will be able to: Explain why training is required. Identify contraindications/test interferences.

E N D
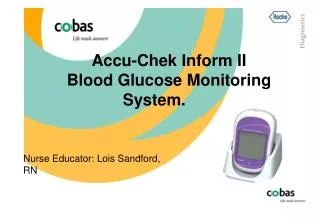
Accu-Chek Inform II Blood Glucose Monitoring System. Nurse Educator: Lois Sandford, RN
Training Objectives By the end of this session you will be able to: • Explain why training is required. • Identify contraindications/test interferences. • State Why and When you have to quality control your meter. • Perform a Quality control test as per hospital policy. • Identify Point of Care contact on site and where you get your meter supplies.
Why Training? • “The use of blood glucose meters by untrained staff, without adequate management supervision of the equipment and without the use of quality control procedures, can lead to misleading results, adversely affecting the treatment of patients” DH • Medicine and Healthcare Products Regulatory Agency • Nursing & Midwifery Council • Local Trust • RCN • Department of Health
Contraindications for use of Blood Glucose System. Due to the Hazard Notices being issued the MHRA recommend that therapeutic decisions should not be based on a capillary sample in these circumstances: • Dehydration • Hypotension • Shock • Peripheral Occulsive Disease • Hyperosmolar Non-Ketotic Coma • Diabetic Ketoacidosis • Unconscious Patients • Decompensated Heart Failure NYHA Class IV Venous Sample should be sent to the Lab for verification of blood glucose level
LIMITATIONS. • Due to medical conditions: • Galactose > 1.11 mmol/L (overestimation) • Lipids > 16.8 mmol/L (overestimation) • Sodium > 150 mmol/L (underestimation) • (Hypernatremia) • For further information refer to Test Strip Information Leaflet, • Workstation insert or Ward Manual
Inform II – Front View. Test Strip Port Touch screen On/off button Base unit
Inform II – Back View. Bar code scanner Battery Pack Wireless Card Reader
Advanced Performa Test Strip. Sample volume detection Robust End Dosing Strip Fast 5 Second Result 0.6μL sample size
Start Up – User Identification. 1 Press and release the On/Off button . The system is now on. 2 The Power Up screen appears. • Bar code scan of operator ID • User ID unique to user and • compulsory for all activities
Quality Control Testing • Why Quality Control? • How to Quality Control Inform II Meter • When to Quality Control? • Quality Control Lockout. • EQA
Quality Control Test: • Checks accuracy of test strips and Inform Meter • Level 1 & 2 controls MUST be analysed every 25 hours – otherwise the user will be locked out of analysing patient samples. • In an emergency – 1 stat test is allowed.
Failed Quality Control Test • Level 1 & 2 solutions must pass QC test. • If test displays FAIL: Add Comment and repeat test. • Troubleshoot: • Check expiry dates, mix/change QC solutions & test strips – repeat test. • Contact relevant department in hospital report fault and obtain replacement meter If meter continues to fail DO NOT use it!
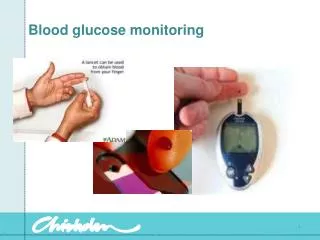
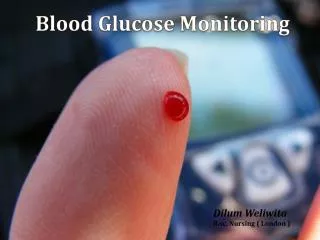
Patient Preparation. • Gain consent • Infection Control • Handwashing • Sites for lancing
Patient Testing. • Select patient test from menu • Select Glucose Test • Scan in Patient hospital number. • Meter will prompt you to confirm patient details • Scan in Test strips
Check test strip code and insert strip. ~ Check Patients details at top of screen
Apply patient blood when prompted. Always perform a visual inspection of the yellow test area.
Results. • Normal Range = 3.5 m/mols – 7.0 m/mols. • Critical Range = < 3.0 m/mols - >20.0 m/mols. • If Critical Range ……….. prompts…. • If HI………………………prompts….. • If LO………………………prompts…… • N.B. Comments………………………… • Hypo Boxes on the ward.
Review Results. • From main menu – select review result – Glucose Test • All results are displayed on screen – Patient & QC. • Select patient – to view patient results - scan ID • Select QC – to view QC results.
Cleaning the Meter. . • A lightly damp cloth before and after patient use and mild soapy water may be used. • Acti-max Clothes – dry off after use. • Follow hospital policy/local Guidelines for decontamination. (Sani-Cloth wipes)
Training Objectives By the end of this session you will be able to: • Explain why training is required. • Identify contraindications/test interferences. • State Why and When you have to quality control your meter. • Perform a Quality control test as per hospital policy. • Identify Point of Care contact on site and where you get your meter supplies.
Thank youfor listening… Any further questions?