Download
1 / 40
440 likes | 1.12k Vues
Rescue Techniques. Presented by the NOAA Diving Center Seattle, Washington. Global View. Preventing accidents What causes accidents Panicked diver at the surface Panicked diver underwater Unconscious diver at the surface Unconscious diver underwater Removing the diver from the water

E N D
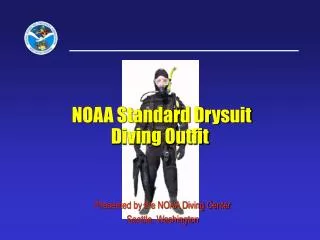
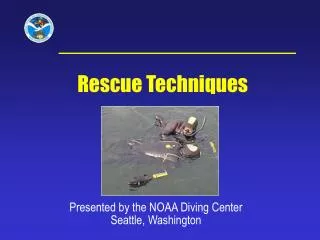
Rescue Techniques Presented by the NOAA Diving Center Seattle, Washington
Global View • Preventing accidents • What causes accidents • Panicked diver at the surface • Panicked diver underwater • Unconscious diver at the surface • Unconscious diver underwater • Removing the diver from the water • Post rescue care • Key Points
Introduction • Need & Value:Every diver must be able to save himself, his buddy, and other divers. You need to be able to recognize and prevent problems before they escalate to an emergency. You need to learn what to do for various rescue situations, so you will be prepared to save yourself or another diver when called upon to respond. • Effect:You will learn to recognize situations that require interventions and proven actions to take to rectify potential emergencies. You will be prepared to apply rescue skills.
Preventing Accidents - 1 • Physical fitness • Proper training • Proper equipment • Equipment properly serviced • Pre-dive safety checks • Diving within your training and experience level • Following proper diving procedures • Staying together as buddy teams
Preventing Accidents - 2 • Thorough pre-dive safety checks are the most important part of the dive. This is your opportunity to diffuse potential problems before you enter the water. • Always check: • The cylinder is full • Air is all the way on quarter turn off • Cylinder cam band was dipped in water before it was attached to the cylinder • The cam band is not at an angle and is very tight • Low pressure inflator hose is connected to the BCD and / or the dry suit all the way, and the inflator works
Preventing Accidents - 3 • Your weight belts are on correctly – right hand release and will not become trapped in any piece of equipment if it becomes necessary to drop the belt • You know how to release all of the weight you and your dive buddy are wearing • Both BCDs inflate and hold air • You know where your buddies alternate air source is and how to use it • You both have a knife and it can be reached with either hand • You are diving within your training and within your physical abilities
Factors That Contribute to Accidents • Stress • Anxiety • Fatigue • Fear • Panic • Equipment problems • Buddy separation • Diving beyond our training and abilities • Poor pre-dive safety checks
Stressors • Example: the unknown or unexpected can cause apprehension. Some divers may respond in ways inappropriate to survival • Diver stressors: exposure, illness, exhaustion, injury, personality, experience, fears, equipment problems, poor visibility, buddy separation, depth, darkness, currents, disorientation, entanglement, narcosis, hypoxia, dehydration
Anxiety & Panic • Stress, anxiety, panic & fatigue: • Adrenalin excites the body’s flight or fight mechanism • Increases breathing, heart rate, nervous system activity • As anxiety increases, awareness & performance decreases • Left unchecked this leads to panic or the uncontrolled & irrational reaction to perceived danger • Active versus inactive panic • Critical factor in the progressive steps of panic is whether or not a problem arises after one is stressed • Will victim be able to self-rescue? • Rescuer alert for signs of change (fatigue, etc.) in victim’s behavior
Emergency Signs & Signals • Day • Waving arm(s) over head • Unresponsive • Obvious signs of struggle • Out of air signal • Rocking of outstretched hand • Mask on forehead at surface • Night • Rapid up and down motion of light • Mask on forehead at surface
Self-Rescue - 1 • Self rescue steps: • Recognize and assess the situation • The problem may be solvable underwater • Don’t panic / don’t hold your breath and bolt to the surface • Once at the surface / establish positive buoyancy inflate BCD / dry suit / drop weight belt • Reduce physical activity • Gain control of respiration • If assistance is needed, wave your arms above your head / shout for assistance
Self-Rescue - 2 • Know how to handle equipment failure, loss, out-of-air options • Where is your buddy? Your buddy is your alternate air source • Physiological • Minimize exposure risks • Energy and body-heat conservation • Decompression & surface intervals • Exertion • Hydration level and cramp removal • Level of fitness and experience
Panicked Diver at the Surface - 1 • A diver in distress at the surface will usually put their mask on their forehead and spit out their regulator • If they are beginning to panic they may forget to do the one thing that will most likely solve the problem • Establish positive buoyancy • Shout at the diver “inflate your BC, drop your weight belt” • If they do not respond, offer them another source of buoyancy
Undesirable “Natural” aquatic responses: Body in vertical position, head back and above water, mouth open Rapid breathing or breath-holding Arms flailing above the water Clinging and climbing Ineffective leg kicks Panicked Diver at the Surface - 2
Panicked Diver at the Surface - 3 • If the panicked diver does not respond to your commands, don’t offer yourself as flotation • Establish ample buoyancy for yourself • Approach the panicked diver from behind • With your left hand grab hold of the tank valve • Grab the scuba bottle between your knees • With your right hand, reach around in front and release the weight belt
Panicked Diver at the Surface - 4 • If a panicked diver gets a hold of you and won’t let go you may have to deflate your BCD and go back under water • Then, from underwater you can approach the diver from in front and release their weight belt
Defenses & releases: Block grasping attempts Get behind victim and hold tank valve Push yourself down and push victim upward Tuck head and push victim’s elbows upward Put knee against diver and push backward Submerge and swim away Panicked Diver at the Surface - 5
Panicked Diver at the Surface - 6 • Always maintain a visual bearing on victim • Spotters, head above water entry • Assess situation, determine plan of action • Rescue swimmer: • Dressed for exposure and recovery • Rescue swim - pace yourself • Assess victim’s condition, establish communication • Extend flotation or establish victim buoyancy • If victim does not grab float, physically support victim and establish buoyancy at surface • Recognize the problem, severely distressed divers may not signal for help • Act quickly. The panicked diver struggles for approx. 60 seconds. Self-help is not always possible
Panicked Diver Underwater - 1 • Be prepared to use your alternate air source, the panicked diver may take your primary regulator • Try to approach them from the front so you don’t startle them and compound the problem • Try and calm the diver / hold on to them firmly and assist with the problem • Anticipate early in entanglement situations, assistance and more air for the trapped diver may be needed
Panicked Diver Underwater - 2 • Use of up / down line for reference • Support from side or back if panicky • Alternate air sources • Octopus • Spare air • Poor man’s octopus • Control the bolt for the surface…..
Panicked Diver Underwater - 3 • Flexibility to think and adapt skills & equipment • Pre-dive planning with buddy • Scenarios • Problem solving
Conscious Diver at the Surface • For a conscious diver: • Call for assistance, establish communication • Assess mental state: rational or irrational • Establish buoyancy • Assess problem. Can diver self-rescue? • Transport distressed victim • Tank tow • Talk to person being assisted • Account for buddies • Tired swimmer push (option)
Surfacing Unconscious Diver - 1 • Breathing victim • Modified “head lock” • Arm around head • Hold airway open and regulator in mouth • Vertical Swimming Ascent • Rescuer elbow in base of chest • Hold regulator in mouth with hand • Hold onto tank valve with other hand for control
Surfacing Unconscious Diver - 2 • Swim Victim Up • Remove mask if flooded and pinch nose • Swim to surface as fast and as safe as possible
Surfacing Unconscious Diver - 1 • Non- breathing victim • Approach victim • Check responsiveness • Remove weight belt • Establish positive buoyancy • Position head for open airway • Surface using vertical swimming ascent with ‘do-si-do’ position • Flare fins or victim to control ascent rate
Surfacing Unconscious Diver - 2 • Must get victim to surface quickly and safely • DO NOT DELAY ASCENT! • Protect yourself, release victim if uncontrolled ascent develops!! • Or use “send him up” technique • “Send him up” – last option • Make victim positively buoyant and release to surface • Not recommended if direct access to surface is obstructed (kelp, cave, wreck, ledge, etc.)
Non-Breathing Diver at Surface - 1 • Use “do-si-do” hold (rescuer’s left arm under victims left arm and grasping tank valve / BCD or head cradle position • Push up with left arm and push down on forehead with upper arm, pinching nose during rescue breaths • Tilt victim toward rescuer • Airway clear of water, mucous, blood • Pinch nose, seal mouth, and deliver slow rescue breath • Pocket mask is useful for ARB. • Can be carried in BC pocket
Non-Breathing Diver at Surface - 2 • Objectives: • Maintain dry, open airway • Minimal interruption of rescue breathing • Rate: 1 breath every 5 seconds or 2 breaths every 10 seconds • CPR cannot be done effectively in the water • Do not attempt pulse check. Ventilate and transport • Unable to feel a pulse through wet suit material • Hands encumbered by gloves, numb from cold
Non-Breathing Diver at Surface - 3 • Call for assistance • Approach quickly at surface • Pull victim to face-up position • Establish buoyancy, drop weight belt • Use left-side “do-si-do” position • Deliver rescue breaths and transport • Remove mask if not breathing • Drain mask and keep in place for breathing victim
Equipment Removal • Be familiar with buddy’s equipment • Release weight belt to aid buoyancy • Removal of other equipment necessary prior to exiting? • Remove equipment in 5-10 second steps, ventilating victim between • Equipment retained for analysis
Rescue Exits • Considerations: • Victim kept as horizontal as possible • Minimal interruption of rescue breathing • Recovery equipment on site and ready • Fatigued Rescuer • Recommended methods: • Horizontal float and drag • 3-person hammock carry • Parbuckling • Ladder or backboard lift
Parbuckle Exit • Position lines (“W”) • Keep tension on lines • Place victim’s arms beside head for support • Keep victim horizontal while lifting! • Do not step back if standing on line!
Specific Exits - 3 • For small boat exits: • A levered backboard • Ladder and BC carry or ladder carry • If victim unconscious, rescuer exits first • If victim conscious, victim exits first
Specific Exits - 4 • For large vessels, piers, or cliffs: • Use a backboard / multiple lifting lines for control • Use proper straps, slings and hardware • Deck crane & safety / cargo netting
Specific Exits - 5 • For surf or rocky shore exits: • Time period of swells • Turn into breaking waves • Seal victim’s mouth & nose before waves break • Ride swell onto rocks • Drag or roll victim up rocks • Quickly move to less exposed platform
Post-Rescue • Stabilize victim, control shock and hypothermia • Transfer to next level of care as required • Investigate events leading up to accident • Evaluate how the situation could have been prevented • Evaluate victim’s and rescue team actions • Identify correct / incorrect actions • Address deficiencies in events • Have equipment inspected • Review rescue • If necessary, improve / update emergency action plan
Preparation: Training: CPR & First Aid Oxygen First Aid Scuba Diving First Aid Rescue techniques Rescue equipment Personnel Review emergency procedures & accident response plans Plan & delegate Transportation Drills & skill maintenance (required annually) Rescue Training
Skill Proficiency • Frequently review & practice rescue skills so they are easily recalled (if you are in doubt = time to refresh) • Maintain certifications, attend advanced training • Rescue techniques will vary with circumstances • Practice skills under a variety of scenarios & conditions • Plan and organize for emergencies before every dive • Inspect & maintain readiness of support equipment
Rescue floatation Marker buoy Throwing line Search lines Recovery system Rescue breathing mask Diver’s first aid kit Blankets & water Oxygen delivery system Personnel delegated Communications & emergency contact information Designated chase boat Accident Management Evacuation plan (each location) Rescue Equipment
Key Points • Pre dive safety checks are the most important part of the dive • Diving accidents may have multiple injuries • Recognize and be able to control the signs of stress • Before rescuing others, you must be able to self-rescue • Assess the situation--assistance required or self-rescue possible? Monitor closely for changes • Do no further harm • Practice skills frequently • Keep track of your buddy • Don’t be the next victim