Download

1 / 45
460 likes | 863 Vues
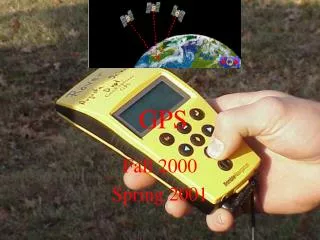
GPS Basics . by Monica Spicker 2010 Some figures are copyrighted and used with the kind permission of Dr. Peter H. Dana. Objectives. Student will Understand how GPS basically works Understand the limitations of GPS Describe common error sources Correctly setup a receiver

E N D
GPS Basics by Monica Spicker 2010 Some figures are copyrighted and used with the kind permission of Dr. Peter H. Dana. B M O C
Objectives • Student will • Understand how GPS basically works • Understand the limitations of GPS • Describe common error sources • Correctly setup a receiver • Input waypoints in the classroom and in the field • Navigate to points in the field using a variety of techniques. B M O C
Rule To Remember! A GPS receiver is an accessory, NOT A REPLACEMENT for a map, compass altimeter and good, basic navigation skills! B M O C
Parts of a GPS System B M O C
Satellites • About 31 satellites • Very high orbits • Several replaced every year. • 6 orbital planes ensure at least 4 or more satellites available at almost all times. • There is a large gap to the north. B M O C
Receiver • 100 – 500$ • 10+ meter accuracy • Computer cable • Download and upload maps, routes and waypoint. • Upgrade over the internet • Computer Mapping Software • Can map out tracks and waypoints • Can plan and upload routes, tracks and waypoints • Receivers may also have • Digital compasses • Barometric Altimeters • FRS Radio • Other features. B M O C
Hints • Check batteries and settings before setting out. • Use lithium batteries when available. • Practice with and know all needed screens on your receiver. • Have all your screens set the way you want them • If possible, set up trip screen to include both UTM and latitude/longitude fields. • Clear out old tracks, unneeded waypoints. • Organize waypoints by name and symbol for easier management. • Calibrate the compass and altimeter, if you have them. • Have all navigation equipment together and readily available. • Tie your navigation equipment onto yourself. B M O C
Three okay, four or more better 3 satellites are needed to acquire a position fix. (2D mode) 4 satellites are needed for an accurate position and to get elevation. (3D mode) More satellites are really needed because of errors that arise from a variety of sources. Satellite positions (geometry) Weather Multipath Timing errors Typical error is 10+ meters. All GPS are 12 channel: can receive up to 12 satellites B M O C
Ideal Satellite Geometry N E W S
Poor Satellite Geometry N W E S
GPS cannot “see” through objects! Some of the newer satellites and receivers can receive through thinner solid objects like cars, building walls and forest canopy. Terrain and larger buildings are still too big. B M O C
Multipath Error • A signal that bounces of a smooth object and hits the receiver antenna. • Increases the length of time for a signal to reach the receiver. • A big position error results. • Gravel roads • Open water • Snow fields • Rock walls • Buidlings B M O C
Initializing the receiver Setup : *CRITICAL! Map Datum* Grid System* It is possible to create your own grid and or datum! Distance units Other features or options If you have a digital compass, set it to kick in at under 2 mph speed Calibrate compass and altimeter, if receiver has them. B M O C
Map Datums • Earth model to reference and compute coordinates • GPS based on World Geodetic System 1984 (WGS 84) • USGS quad maps based on North American Datum 1927 (NAD27) • Some US maps are based on NAD83 (=WGS84) • Canadian maps are based on NAD83 • Other countries have their own datums • GPS Receiver set up must match map. B M O C
Elevations • GPS uses Height Above Ellipsoid (HAE) • Elevations on a map are based on mean sea level shape (HAG) • Can be very different and you won’t know where or when it’s different and by how much. • Satellite geometry error increases elevation error. • DO NOT USE GPS ELEVATIONS FOR CRITICAL NAVIGATION DECISIONS. • GPS receivers with barometric altimeter use both methods. • Set to fixed, • Barometric altimeters still need to be regularly calibrated at a known elevation. B M O C
WAAS • Wide Area Augmentation System • 25 ground reference stations in US monitor GPS satellite data and calculate corrections. • The correction is broadcast through one of two geostationary satellites. • Currently, WAAS coverage is only in US and parts of southern Canada. • Any receiver with a WAAS antenna can receive the signal. • Must enabled through setup. • Uses up batteries • Doesn’t always give best results. • Uses up to 4 regular satellite channels. B M O C
What Receivers Record • Track Logs • Collected any time receiver is on. • Should be cleared before each mission • Overwrites previous positions, if track memory is full • Tracks • Track logs can be saved for reuse • Not as much detail as log • Can be drawn on computer map and uploaded • Waypoints • Stored or entered locations • Routes • Set series of waypoints • Less detail than a track B M O C
Need to have stored waypoints. Travel is in a straight line from waypoint to waypoint (route). Can also be a track you uploaded and follow. Feedback is distance and direction – compass and pace may be more efficient. Can use to check progress and whether you are still on track. Can save waypoints along the way and follow back (reverse route). Straight line may not be safest - use a map when planning or to double check! Navigation B M O C
Planning a Navigation Route = Waypoint Start
GPS Navigation Strategies • Receiver downloads new position every 5 to 30 seconds. • “Compass” may jump • Best to follow hand compass or electronic compass rather than GPS compass. • If receiver has electronic compass, set it so it will kick in at under 2 mph. • As long as distance is decreasing, you are going the right direction. • Can select easier terrain to increase travel speed. B M O C
Use Basic Navigation Techniques! Target Better: Follow road (or handrail it) until distance starts to increase. Now follow GPS the shorter distance into the target. If curve is easy to identify, can use GPS to navigate road to this checkpoint and then use compass and pace into target from here. Okay: GPS “track” if just following it in nav mode Start B M O C
Garmin Basics • There are differences between models as well as between brands. • Basics are the same. • Should sit down with instruction booklet and learn all the functions. B M O C
The Parts On/Off Turn Backlight on off Page key to switch screens Toggle between fields. Left side of etrex: up down keys and find or zoom key. Depends in which screen you are. Enter. Push straight down on etrex. Holding enter will create a waypoint. B M O C
Backlight • Needed at night • Turn on and off by pushing power switch. • On some, only one level, on others settable. Should set at lowest level to see. • Some will go to full brightness if power is pushed again – be careful! B M O C
The Screens • Other makes will have similar screens and functions • Basic screens: • Sky View • Map View • Trip Log • Main Menu • Other screens • Compass view – always on some, only during navigation on others. • Elevation screen – only if unit has an altimeter • Most screens have sub screens to allow you to pick what will be displayed. • Use page key to move between screens. B M O C
Sky View • First screen to come up after turning on. • Shows sky plot, which satellites should be up and onto which you have locked. • Center of circle is zenith, outer edge is horizon. • Ready to navigate or similar after lock onto 4 achieved. • Gives estimate of precision based on geometry B M O C
Sky View B M O C
Map View • Shows map of current location. • If navigating, some will show purple line to follow. • Can zoom and pan on some models. B M O C
Map View B M O C
Trip View • Gives overview of current trip stats. • Can set up what you see • This may have multiple sub screens. • Clear out old data from this view. • Keeps a track log. Stores position every 5 to 30 seconds. Can be saved. Can be downloaded and mapped • Should at least clear track log before every trip. B M O C
Trip View B M O C
Main Menu • Most functions found here • Setup • Waypoints • Create, Edit, Delete • Tracks • Setup, Clear, Save, Turn on and off. • Calibration • Other B M O C
Main Menu B M O C
Main Menu – Setup • System: basic look and feel, turn WAAS on and off. • Set compass to kick in when speed = 2mph. • Display: set backlight. • Set backlight to stay on. • Set for lowest level to do night work. • Units: Coordinate system, Datum, Units for distance and elevation, etc. B M O C
Setup B M O C
Waypoints • On most Garmins, hold enter key to mark a waypoint or go to main Menu to mark. • Can then edit Name, Symbol, Location. • Have a naming convention so waypoints show up in the list together. • Group important points with the same symbol. like a folder – can bulk delete everything with the same symbol and not others. • Select named waypoint, then GOTO to start navigation. B M O C
Waypoints B M O C
Waypoints – Marking B M O C
Waypoints – Editing B M O C
Navigation • Main Menu – Waypoints or Find • Select desired waypoint • Go To • Map screen or compass screen comes up B M O C
Waypoints – Find B M O C
GPS Navigation Once map or compass screen comes up: • Start walking • You must be moving for navigation mode to work. • Turn so compass points to top of unit or the arrow points down the map track. • When you get close • Switch to coordinate screen to find final coordinates. • GPS usually has a 5 to 10 meter error, more in poor conditions. • Mark where the GPS takes you and search a 10 meter full circle around the point B M O C
Calibrate • Only if your GPS has an altimeter and/or compass. • Calibrate will not show in menu, if you do not have it. • Calibrate, altimeter, known elevation. • Must be at that actual elevation to calibrate. • Should recalibrate daily or when weather has changed. • Calibrate, compass • Hold GPS level and slowly turn 2 rotations – receiver will tell you when it is complete. • Must recalibrate after changing datum and coordinates. • Navigation will not work right if compass not calibrated. B M O C
Calibrate B M O C