Download
1 / 20
210 likes | 427 Vues
ECE 448: Spring 12 Lab 4 – Part 2 Finite State Machines Basys2 FPGA Board. Agenda for today. Part 1: Simple Demo Part 2: Digilent Basys2 FPGA Board Part 3: UCF Files Part 4: Generating and uploading bitstream using FPGA Design Flow based on Aldec Active-HDL

E N D
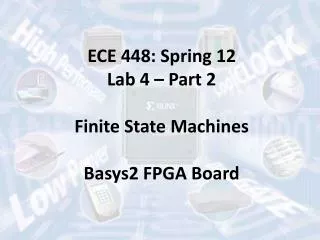
ECE 448: Spring 12 Lab 4 – Part 2 Finite State Machines Basys2 FPGA Board
Agenda for today Part 1: Simple Demo Part 2: Digilent Basys2 FPGA Board Part 3: UCF Files Part 4: Generating and uploading bitstream using FPGA Design Flow based on Aldec Active-HDL Part 5: Generating and uploading bitstream using FPGA Design Flow based on Xilinx ISE Part 6: Synthesis using Synplify Premier DP
Part 1 Simple Demo
Part 2 Digilent Basys2 FPGA Board
Basys2 • 100,000-gate Xilinx Spartan 3E FPGA • Atmel AT90USB2 Full-speed USB2 port providing board power and programming/data transfer interface • Xilinx Platform Flash ROM to store FPGA configurations • 8 LEDs, 4-digit 7-segment display, 4 buttons, 8 slide switches • PS/2 port and 8-bit VGA port • User-settable clock (25/50/100MHz), plus socket for 2nd clock • Four 6-pin header expansion connectors
Basys2 Expansion ports VGA connector 7 Segment Displays (4) ON/OFF Switch Buttons (4) Switches (8) LEDs (8)
Basys2 I/O Circuits
Seven Segment Display • By lighting different combinations of LEDs, different figures appear • For Instance CA, CB, CC make ‘7’ • Common anode means that writing a ‘0’ to CA-DP illuminates the led, where a ‘1’ turns it off
Seven Segment Display • SSRegCtrl has a 16 bit input that is divided into four 4-bit digits • AN(0:3) select which 7 segment display to output to • Digilent recommends a digit period of between 1kHz and 60Hz
Part 3 User Constraint File (UCF)
User Constraint File (UCF) • File contains various constraints for Xilinx • Clock Periods • Clock Boundary Crossings (hard to do! That’s why we use a CoreGen’ed FIFO) • Circuit Locations • Pin Locations • Every pin in the top unit needs to have a pin in the UCF
Basys 2 I/O Circuits
User Constraint File (UCF) Top Level Unit (VHDL) UCF # Connected to Basys2 onBoard 7seg display NET "seg<0>" LOC = "L14"; # Bank = 1, Signal name = CA NET "seg<1>" LOC = "H12"; # Bank = 1, Signal name = CB NET "seg<2>" LOC = "N14"; # Bank = 1, Signal name = CC NET "seg<3>" LOC = "N11"; # Bank = 2, Signal name = CD NET "seg<4>" LOC = "P12"; # Bank = 2, Signal name = CE NET "seg<5>" LOC = "L13"; # Bank = 1, Signal name = CF NET "seg<6>" LOC = "M12"; # Bank = 1, Signal name = CG NET “seg<7>" LOC = "N13"; # Bank = 1, Signal name = DP NET "an<3>" LOC = "K14"; # Bank = 1, Signal name = AN3 NET "an<2>" LOC = "M13"; # Bank = 1, Signal name = AN2 NET "an<1>" LOC = "J12"; # Bank = 1, Signal name = AN1 NET "an<0>" LOC = "F12"; # Bank = 1, Signal name = AN0 # Pin assignment for SWs NET "sw<7>" LOC = "N3"; # Bank = 2, Signal name = SW7 NET "sw<6>" LOC = "E2"; # Bank = 3, Signal name = SW6 NET "sw<5>" LOC = "F3"; # Bank = 3, Signal name = SW5 NET "sw<4>" LOC = "G3"; # Bank = 3, Signal name = SW4 NET "sw<3>" LOC = "B4"; # Bank = 3, Signal name = SW3 NET "sw<2>" LOC = "K3"; # Bank = 3, Signal name = SW2 NET "sw<1>" LOC = "L3"; # Bank = 3, Signal name = SW1 NET "sw<0>" LOC = "P11"; # Bank = 2, Signal name = SW0 # Pin assignments for the Buttons NET "btn<3>" LOC = "A7"; # Bank = 1, Signal name = BTN3 NET "btn<2>" LOC = "M4"; # Bank = 0, Signal name = BTN2 NET "btn<1>" LOC = "C11"; # Bank = 2, Signal name = BTN1 NET "btn<0>" LOC = "G12"; # Bank = 0, Signal name = BTN0 entity top_level is port( -- LEDs led : out std_logic_vector(7 downto 0); -- Seven Segment Display seg : out std_logic_vector(7 downto 0); an : out std_logic_vector(3 downto 0); -- Rotary button and switches sw : in std_logic_vector(7 downto 0); btn : in std_logic_vector(3 downto 0)); end entity top_level; # Pin assignment for LEDs NET “led<7>" LOC = "G1" ; # Bank = 3, Signal name = LD7 NET “led<6>" LOC = "P4" ; # Bank = 2, Signal name = LD6 NET “led<5>" LOC = "N4" ; # Bank = 2, Signal name = LD5 NET “led<4>" LOC = "N5" ; # Bank = 2, Signal name = LD4 NET “led<3>" LOC = "P6" ; # Bank = 2, Signal name = LD3 NET “led<2>" LOC = "P7" ; # Bank = 3, Signal name = LD2 NET “led<1>" LOC = "M11"; # Bank = 2, Signal name = LD1 NET “led<0>" LOC = "M5" ; # Bank = 2, Signal name = LD0
Part 4 Generating and uploading bitstream using FPGA Design Flow based on Aldec Active-HDL
FPGA Design process (1) Design and implement a simple unit permitting to speed up encryption with RC5-similar cipher with fixed key set on 8031 microcontroller. Unlike in the experiment 5, this time your unit has to be able to perform an encryption algorithm by itself, executing 32 rounds….. Specification (Lab Assignments) On-paper hardware design (Block diagram & ASM chart) VHDL description (Your Source Files) Library IEEE; use ieee.std_logic_1164.all; use ieee.std_logic_unsigned.all; entity RC5_core is port( clock, reset, encr_decr: in std_logic; data_input: in std_logic_vector(31downto0); data_output: out std_logic_vector(31downto0); out_full: in std_logic; key_input: in std_logic_vector(31downto0); key_read: out std_logic; ); end AES_core; Functional simulation Synthesis Post-synthesis simulation
FPGA Design process (2) Implementation Timing simulation Configuration On chip testing
Part 5 Generating and uploading bitstream using FPGA Design Flow based on Xilinx ISE
Part 6 Synthesis using Synplify Premier DP