Download

1 / 24
270 likes | 559 Vues
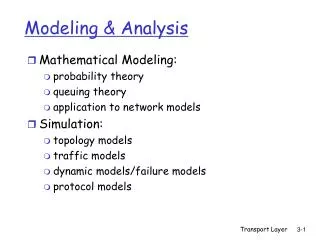
TNK092: Network Simulation/Nätverkssimulering Network Simulation---ns2. Lecture 2. n1. n0. n2. n3. n0. n2. n3. n1. An Example with all we’ve seen so far. #Create four nodes set n0 [$ns node] set n1 [$ns node] set n2 [$ns node] set n3 [$ns node]. set ns [new Simulator]

E N D
TNK092: Network Simulation/Nätverkssimulering Network Simulation---ns2 Lecture 2
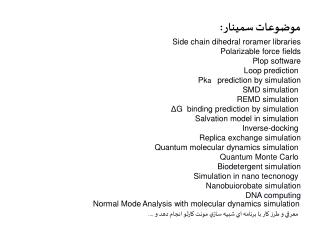
n1 n0 n2 n3 n0 n2 n3 n1 An Example with all we’ve seen so far. #Create four nodes set n0 [$ns node] set n1 [$ns node] set n2 [$ns node] set n3 [$ns node] set ns [new Simulator] #Define different colors #for data flows (for NAM) $ns color 1 Blue $ns color 2 Red #Create links between the nodes $ns duplex-link $n0 $n2 2Mb 10ms DropTail $ns duplex-link $n1 $n2 2Mb 10ms DropTail $ns duplex-link $n2 $n3 1.7Mb 20ms DropTail #Give links position (for NAM) $ns duplex-link-op $n0 $n2 orient right-down $ns duplex-link-op $n1 $n2 orient right-up $ns duplex-link-op $n2 $n3 orient right #Open the NAMtrace file set nf [open out.nam w] $ns namtrace-all $nf #Open the Trace file set tf [open out.tr w] $ns trace-all $tf #Set Queue Size of link (n2-n3) to 10 $ns queue-limit $n2 $n3 10 #Monitor the queue for link (n2-n3). (for NAM) $ns duplex-link-op $n2 $n3 queuePos 0.5 #Define a 'finish' procedure proc finish {} { global ns nf tf $ns flush-trace #Close the NAM trace file close $nf #Close the Trace file close $tf #Execute NAM on the trace file exec nam out.nam & exit 0 }
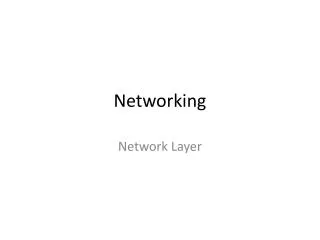
An Example with all we’ve seen so far.. #Setup a TCP connection set tcp [new Agent/TCP] $ns attach-agent $n0 $tcp set sink [new Agent/TCPSink] $ns attach-agent $n3 $sink $ns connect $tcp $sink $tcp set fid_ 1 #Setup an FTP over TCP connection set ftp [new Application/FTP] $ftp attach-agent $tcp $ftp set type_ FTP #Setup a UDP connection set udp [new Agent/UDP] $ns attach-agent $n1 $udp set null [new Agent/Null] $ns attach-agent $n3 $null $ns connect $udp $null $udp set fid_ 2 cbr ftp tcp 0 0.1 1.0 4.0 4.5 sec sink upd null n0 n2 n3 n1 #Schedule events for the CBR and FTP agents $ns at 0.1 "$cbr start" $ns at 1.0 "$ftp start" $ns at 4.0 "$ftp stop" $ns at 4.5 "$cbr stop" #Detach tcp and sink agents (not so necessary) $ns at 4.5 "$ns detach-agent $n0 $tcp ; in the SAME line$ns detach-agent $n3 $sink" #Call the finish procedure after 5 #seconds of simulation time $ns at 5.0 "finish” #Print CBR packet size and interval puts "CBR packet size = [$cbr set packet_size_]" puts "CBR interval = [$cbr set interval_]" #Run the simulation $ns run #Create four nodes set n0 [$ns node] set n1 [$ns node] set n2 [$ns node] set n3 [$ns node] set ns [new Simulator] #Define different colors #for data flows (for NAM) $ns color 1 Blue $ns color 2 Red #Create links between the nodes $ns duplex-link $n0 $n2 2Mb 10ms DropTail $ns duplex-link $n1 $n2 2Mb 10ms DropTail $ns duplex-link $n2 $n3 1.7Mb 20ms DropTail #Give links position (for NAM) $ns duplex-link-op $n0 $n2 orient right-down $ns duplex-link-op $n1 $n2 orient right-up $ns duplex-link-op $n2 $n3 orient right #Open the NAMtrace file set nf [open out.nam w] $ns namtrace-all $nf #Open the Trace file set tf [open out.tr w] $ns trace-all $tf #Set Queue Size of link (n2-n3) to 10 $ns queue-limit $n2 $n3 10 #Monitor the queue for link (n2-n3). (for NAM) $ns duplex-link-op $n2 $n3 queuePos 0.5 #Define a 'finish' procedure proc finish {} { global ns nf tf $ns flush-trace #Close the NAM trace file close $nf #Close the Trace file close $tf #Execute NAM on the trace file exec nam out.nam & exit 0 } ftp #Setup a CBR over UDP connection set cbr [new Application/Traffic/CBR] $cbr attach-agent $udp $cbr set type_ CBR $cbr set packet_size_ 1000 $cbr set rate_ 1mb $cbr set random_ false cbr 3
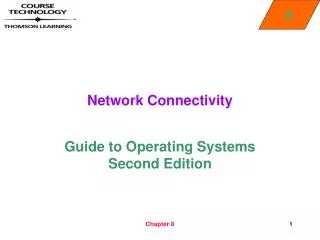
An Example with all we’ve seen so far... epimyth cbr ftp tcp 0 0.1 1.0 4.0 4.5 sec sink upd null n0 n2 n3 n1 • To create agents or traffic sources, a user should know the class names these objects (Agent/TCP, Agnet/TCPSink, Application/FTP and so on). • Remember to look at look at the …/tcl/libs/ns-default.tcl file. • This file contains the default configurable parameter value settings for available network objects. • Hint: a good indicator of what kind of network objects are available in NS and what are their configurable parameters. ftp cbr 4
Tracing • Besides the NAM trace ns2 can provide an ASCII trace file. • At every link a packet is
About Awk AWK is a tool that allows “simple” data manipulation on trace files. Sample AWK code: BEGIN {sum+=$2; array[N]=$2} END { for(i=1;i<=N;i++) { sumsq+=((array[i]-(sum/N))^2); } print sqrt(sumsq/N) } _______________________________________________________________________________________________________________________ To run use: awk -f Average.awk out.tr
End to end delay (measure-delay.awk) BEGIN { #initial the highest packet id highest_packet_id = 0; } { event = $1; time = $2; from = $3; to = $4; type = $5; pktsize = $6; flow_id = $8; src = $9; dst = $10; seq_no = $11; packet_id = $12; if ( packet_id > highest_packet_id ) highest_packet_id = packet_id; if ( start_time[packet_id] == 0 ) start_time[packet_id] = time; if ( flow_id == 2 && action != "d" ) { if ( event == "r" ) { end_time[packet_id] = time; } } else { end_time[packet_id] = -1; } } END { for (packet_id=0; packet_id<=highest_packet_id; packet_id++ ) { start = start_time[packet_id]; end = end_time[packet_id]; packet_duration = end - start; if ( start < end ) printf("%f %f\n", start, packet_duration); } } Remember . . . awk -f measure-delay.awk out.tr > cbr-delay
Plotting with gnuplotGnuplot(http://www.gnuplot.info/;http://www.gnuplot.info/documentation.html) #plotdelay.plot set term png medium #000000 set output "cbr-delay.png" set ylabel "End-to-End delay(sec)" set xlabel "Start transmission time(sec)" set xrang [0:5] set xtics 0, 0.5, 5 set yrang [0:0.1] set ytics 0, 0.01, 0.1 set title "CBR end-to-end delay" plot "cbr-delay" title "CBR" with linespoints lt -1 pt 8 gnuplot>load ’plotdelay.plot’
xgraph xgraph cbr-delay
Jitter (awk codes) END { for (j=1; j <i ;j++) printf("%d\t%f\n",seq[j],jitter[j]); } #cbr-jitter.awk BEGIN { old_time=0; old_seq_no=0; i=0; } { action = $1; time = $2; node_1 = $3; node_2 = $4; type = $5; flow_id = $8; node_1_address = $9; node_2_address = $10; seq_no = $11; packet_id = $12; if(node_1==2 && node_2==3 && type=="cbr" && action=="r") { dif=seq_no-old_seq_no; if(dif==0) dif=1; jitter[i]=(time-old_time)/dif; seq[i]=seq_no; i=i+1; old_seq_no=seq_no; old_time=time; } } awk –f cbr-jitter.awk out.tr > cbr-jitter 11
Jitter (...more awk codes) END { last_seqno = 0; last_delay = 0; seqno_diff = 0; for ( packet_id = 0; packet_id <= highest_packet_id; packet_id++ ) { start = start_time[packet_id]; end =end_time[packet_id]; packet_duration = end - start; if ( start < end ) { seqno_diff = pkt_seqno[packet_id]- last_seqno; delay_diff = packet_duration - last_delay; if (seqno_diff == 0) { jitter =0; } else { jitter = delay_diff/seqno_diff; } printf("%f %f\n", start, jitter); last_seqno = pkt_seqno[packet_id]; last_delay = packet_duration; } } } $awk –f cbr-jitter2.awk out.tr > cbr-jitter #cbr-jitter2.awk BEGIN { highest_packet_id = 0; }{ action = $1; time = $2; node_1 = $3; node_2 = $4; type = $5; flow_id = $8; node_1_address = $9; node_2_address = $10; seq_no = $11; packet_id = $12; if ( packet_id > highest_packet_id ) { highest_packet_id = packet_id; } if ( start_time[packet_id] == 0 ) { pkt_seqno[packet_id] = seq_no; start_time[packet_id] = time; } if ( flow_id == 2 && action != "d" ) { if ( action == "r" ) { end_time[packet_id] = time; } } else { end_time[packet_id] = -1; } }
Packet loss (awk codes) # cbr-loss.awk BEGIN { fsDrops = 0; numFs = 0; } { action = $1; time = $2; node_1 = $3; node_2 = $4; src = $5; flow_id = $8; node_1_address = $9; node_2_address = $10; seq_no = $11; packet_id = $12; if (node_1==1 && node_2==2 && action == "+") numFs++; if (flow_id==2 && action == "d") fsDrops++; } END { printf("number of packets sent:%d lost:%d\n", numFs, fsDrops); }
Throughput (awk codes) BEGIN { init=0; i=0; } { action = $1; time = $2; from = $3; to = $4; type = $5; pktsize = $6; flow_id = $8; src = $9; dst = $10; seq_no = $11; packet_id = $12; if(action=="r" && from==2 && to==3 && flow_id==2) { pkt_byte_sum[i+1]=pkt_byte_sum[i]+ pktsize; if(init==0) { start_time = time; init = 1; } end_time[i] = time; i = i+1; } } END { printf("%.2f\t%.2f\n", end_time[0], 0); for(j=1 ; j<i ; j++){ th = pkt_byte_sum[j] / (end_time[j] - start_time)*8/1000; printf("%.2f\t%.2f\n", end_time[j], th); } printf("%.2f\t%.2f\n", end_time[i-1], 0); }
Packet loss (awk codes) BEGIN { fsDrops = 0; numFs = 0; } { action = $1; time = $2; from = $3; to = $4; type = $5; pktsize = $6; flow_id = $8; src = $9; dst = $10; seq_no = $11; packet_id = $12; if (from==1 && to==2 && action == "+") numFs++; if (flow_id==2 && action == "d") fsDrops++; } END { printf("number of packets sent:%d lost:%d\n", numFs, fsDrops); }
Some basic ns2 structuring In …/ns-2.34/tcl/lib: ns-lib.tcl: • The actial simulator class, most of its member function definitions are here ns-default.tcl: • default values for configurable parameters for various network components, configure the parameter in otcl which actually take effect through C++… ns-packet.tcl: • Packet header initialization & implementation, where you register your own packet type 16
Adding your own modules... You will develop NS2 modules in one the following file types: What you would like to do is to incorporate these files into NS2 …how? 17
Working assumption... Assume that we wanted to build a multimedia application that runs over a UDP connection. Lets say that this application implements a "five rate media scaling" which can respond to network congestion to some extent by changing encoding and transmission policy pairs associated with scale parameter values 18
Adding modules Step by step... STEP 1:Register the new application header, by modifying the files: …/common/packet.h and …/tcl/lib/ns-packet.tcl 1. In packet.h A. Look for: // insert new packet types here Static packet_t PT_NTYPE = 62; // This MUST be the LAST one And insert new packet types between those 2 lines, eg: static const packet_t PT_Multimedia = 70; B. Look for: class p_info { In public: In static void initName() in the long list of name_ add: name_[PT_Multimedia] = "Multimedia"; 2. In ns-packet.tcl - Look for: foreach prot { And in the list of protocols add: Multimedia 19
Adding modules Step by step... STEP 2:Add new methods to the Agent and Application classes, by modifying the files: …/common/agent.h and …/apps/app.h 1. In agent.h -look for: class Agent : public Connector { public: Agent(packet_t pktType); And insert new agent methods as e.g.: virtual int supportMM() {return 0;} virtual void enableMM() {} 2. In app.h -look for: class Application : public Process { public: Application(); And in that list also insert your application methods defintions as e.g.: virtual void recv_msg(int nbytes, const char *msg = 0){} 20
Adding modules Step by step... STEP 3:Set defaults for the new configurable parameters, in /tcl/lib/ns-default.tcl add ...... Application/MmApp set rate0_ 0.3mb Application/MmApp set rate1_ 0.6mb Application/MmApp set rate2_ 0.9mb Application/MmApp set rate3_ 1.2mb Application/MmApp set rate4_ 1.5mb Application/MmApp set pktsize_ 1000 Application/MmApp set random_ false ...... 21
Adding modules Step by step... STEP 4:Modify the Makefile Assuming that you have all three .h, .cc and .tcl file types you must make the following modifications (if not, reduce steps accordingly). Note: the Makefile lies in the …/ns-2.23 directory Lets assume your files are in …/ns-2.34/myWork You will have to modify three places in theMakefile 1. OBJ_CC 2. NS_TCL_LIB 3. INCLUDE As follows: 1. Look for OBJ_CC = \ And add: myDir/myNewMod.o \ To one line below 22
Adding modules Step by step... 2. Look for NS_TCL_LIB = \ And add: myDir/myfile.tcl \ To one line below 3. (OPTIONAL) Look for INCLUDES = \ And add: -I. /myWorks \ To one line below 23
Adding modules Step by step... STEP 6: Recompile the software ./make Note: These will be key instruction steps for Lab Assignment 2 24