Download
1 / 28
280 likes | 367 Vues
Learn how to add color to cave maps in Illustrator for better comprehension. Discover techniques for filling large areas, creating detailed rocks with color, and avoiding common pitfalls.

E N D
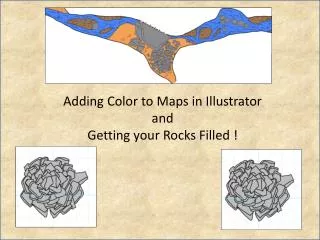
Adding Color to Maps in Illustrator and Getting your Rocks Filled !
Cave Cartography has evolved over the years We started with hand drafted and inked maps In the past 15 years, computer drafted maps have become the standard More recently, maps that use color to aid comprehension are rapidly becoming more and more common
Sometimes we use color to highlight the cave itself B. Kowallis Sometimes we use color to inform about the characteristics of the cave Sometimes we use color for both purposes
For all of these uses there are many techniques and tricks that we can use in Illustrator (or many other drawing programs) that help us add color to our maps
Filling Large Areas Here is a section of a River Cave (R. Finch, Guatemala) How do we add some color to designate water and mud fill? First , walls are drawn in, as normal
However, if I try to add a fill color, strange things happen. Color ends up OUTSIDE the passage This is due to the fact that your line segments are not connected, because the passage beyond is not surveyed But that leaves passage walls where we really don’t want them We can make this work by connecting the line segments
How to add color without walls! 1) Copy the walls that will enclose your color 2) Set up a new Layer – name it a color layer, like water color, for example
3) Use the paste in front function (in the edit menu). This will paste a copy of the walls in front of the current set of walls 4) The extra set of walls will be in the same layer. They need to be placed in the new layer. This can be done with the bulk move function in the layer menu 5) The new set of walls are in the new layer (water)
6) Now use the Pen tool, and connect all the line segments with section of line 7) Close all open sections of cave
8) Using the Stroke and Fill command, add a water color, and set the stroke to none 9) Turn on the original walls, and the color will fill behind it without closing the passages that are open
This can be used over large areas and used for several different areas and colors
This can also be used to create a blank area inside passages to offset against outside color
Rocks! Done right, rocks with color can add a lot to a map. Nothing is easier to draw, and adds as much visual impact as rocks and other details
However using color with rocks forces us take special steps Certain rocks that look good without color, like this large one, which is covered by other rocks…. is really made up of separate segments of line
Trying to fill these ‘virtual’ rocks leads to disaster….. In fact this issue is repeated many times in large rock piles
This is a result of a time saving (and necessary) technique of just sketching what you see in the cave, and not drawing the sections of rock you cannot see We are not going to change the way we sketch rocks in the cave .. But we ARE going to have to change how we represent them in our drawing programs
To make this work, most individual rock will have to be fully drawn and ‘closed There are certain hints and tips to make this work better
1) Practice closing all your rocks: Rocks need to be fully closed or ‘unslightly’ effects might occur. In some cases, color can ‘leak’ out of closed areas and flood adjacent areas Shapes can be auto-closed, by holding down the alt key while drawing - this will force the shape to be closed
2) Watch your 3D effects Some rocks need to be monitored to make sure that ‘3D effects’ do not break the fill. The same thing that works in unfilled rock may not work in filled rocks Sometimes the 3D effect needs to be an unfilled line to make sure that color does not bleed
3) Plan Ahead! When you have a pile of rocks, you are going to have to plan ahead to make them look natural. Once you understand this it becomes easy
Start with your ‘deepest’ rock, the rock at the bottom of the pile. Draw it in and make sure it closes Add your 3D effect. This can be hard, as the first shape (the one you drew in above) will cover your sketch. Work quickly to remember it, or just make it look good Continue and complete all the ‘lowest’ rocks in the pile. These may be in a row, or randomly placed
Start adding the second row up. Because the bottom row may cover some details from the second row, you may have to freehand, or try to remember… I once tried to do this without fill, so I could see the sketch through the rocks, but this quickly grew to too many lines to make sense You can also try turning rocks on and off in the Menu, but then you end up taking foever in the layers menu turning things on and off
So keep adding more rocks, sometimes not strictly following the sketch, but making the arrangement true to the sprit of the sketch Continue adding you are complete and you have a pile of rocks that creates the effect you want
Large Breakdown rooms can be done fairly quickly as well – even if there is not a detailed sketch to work from The original Sketch. Not much detail on the breakdown Draw what is detailed
Add a widely distributed first layer Start adding a second layer on top of the first
Continue adding the second layer, trying to cover as much floor as possible Complete other Rocks and do final adds, again trying to cover as much white as possible
Finished rocks Finished drawing, with other colors filling in blank areas