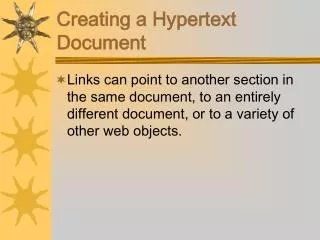
Creating a Sample Multiple Document Interface (MDI) application
Creating a Sample Multiple Document Interface (MDI) application. Creating a Sample MDI Application. To create an MDI application: Start a new Windows Forms project. Name the project SampleMDI From the Toolbox, select a MainMenu control and drag it onto mdiMain

Creating a Sample Multiple Document Interface (MDI) application
E N D
Presentation Transcript
Creating a Sample Multiple Document Interface (MDI) application
Creating a Sample MDI Application • To create an MDI application: • Start a new Windows Forms project. Name the project SampleMDI • From the Toolbox, select a MainMenu control and drag it onto mdiMain • Right-click any menu item, and click Edit Names. Replace the default menu item names by typing names corresponding to the Text property of each item • Click the Window menu item, and set its MdiList property to True • In Solution Explorer, right-click the SampleMDI project name; then click Add | Add Windows Form to add another form to the project • Open mdiMain in the Designer. Double-click Exit in the Designer, and then insert End in the procedure for mnuExit_Click() • Run the SampleMDI application, create two child forms, and click Window | Cascade • Add the code shown in Figure 3-39 to mnuCreateChild_Click, inserting it right after Dim MyChild.... • Run the SampleMDI program again. This time, create four child forms, and click Window | Cascade
Inserting New Controls in the Sample MDI • LogonManager application requires the use of the following new controls: • TabControl, ComboBox, CheckBox GroupBox, RadioButton • TabControl Control • Provides an excellent means of conserving screen space • ComboBox Control • Create a combo box regarding Hilda’s pet schnauzer and place this control on the Hilda tab of frmChild • CheckBox Control • Place a series of check boxes on Rick’s tab page of frmChild’s tab control • Rick may own pet fish, a parrot, an alien rabbit, or a pet rock • Rick may own none, some, or all of the above pets • RadioButton • Place on Althea’s tab page • You need three group boxes, with a set of RadioButton controls in each
Planning the LogonManagerDraft Windows Forms MDI Application • The following list outlines the overall plan for building LogonManager: • Design structUser, a structure for a record in the random-access Users file • Define the public variables needed for manipulating a record in the Users file and for storing the entire Users file in an array • Start the project and load the defined data structures into a module • Build the MDI form and menu • Program the File | Initialize menu item, which initializes the random-access Users file
Planning the LogonManagerDraft Windows Forms MDI Application (Continued) • Create the mdiMain_Load procedure to load the Users file into an array at startup. • Write the menu Click event procedures, but use stubs for those menu items that will not be developed until Tutorial 4. Also insert stubs for the menu items that display the About form (frmAbout) and the New User form (frmUser), developed later in this tutorial. Test the overall logic • Build two empty child forms (frmUser and frmAbout), and connect these to the MDI form by replacing the MDI stubs with calls to the child forms. Test the overall logic • Complete the two child forms that are implemented in the draft application. Use stubs for the Logon functionality. Test the nearly completed application
Task 1. Designing the Format of the Users File • Necessary data items are as follows: • Identification • First and last name, e-mail address (used as the logon), password, home and work phone numbers • Status and role • Active, inactive, new user, or supervisor role • Start date • When the user was first authorized • Password expiration date • Passwords must be changed every 90 days • Secret question and answer • Used to recover a forgotten password
Task 3. Creating a Partially Complete, Working Application • To begin the LogonManagerDraft application: • Start a new Windows Forms application named LogonManagerDraft in the Tut03 folder • In Solution Explorer, right-click the project name, click Add | Add Module. In the Add New Item dialog box, name the module Module1.vb • Click File | Open | File, and browse to locate AltheasModule.txt in the Tut03 folder. Select this item, and click OK. Copy the contents of AltheasModule.txt into Module1.vb. Close AltheasModule.txt • Run the LogonManagerDraft program. It should not do anything at this point, but it should compile correctly, and then display an empty Form1. Exit the running application to return to the IDE
Task 4. Building the MDI Form and Menu • To create the MDI form and Main menu for LogonManagerDraft: • Display the Form Designer for Form1, and set the properties for Form1 • Add a MainMenu control to mdiMain. Click Type Here. Type the menu item text values shown in the right column of Figure 3-60. To enter a separator bar, you can right-click and choose Insert Separator, or you can enter a hyphen in the Type Here box. Disable the menu items that are so identified in Figure 3-60. After all menu item text values have been entered, right-click any part of the Main menu, and click Edit Names. Then enter the menu item names shown in the left column of Figure 3-60 • Set mdiMain as the Startup object for the LogonManagerDraft project. Then run the LogonManagerDraft application to see that your menu items appear as they should
Task 5. Initializing the Random-Access Users File • Random-access data file • Has a fixed record length, specified as part of the FileOpen() function call • Each record is identified by an integer record number • Parameters of the FileOpen() function include • The file number • The name of the file • The open mode • Access permission (Read, Write, or ReadWrite) • Share status • The length of one record
Task 6. Loading the Users File into an Array at Startup • To load the Users file into the pastructUsers() array: • In Solution Explorer, click Module1. Click the View Code button • Add the ReadUsersFile() procedure shown in Figure 3-64. • In the Form Designer for mdiMain, double-click mdiMain’s title bar to open the mdiMain_Load() event procedure in the Code Editor. Enter the following single line of code, ReadUsersFile(), in the mdiMain_Load() procedure to call Sub ReadUsersFile() from Module1, that is, the procedure you just added to Module1 • Also add the same line, ReadUsersFile(), as the last line in Sub mnuFileInitialize_Click(), because pastructUser() should be reloaded if the Users file has been reinitialized • Run the LogonManagerDraft program to ensure that you have not introduced any syntax errors • Exit the running program, and return to the IDE
Task 7. Writing the Menu Click Event Procedures • Menu items with programmable Click events yet to be programmed • In the File menu • mnuFileBackup, mnuFileRestore, and mnuFileExit • In the View menu • mnuViewNewUser, mnuViewExistingUser, • mnuViewSupervisorLogon • mnuViewSupervisorAcceptNewUsers • mnuViewSupervisorEditUserInfo • mnuViewSupervisorViewAllUsers • mnuViewSupervisorResetExpirationDates() • In the Window menu • mnuWindowCascade • In the About menu • mnuAbout
Task 8. Building Empty Child Forms • To create the About form: • Add a new form to the LogonManagerDraft project, named frmAbout.vb • Set the Text and BackColor properties to About Logon Manager and light yellow respectively • Add the two labels and set their size and text properties to match the figure. Add a PictureBox control, positioned as shown. Set the Image property to the sailboat icon (or another icon of your choosing) • In mdiMain.vb, in the mnuAbout_Click procedure, remove the message box stub you created earlier, and instantiate a New frmAbout. Declare mdiMain (that is, Me) as the MdiParent of the child form, and then display the form. To do this, delete the MsgBox you put there before, and insert the code shown in Figure 3-69 instead • Run the LogonManagerDraft application, and to test the About menu item, click the About item several times, and then click Window | Cascade
Task 9. Completing the Child Forms • To copy Hilda’s code into your form: • Insert Hilda’s draft code into your frmUser by clicking the Open File button on the toolbar, and opening Hilda.txt. Copy the Hilda.txt code into the Code Editor for frmUser.vb, right after the Windows Form Designer generated code and before the End Class statement
Summary • SampleMDI application • Demonstrates features of Multiple Document Interface application • Child forms • Must be instantiated before being displayed using Show() or ShowDialog() • TextBox control • Has not changed materially from Visual Basic 6.0 • TabControl control • Container control specially designed to save screen real estate • ComboBox control • Combines the features of a text box and a list box • CheckBox control • Used to determine whether particular option has been selected • GroupBox control • Container for other controls • RadioButton control • Determines whether an option has been selected
Summary • Visual Basic .NET random-access data file • Contains fixed-length records • DateString() • Returns today’s date as a string • OrElse short-circuit construct • Sometimes used to avoid accessing a nonexisting array element • Items.Add method • Used to add items to a combo box in code • PasswordChar property of a text box • Hides the contents of the text box • CheckedChanged event • Triggered when the value of the Checked property changes for a CheckBox control or a RadioButton control • Event procedure • Can handle events for multiple controls