Synapse 3.2.1
Synapse 3.2.1. MD Web Based Training . Yale New Haven Hospital Diagnostic Radiology . Overview. Synapse is a web based application used for storing and visualizing diagnostic images.


Synapse 3.2.1
E N D
Presentation Transcript
Synapse 3.2.1 MD Web Based Training
Overview • Synapse is a web based application used for storing and visualizing diagnostic images. • This tutorial will demonstrate how to login, locate studies, view and manipulate images, review available reports and compare exams. • The Help feature will enable you to find answers to any questions you have.
Accessing Synapse through MDLink • Access Synapse through MDLink. • Enter your username and password, then click on Enter.
Accessing Synapse through MDLink • Click on YNHH on the left side of the screen. • From the dropdown menu select Yalepacs.
Accessing Synapse through MDLink • Enter your username. Note that it must be preceded by “ynhh\”. • Enter your password. • Click on OK.
Accessing Synapse through MDLink • Click on the link to “View Images”.
Synapse Folders • You will see a list of folders and your name listed as the last folder. • Search for your patient in the “All Patients” folder.
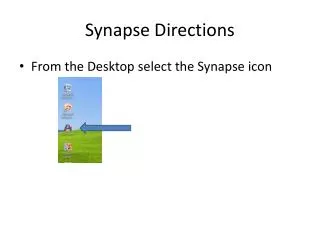
Accessing Synapse using the Synapse Icon • If the Synapse icon is on the desktop, double click on the icon to access Synapse. • This will display the Synapse folders with your name listed as the last folder. • Search for your patient in the “All Patients” folder.
Synapse Folders • You will see a list of folders and your name listed as the last folder. • Search for your patient in the “All Patients” folder.
Locating a Patient • When first opened, the “All Patients” folder lists all the patients in the database, in no particular order. • You can search by: • Patient Name • Patient ID (MRN) • Gender • Date of Birth
Locating a Patient • To search by name, type in any portion of the last name, comma, and a portion of the first name in the empty field below the patient name header. Hit the “Enter” key. • In this example, 2 patients were located with the name entered. • Double click on the correct patient name to view the list of studies for this patient.
Patient Information • All studies for the patient will be listed. • Click on a column header to SORT the list in order. In this example, the arrow on the “Study Date Time” header indicates the list is sorting exams chronologically. • Double click on the study to view the images.
Viewing the Study • The “Power Jacket” will automatically display on top of the images. • The “Power Jacket” represents the patient master jacket, listing all Radiology studies chronologically. • The displayed study is listed in Bold Italicized font.
Power Jacket Icons • A. Study Info: Patient demographics. • B. Report : If a report is available, view by clicking on this icon. • C. Series: Displays thumbnail of study series. • Close “Power Jacket” to view the images. A A B B C C
Viewing Images • Left click on an image to activate the study. The image will be outlined with dots as shown here. • Scroll through images using the Up/Down arrow keys on the keyboard -OR- • Scroll through images using the Page Up/Page Down keys -OR- • Scroll through images using the wheel of the mouse. • Patient information, study date and page count are displayed in the corners of the image.
Right Mouse Click Tools • Access all tools for image manipulation with a right mouse click. • They all work in the same fashion: • Right click to display the menu • Left click on the desired tool • Left click and move the mouse to activate the tool. • When you let go of the mouse, the tool disappears. Right mouse click again to get back to the tools.
Most Commonly Used Tools • Window/ Level: Changes contrast and density. • Zoom: Enlarges entire image. • Pan: Only works when image has been zoomed. Allows visualization of the entire image despite zoom factor. • Ruler: Line measurement. • Image Presets: Preconfigured values for window level (contrast/density) of images. These are modality specific. • Scale, Rotate, Flip: Image Orientation.
Most Commonly Used Tools • Tools / Anonymize Text Overlay: Hides patient name and MRN. This tool should be used to maintain patient confidentiality when exporting images. • Exporting Images: “Copy to Clipboard” saves a single image for use in other applications; i.e. Powerpoint, Word, Paint. • Anonymize all images prior to using “Copy to Clipboard”. 1 2
Power Jacket • Anytime you need to reopen the “Power Jacket”, click on any of the Synapse icons on the Synapse Toolbar.
Synapse Toolbar • Top Row: Synapse Icons. Clicking on any of these icons will open the “Power Jacket”. • Bottom Row: • Study Protocol for Study Display. • Protocol Steps. Changes the display format of the images. • Click on the arrow to step through the different display formats.
Synapse Toolbar • Clicking on an icon opens the “Power Jacket” to the respective area. • As last viewed. • To the Study Info page. • To the Study Report. • To the Notes section. • To Document section. • To the Study Thumbnails. They represent the images in the study. Left click drag and drop an image into a desired viewport. 1 2 3 4 5 6
Returning To The Exam List • After viewing an exam, click on the “Up Folder” button to move up a folder level, back to the study list. • To select a different study of the same patient, double click on the study from the list and display images. • To view a study on a new patient, click on the "Up Folder” button again to go up another level to “All Patients”. Search for the new patient.
Synapse Search Tool • The “Synapse Search” tool can be used to locate a study. • Right mouse click on the Synapse desktop icon. • Enter the criteria for the search. • Search options are: • Patient ID (MRN) • Patient Name • Accession number. • Click on “Find Studies” button.
Comparing Studies • To compare 2 studies on the same patient: With 1 exam displayed, open the “Power Jacket” by clicking on any of the Synapse Icons. • Highlight the comparison study and click on the “Compare” button. -OR- • Double click on the comparison study in the “Power Jacket”. • Both studies will be displayed simultaneously.
Comparing Studies New Comparison • The two studies will display at the same time. • A gray box surrounds the date of the Comparison study, for easy identification as displayed in the second slide. • The date of the Current study is displayed in basic font. Old Comparison
Comparing Studies • In the Power Jacket • Bold Italicized Font: Original study • Bold Font: Comparison Study
Comparing Studies • To take compare off, click on “Compare Off” button. The original study is displayed alone.
On Line Help • 1. At the top of the screen display, locate the Help button. • 2. Select “Synapse Help”. • 3. Type in content for search. • Click on topic to review Help information.
? Questions ? • If you have any further questions or would like more training on this application please email: DITraining@ynhh.org