Lab 1
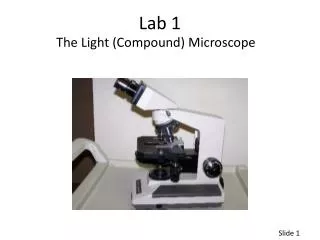
Lab 1. The Light (Compound) Microscope. Slide 1. pages 27 - 38. pages 23 - 34. pages 27 - 38. pages 29 - 40. Slide 2. How to carry microscope properly. One hand holding arm of microscope. One hand supporting base of microscope. Slide 3.

Lab 1
E N D
Presentation Transcript
Lab 1 The Light (Compound) Microscope Slide 1
pages 27 - 38 pages 23 - 34 pages 27 - 38 pages 29 - 40 Slide 2
How to carry microscope properly One hand holding arm of microscope One hand supporting base of microscope Slide 3
Please bring one microscope to your work station. Carry it correctly!Each person should have his/her own microscope today.DO NOT PLUG IT IN! Each time you use a microscope, you must sign it out in a notebook on the instructor’s desk. You must indicate your name & microscope number. You are responsible for that ‘scope! For today only, sign out the microscope later during the lab period rather than now. Slide 4
NEVER clean the lenses of your microscope yourself. Ask your instructor to clean them if they are dirty. Your instructor will use lens paper. Kimwipes scratch and ruin microscope lenses. Slide 7
Now plug your microscope in & turn the light on. Neverlet the microscope cord hang over the side of the desk – somebody might trip and get hurt (and the ‘scope might break)! Slide 10
TOTAL MAGNIFICATION magnification of oculars (10) times magnification of objective lens used cat blood in field of view of microscope Slide 12
QUESTION You are observing a slide using the high power objective. What is the total magnification of the image? under low power? under oil immersion? under the scanning objective? Slide 13
Working Distance Asmagnification increases, working distance decreases. What is the significance of this? Slide 14
QUESTION Are working distance and total magnification directly or inversely proportional to each other? Slide 15
Resolution Ability to distinguish between 2 closely spaced points. Resolution of human eye: 100 µm (100 µm = 0.0039 inches) If > 100 µm If < 100 µm Will see only 1 object Will see 2 objects Slide 16
Resolution continued … Resolution of compound microscope: 0.2 µm (0.2 µm = 0.0000078 inches) If > 0.2 µm If < 0.2 µm Will see only 1 object Will see 2 objects Slide 17
Limit of Resolution continued … can reach a point where you can increase volume, but the sound won’t be clear because you have reached the limit of resolution of the radio Why can’t you just keep putting more powerful objective lenses on a microscope to keep increasing magnification? Slide 18
Oil Immersion: Theory objective lens cover slip slide on stage After passing through the slide, light must pass through the coverslip (glass) and air before reaching the objective. Slide 19
But air and glass have different refractive indexes. This means that they bend light differently (i.e., to different degrees) Air and water also have different refractive indexes, so the spoon appears bent at the air/water interface. Slide 20
Oil Immersion: Theory continued … With no oil: Not all light goes into objective; Enough light for 4X, 10X & 40X objectives; Not enough light for 100X objective. With oil: Glass & oil have similar refractive indexes; Almost all of the light goes to 100 X objective Slide 21
1. Obtain letter “e” slide from side counter2. Move stage as far away from objectives as possible. 3. Put the 10x objective in place. Always use the low power objective to focus your slide – even if you want to view your slide under high power. Slide 23
4. Look at your letter “e” on the slide with your • eyes (i.e., NOT through the ‘scope). Note the • orientation of the letter “e” in your labbook. • 5. Put the letter e slide on the stage of your microscope; be sure it is clipped into place by the mechanical stage. You can test if your slide is in the mechanical stage correctly by trying to move it around with the appropriate dials. • 6. Move the slide so that the “e” is centered in the hole the light comes up through. Slide 24
Looking to the side of the microscope (NOT through the oculars), move the stage as close as possible to the objective lens without touching the slide to the objective lens. • Why do you have to look to the side of the ‘scope when you are moving the stage closer to the objective lens? • ________________________________ Slide 25
Adjust the oculars for your eyes. • 9. Looking through the oculars, slowly move the course adjustment knob until the image is almost in focus. • When you do step 9, are you moving the slide toward or away from the objective lens? • ________________________________ When moving stage & objective closer together, you must look at the side of ‘scope rather than through the oculars. When moving the stage & the objective away from each other, you can look through the oculars. Slide 26
Use the fine adjustment knob to finish focusing the slide. NOTE: if the slide doesn’t come into focus, • repeat steps 2 – 10. • Once the slide is in focus, note the orientation of the letter “e” in your labbook. • 12. Compare the orientation of the letter “e” in steps 4 and 11. • What changes do you see in the orientation of the letter “e” when looking at it without a microscope (step 4) and with a microscope (step 11)? • ________________________________ Slide 27
Now move the slide to your right while looking through the ocular. • In which direction (left or right) does the letter “e” appear to move? • _________________________ • 14. Now move the slide away from you while looking through the ocular. • In which direction (toward you or away from you) does the letter “e” appear to move? • _______________________________ Slide 28
QUESTION What implications do the answers to the questions in steps 13 and 14 have in terms of looking at tissues under the microscope? Slide 29
Make sure that the letter “e” is in the center of your field of vision and is in focus. • 16. Looking at the side of the microscope, switch from the 10x objective to the 40x objective. • In step 16, why do you need to look at the side of the microscope rather than through the oculars? • _______________________________________ Slide 30
17. The slide should be in focus because our microscopes are PARFOCAL (i.e., if they are in focus using one objective, they should be in focus using all objectives). • Microscopes are not perfectly parfocal, though. If your image is not quite in focus, use the FINE adjustment knob. DO NOT TOUCH the course adjustment knob. • Can you see the whole “e” ? • _______________________________ • Is there enough light? _____________ • (If not, move the iris diaphragm lever until there is enough light) Slide 31
Field of View 10x 40x Slide 32
QUESTION As magnification increases, do you see more or less of the “e”? What implications does this have if you are looking at a tissue under the microscope? As magnification increases, does the field of view increase or decrease? What implications does this have for looking at cells under the microscope? As magnification increases, does the amount of light getting through to your eyes increase or decrease? What implication does this have in terms of looking at something under the microscope? Slide 33
Depth of Field (Activity 4) 3 colored threads are crossed on a slide. Each thread is 3 dimensional. If you focus on the point at which the threads cross, the threads should not be in focus at the same focal point. Slide 34
Which thread should come into focus first – top or bottom? objective lens 3 colored threads on slide When focusing correctly, are you moving the threads toward or away from the objective while looking through the oculars? ________________________________________ Therefore, should the focal point be above the orange thread or below the green thread? ____________________ Slide 35
objective lens 3 colored threads on slide Focal Point Therefore, which should come into focus (i.e., reach the focal point) first – the top thread or the bottom thread? __________________________________________ Slide 36
Obtain a crossed colored thread slide from the side counter. Focus correctly using the same steps used to focus the letter “e” slide. HINT: once the slide is almost in focus, you have to do this very slowly! Which thread (blue, red or yellow) is on top? __________ on the bottom? __________ Slide 37
QUESTION 3 threads are crossed on a slide – a green thread, a blue thread, and a silver thread. When focusing correctly, first the green thread comes into focus, then the blue thread comes into focus, and, lastly, the silver thread comes into focus. Which thread is on the top? Which thread is on the bottom? Slide 38
What were the purposes of looking at the letter “e” slide? What was the purpose of looking at a crossed colored thread slide? What implications does this have in terms of looking at tissues through the microscope? Slide 39
Preparing/Observing Wet Mount Activity 5 cheek cells = squamous cells flat, plate-like, 6 sided cells; nucleus in center of cell Slide 40
1. Obtain the following: 1 clean microscope slide 1 clean coverslip 1 bottle methylene blue 1 sterile applicator stick 1 toothpick 1 bottle 0.85% saline 2 small pieces of paper towel Slide 41
2. Put a slide on the paper towel. 3. Put 1 drop of 0.85% saline in the center of the slide. NOTE: 0.85% saline is isotonic saline – i.e., it has the same concentration of salt as most body fluids 4. Using the wooden end of a sterile applicator stick, lightly scrape the inside of your cheek. 5. Put the wooden end of the applicator stick in the saline on the slide and wiggle it around so cells fall off into the saline. throw the used applicator stick in the proper container immediately! Slide 42
7. Add one drop of methylene blue to the saline – cheek cell suspension on the slide. 8. Your instructor will tell you how to correctly put the coverslip on the slide – do so. NOTE: it’s better to use a toothpick to balance the coverslip than your fingers (because a toothpick is thinner than your fingers) NOTE: you can use a paper towel to soak up excess liquid outside of the coverslip. BE CAREFUL: the paper towel can suck liquid from underneath the coverslip, and you don’t want to do that. Figure 4 Slide 43
Focus on the cheek cell wet mount using the directions given previously in this slide module to focus. Draw what you see under low power in your labbook 11. Draw what you see under high power in your labbook • Discard your wet mount and your used toothpick in the containers indicated by your instructor! • Neatly return the saline and methylene blue to the set-up area. • Throw your used paper towels in the waste basket. Slide 44
HOW TO PUT YOUR MICROSCOPE AWAY! • Turn microscope light off • Remove slide from microscope • Put low power (10x) objective in place • Unplug microscope (DON’T pull on cord) • Wrap cord tightly around microscope • If microscope has dust cover, put dust cover on microscope • Make sure the number on your microscope corresponds to the • number of the cubbyhole you return the microscope to • Put your microscope in the cubbyhole so that the next person • taking the microscope will grab the arm, not the objectives • Do NOT cross out your name or microscope number from the • microscope sign-out notebook Slide 45