METHODS OF MEASUREMENT Direct comparison :
1.07k likes | 2.32k Vues
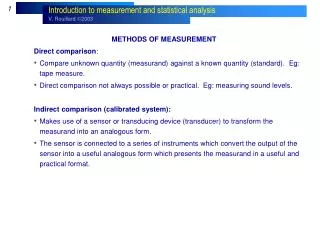
METHODS OF MEASUREMENT Direct comparison : Compare unknown quantity (measurand) against a known quantity (standard). Eg: tape measure. Direct comparison not always possible or practical. Eg: measuring sound levels. Indirect comparison (calibrated system):

METHODS OF MEASUREMENT Direct comparison :
E N D
Presentation Transcript
METHODS OF MEASUREMENT • Direct comparison: • Compare unknown quantity (measurand) against a known quantity (standard). Eg: tape measure. • Direct comparison not always possible or practical. Eg: measuring sound levels. • Indirect comparison (calibrated system): • Makes use of a sensor or transducing device (transducer) to transform the measurand into an analogous form. • The sensor is connected to a series of instruments which convert the output of the sensor into a useful analogous form which presents the measurand in a useful and practical format.
METHODS OF MEASUREMENT • Processing of the analogous signal is often necessary to extract the desired information from the signal. • For reasons related to signal processing, automatic recording and process control, the majority of measuring systems convert the measurand into an analogous electrical form.
THE GENERALISED MEASURING SYSTEM • Most measuring systems consist of three stages: • Detection-transduction stage (sensor-transducer) • Intermediate stage (signal conditioning) • Terminating stage (readout, display, recorder) Indicator Recorder Conditioned signal (raw) signal measurand Processor Sensor-transducer Signal conditioner Controller Human (eyes, pen, paper)
THE GENERALISED MEASURING SYSTEM • Detection-transduction stage (sensor-transducer) • Function: to detect or sense the measurand without affecting it. • Ideally, must also be insensitive to other variables. Eg: Pressure sensor must be insensitive to acceleration, strain gauge must be insensitive to temperature. • Unwanted sensitivity is a measuring error. • Noise: high frequency (fast) • Drift: low frequency (slow)
THE GENERALISED MEASURING SYSTEM • Signal conditioning stage • Function: to modify (improve) the transduced information for compatibility with the terminating (readout / recording/ processing) stage • These include amplification (most common) , filtering (noise removal), offset adjustment, differentiation, integration, telemetry…. • Sometimes also used to provide electrical power or excitation signal required by sensor.
THE GENERALISED MEASURING SYSTEM • Terminating stage (readout, display, recorder) • Function: to provide information on measurand in a format suitable for the application. • For (immediate) human recognition, the display usually comprises: • A relative displacement indicator. Eg: needle, / pointer, trace in a screen (oscilloscope), stylus on a chart, a level change (thermometer)… • In digital (numeric) form. Eg: counter (odometer), numeric LCD etc.. • For recording or processing purposes, the terminating stage may comprise of magnetic recorders, chart (paper) recorders, digital recorders (PC-based data acquisition systems, digital storage oscilloscopes), process controllers (PLCs, computer-based control systems).
THE GENERALISED MEASURING SYSTEM • Example: Pressure gauge Indicator: Visual scale Signal conditioning: none Sensor-transducer: Piston/cylinder (pressure to force) and spring (force to displacement) measurand: Pressure
THE GENERALISED MEASURING SYSTEM • Example: Rocket velocity Sensor-transducer Recording & display Signal conditioning Accelero-meter Low-pass filter Integrator Amplifier PC Data acquisition Printer
THE GENERALISED MEASURING SYSTEM • Example: Rocket velocity Sensor-transducer Recording & display Signal conditioning Accelero-meter Low-pass filter Integrator Amplifier PC Data acquisition Printer
MEASURING SYSTEMS : SELECTED EXAMPLES • Displacement / distance: micrometer Micrometer
MEASURING SYSTEMS : SELECTED EXAMPLES • Displacement / distance: Linear Variable Differential Transformer (LVDT)
MEASURING SYSTEMS : SELECTED EXAMPLES • Displacement / distance: Linear Variable Differential Transformer (LVDT)
MEASURING SYSTEMS : SELECTED EXAMPLES • Displacement / distance: Linear Variable Differential Transformer (LVDT)
MEASURING SYSTEMS : SELECTED EXAMPLES • Displacement / distance: Laser (triangulation)
MEASURING SYSTEMS : SELECTED EXAMPLES • Displacement / distance: Laser (triangulation)
MEASURING SYSTEMS : SELECTED EXAMPLES • Displacement / distance: Time-of-flight distance sensors: • Ultrasonic (Sonar), Radio waves (Radar), Optical (Ladar),
MEASURING SYSTEMS : SELECTED EXAMPLES • Displacement / distance: Time-of-flight distance sensors: • Ultrasonic (Sonar), Radio waves (Radar), Optical (Ladar),
MEASURING SYSTEMS : SELECTED EXAMPLES • Displacement / distance: Time-of-flight distance sensors: • Ultrasonic (Sonar), Radio waves (Radar), Optical (Ladar),
MEASURING SYSTEMS : SELECTED EXAMPLES • Displacement / distance: Time-of-flight distance sensors: • Ultrasonic (Sonar), Radio waves (Radar), Optical (Ladar), • Laser diode is pulsed every microsecond • The reflection is detected by a photo diode Animation courtesy Banner Engineering
MEASURING SYSTEMS : SELECTED EXAMPLES • Strain: (resistance strain gauge) • When the conductor (wire) is strained (extended), its cross-sectional area reduces and the total electrical resistance increases. • The change in resistance is used to measure the strain of the material or component onto which the strain gauge is bonded. Bi-axial gauge Tri-axial gauge (rosette) for Principal strains Bi-axial gauge for normal or shear strains
MEASURING SYSTEMS : SELECTED EXAMPLES • Strain: (resistance strain gauge) R = L/A or R = L/CD2 C=1 O: C=/4(1) When the conductor is strained, its geometry will change. Differentiating (1) dR = CD2(L d + dL) – 2C LD dD / (CD2)2 = [(L d + dL) - 2 L dD/D] / CD2 (2) Dividing (2) by (1) dR/R = dL/L - 2dD/D + d/ (3) Dividing by dL/L throughout: (dR/R) / (dL/L) = 1 – 2(dD/D)/(dL/L) + (d/)/(dL/L) (4) Since dL/L = a = axial strain, dD/D = L = lateral strain and = Poisson’s Ratio = (dD/D)/(dL/L), Eqn. (4) can be written to define the Gauge Factor, G: G = (dR/R)/(dL/L) = (dR/R)/ a or a = (dR/R)/G (5)
MEASURING SYSTEMS : SELECTED EXAMPLES Force • Force and torque are often measured by bonding a number of strain gauges on a carefully designed component called a load cell. The load cell is usually manufactured using steel which has very linear (elastic) properties as well as having a high elastic modulus (low deformation under load). • Load cells can be designed to measure a wide variety of forces such as compression, bending, tension, shear and torque. Strain gauge type load cells
MEASURING SYSTEMS : SELECTED EXAMPLES • Strain: (resistance strain gauge) • The Wheatstone bridge
MEASURING SYSTEMS : SELECTED EXAMPLES • Strain gauge type load cells
MEASURING SYSTEMS : SELECTED EXAMPLES • Strain gauge type load cells
MEASURING SYSTEMS : SELECTED EXAMPLES • Strain gauge type load cells
MEASURING SYSTEMS : SELECTED EXAMPLES • Strain gauge type load cells
MEASURING SYSTEMS : SELECTED EXAMPLES • Strain gauge type load cells
MEASURING SYSTEMS : SELECTED EXAMPLES • Strain gauge type load cells
MEASURING SYSTEMS : SELECTED EXAMPLES • Strain gauge type load cells
MEASURING SYSTEMS : SELECTED EXAMPLES • Strain gauge type load cells
MEASURING SYSTEMS : SELECTED EXAMPLES • Strain gauge type load cells
MEASURING SYSTEMS : SELECTED EXAMPLES • Time response
MEASURING SYSTEMS : SELECTED EXAMPLES • Time response
MEASURING SYSTEMS : SELECTED EXAMPLES • Time response
MEASURING SYSTEMS : SELECTED EXAMPLES • Time response
MEASURING SYSTEMS : SELECTED EXAMPLES • Temperature • Thermocouples are based on the principle that when two dissimilar metals are joined a predictable voltage will be generated that relates to the difference in temperature between the measuring junction and the reference junction (connection to the measuring device). • RTDs are wire wound and thin film devices that work on the physical principle of the temperature coefficient of electrical resistance of metals. They are nearly linear over a wide range of temperatures and can be made small enough to have response times of a fraction of a second. They require an electrical current to produce a voltage drop across the sensor that can be then measured by a calibrated read-out device.
MEASURING SYSTEMS : SELECTED EXAMPLES • Velocity: Interferometry (Michelson interferometer)
MEASURING SYSTEMS : SELECTED EXAMPLES • Velocity: Interferometry
MEASURING SYSTEMS : SELECTED EXAMPLES Piezoelectric sensors
MEASURING SYSTEMS : SELECTED EXAMPLES Piezoelectric sensors
MEASURING SYSTEMS : SELECTED EXAMPLES Piezoelectric sensors
MEASURING SYSTEMS : SELECTED EXAMPLES Piezoelectric sensors
MEASURING SYSTEMS : SELECTED EXAMPLES Piezoelectric sensors
MEASURING SYSTEMS : SELECTED EXAMPLES Piezoelectric sensors
MEASURING SYSTEMS : SELECTED EXAMPLES Piezoelectric sensors Accelerometer performance: • Sensitivity (Pc/g or V/g) • Range • Resolution • Transverse sensitivity • Amplitude linearity • Frequency response or frequency range
MEASURING SYSTEMS : SELECTED EXAMPLES Piezoelectric sensors Accelerometer performance:
MEASURING SYSTEMS : SELECTED EXAMPLES Piezoelectric sensors Environmental effects: • Temperature – may affect sensitivity, natural frequency and damping. Effects sometimes characterised by manufacturer. • Humidity – mainly affects high impedance transducers. • Acoustic noise. • Strain sensitivity – may generate spurious signals when the case is strained or distorted (ie. badly mounted)
MEASURING SYSTEMS : SELECTED EXAMPLES Piezoelectric sensors Accelerometer mounting:
