
Uploaded by
claus
0 SLIDES
572 VUES
150LIKES
Chap. 3 Microsoft Word 2003
DESCRIPTION
Chap. 3 Microsoft Word 2003. - A most popular word processor. Objectives. Home. l startup and exit of Word 2003 l Word 2003 screen elements l Word 2003 basic operations l Word document formatting and printing l Word tables and graphics
Download

1 / 0
Télécharger la présentation 
Chap. 3 Microsoft Word 2003
An Image/Link below is provided (as is) to download presentation
Download Policy: Content on the Website is provided to you AS IS for your information and personal use and may not be sold / licensed / shared on other websites without getting consent from its author.
Content is provided to you AS IS for your information and personal use only.
Download presentation by click this link.
While downloading, if for some reason you are not able to download a presentation, the publisher may have deleted the file from their server.
During download, if you can't get a presentation, the file might be deleted by the publisher.
E N D
Presentation Transcript
-
Chap. 3Microsoft Word 2003
- A most popular word processor - Objectives Home lstartup and exit of Word 2003 l Word 2003 screen elements l Word 2003 basic operations l Word document formatting and printing l Word tables and graphics l Creating Web pages using Word 2003
- Tools for document production Hand-copied manuscript: too slowly Quill pen—inconvenient Fountain pen, ball-point and felt-tipped pen Pencil and erasable ink: notable innovations Printing press and photocopier Easy to produce multiple copies of documents Typewriter Computers with document production software 方正中文排版系统
- Illuminated manuscripts, a hand-crafted work of art from the Vatican Library
- Professional outlook may produced by Word 2003
- History—Good News, Bad News News in 1979 and 1980 Bad news: Mar. 28, 2 partial meltdown at the Three Mile Island nuclear power plant (PA, USA) Numbers of the U.S. Embassy were taken hostage in Teheran The Mount St. Helens volcano erupted John Lennon was murdered Good news: WordStar: word processing software by Micropro VisiCalc: spreadsheet, totally new invention dBase: database software
- History of Word Processor In 1979, WordStar (WS) by Micropro In 1990, Microsoft Word for Windows was introduced with the launch of Windows 3.0 by Microsoft Windows 95 ->Office 95 Windows 2000-> Office 2000 In 2003, Windows XP -> Office 2003 (Word 2003) with many innovatory functions One of the most popular word processor Now, Windows vista -> Office 2007 (Word 2007)
- Microsoft Word 98 Word 2000 cursor
- Word 2002 for Windows XP
- Word 2003
- Word Processors—common features Easy input of text Text and page formatting Word wrap Enter key Search and replace Other features Text alignment and font changes Indexes, footnotes, etc…… Spelling and grammar Help
- New features of Word 2003 AutoCorrect and AutoText Agile Format editing Template, Wizard, and Style ‘Easy to use’ table operation Working with text and graphics together Get connected with Internet directly
- Start and Exit Start From ‘Start’ button, select Microsoft Word from the program list Double-click Word icon if you have a desktop shortcut Double-click a Word document Exit Clickon close button of Word 2000 Window Double-click on Control box of the title bar Select File|Exit Use Alt+F4
- standard toolbar menu bar formatting toolbar previous/next page buttons view layout drawing toolbar status bar task pane cursor Word 2003 Layout
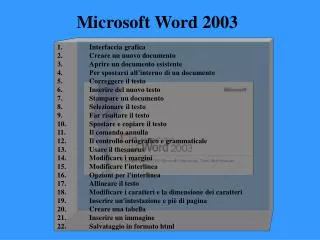
- Word 2003 Window elements Title bar Menu bar Toolbar Standard toolbar, Formatting toolbar Drawing toolbar Picture toolbar, etc Ruler: vertical and horizontal Text Area Scroll bar Status bar Task pane
- Control Box Format Menu
- Back Add Toolbar and customizing toolbars
- Working With Files Home Next Create a new document Open an existing document Save a document Working with text Select, copy, paste and delete Document views
- New Documents Create a document Click the New Document button on the toolbar Choose File|New Press CTRL+N Press General button Choose ‘Blank document’ Open a document Click the Open File button on the toolbar Choose File|Open Press CTRL+O Open dialog box Question: How to open a document from the Internet Back
- Back
- Save a Document Save a document Click the Save button on the toolbar. Select File|Save from the menu bar. Press CTRL+S Working on multiple documents Open several documents Use Window menu or button on the taskbar to switch between them Back
- Working With Text Typing and Inserting Insert a symbol (符号) Insert Chinese characters and punctuation Text selecting Drag mouse through Word, paragraph, entire document Deleting, copying, pasting and moving Via menu Via toolbar Via keyboard The Clipboard: Choose from Edit menu Back
- Back A free program called Unipad, http://www.unipad.org/download/index.html
- 中文标点符号 Back
- Document View (视图) Select View from menu bar or from View Choice at the left-bottom corner Different types of view Normal (普通) Web layout (Web版式) Print layout (页面) Outline (大纲) Reading layout( 阅读版式视图)
- Normal View
- Web Layout View
- Print Layout View
- Outline View
- Reading layout view 阅读版式 Back
- Document Formatting Home Next Text format: 文字格式 Paragraph format: 段落格式 Lists: 项目列表 Columns: 分栏 Style: 样式 Template: 模板 Document Wizard: 内容提示向导
- Formatting Text (文本格式) Back Font face, font size and font Select Format|Font Using formatting icons on the toolbar Other font face : bold, italic or underline By ‘Format Painter’ toolbar Submenus Font, size, style and font color, serif or non-serif Character Spacing Text Effects Question: How to change the background color of the text?
- Back
- Fonts Back
- Formatting Paragraphs (段落格式) Ways: By Formatting toolbars and rulers By selecting Format|Paragraph By ‘Format painter’ toolbar: 格式刷 Control items Indent and alignment: 缩进和对齐 Spacing and line spacing: 间距和行距 Tabs: 制表符
- First Line Indent Hanging Indent Right indent Left Indent
- “Format” /“Paragraph” Back
- Tabs Back
- List (项目符号和编号) Uses to create bulleted or numbered list Ways Automatic as you type: choose Tools|AutoCorrect Options|AutoFormat As You Type Manually: Choose Format|Bullets and Numbering Via Formatting toolbars Use Increase/Decrease Indent to create lists of multiple levels Outline numbered
- An Example of outline numbered paragraphs Back
- Columns (分栏) Back Ways Choose from Format|Columns Using Formatting toolbars Select paragraphs that need to be columned Press mouse and drag to select the numbers of columns Question: How to modify the unit for column width?
- Back
- Style (样式) Back Paragraph and character styles to format a document with a consistent and professional look Creating a new style First select some text that has the desired format From Format | Styles and Formatting , click “New Style” button Applying a style Select a style from the Formatting toolbar Click or double click the Format Painter button From the Style Dialog Box Modifying or deleting a style: via Style Dialog Box
- Back
- Document Templates (模板) Back Provide preset professional formats for your documents Settings such as margins, line spacing, fonts, type size, etc Creating a new template from a model From File|New, select templates, press “On my computer” Use File|Save As to save the template into templates subdirectory Modify the template with appropriate text, graphics and formats Applying a template
- Template categories include letters and faxes, reports. Within each category, you can choose from several templates. A preview window displays an example of a document created using the selected template. Back
- Document Wizards (内容提示向导) Help you with the content and format for a variety of documents Provide step-by-step guidance on the process of entering the text An example: Create an Envelope Select File|New, under New from template, click on my computer. Click “Letters & Faxes” tab. Double-click Envelope Wizard. Follow the steps in the wizard.
- Back
- Page Formatting and Printing Next Page numbering (页面编号) Headers and footers (页眉及页脚) Footnotes and endnotes (脚注及尾注) Page Setup (页面设置) Margins (页边空白) Size and orientation (尺寸及方向) Print preview and Printing (页面预览及打印)
- Page Numbering Back The computer automatically numbers and renumbers the pages as you edit and format your document Select Insert|Page Numbers Headers and Footers: A header: text that appeared automatically in the top margin of every page A footer: text that appeared automatically in the bottom margin of every page Footnotes: Insert|Reference|Footnote Contain citations for works mentioned in the text Endnotes
- Back
- Back
- See attached document for details. Back
- Page Setup (页面设置) Back Page margins (页边空白) By mouse and rulers Via Page Setup dialog box, choose margins tab Paper size and orientation Via Page Setup dialog box, choose Paper Size tab Paper source Layout (页面布局)
- Print Preview and Printing (预览及打印) Print preview Editing documents in Preview window Magnifier mode or editing mode Document printing Default printer Add printer from Control panel Print range, multiple copies … Question: How to print a document on both sides of the paper? Example: Printing a label (标签)
- Printing a label Back
- Working with text and graphics Next Inserting a graphic object Drawing a graphic Editing a graphic Inserting WordArt Equation editor Frames and text boxes Creating a watermark
- Inserting a graphic object Back Adding a Clip Art (剪贴画) Select Insert|Picture|Clip Art From Drawing toolbars Adding an image from a file Select Insert|Picture|From File Inserting pictures from scanner or camera
- Adding a clip art Back
- Drawing a Graphic To Draw different shapes, use ‘Line’ button for lines ‘Arrow’ button for drawing lines with arrows ‘Rectangle’ button for rectangles or squares ‘Ellipse’ button for ellipses ‘AutoShape’ button for different predefined shapes Lines, Basic shapes, Block arrows Flow Chart, Call Outs (标注) and more
- Drawing toolbars Back
- Editing a Graphic Back Change image size Move an image Rotate or flip Group and order Format picture Align or distribute Delete a picture
- Compress Pictures Format Picture More/Less Brightness Rotate Left 900 Reset Picture Image Control Set Transparent Color Line Style More/Less Control Insert Picture Crop Text Wrapping
- Back
- Inserting WordArt(插入艺术字) Back Select Insert|Picture|WordArt
- Equation Editor(公式编辑器) Steps for inputting mathematical equations Select Insert|Object Select Microsoft Equation 3.0 from the Object Type, press ‘OK’ Choose symbols and templates from ‘Equation toolbars’ Exit equation status by clicking the word document
- Back
- Text Box (Frame,文本框) Invisible boxes that you can position anywhere on a page Acts as containers for text and graphics Use to achieve complex layout effects Creating a text box Insert a blank text box Insert a text box with selecting content Editing a text box Text direction: horizontal and vertical
- Back
- Example: Creating a Watermark(水印) Demo Select Format|Background|Printed Watermark Click ‘Picture watermark’ or ‘Text watermark’ button on the dialog box Insert picture or text that designed for watermark into the text Press ‘ok’ button on the ‘Printed Watermark’ dialog box
- Back
- Tables Next Creating a table Use Table|Insert|Table to Insert a table Use ‘Insert Table’ button on standard toolbars Use ‘Tables and Borders’ toolbox to draw a table Editing a table Table operations Sort Formula
- Back
- Editing a Table Back Input data Select the operating area: Tab Insert rows, columns, and cells Delete rows, columns, and cells Merge and split cells Moving and resizing a table Table properties: size, alignment, text wrapping, borders, etc Convert between text and table
- Back
- Table Operations Back Sorting Select Table|Sort… Sorting a table by text, number, date Formula Select Table|Formula Calculate following given formula: paste function
- Back
- 3,653 Back
- Special Elements and Features Next Autotext (自动图文集) Comments (批注) Bookmarks and hyperlinks (书签和超链接) Mail merge (邮件合并) Table of contents (目录) Spelling and grammar (拼写和语法) Advanced search and replace feature Document protection
- Autotext(自动图文集) allows you to give a name to frequently used text items Insert them into your document by name. Choose from a number of premade Autotext items
- Back
- Comments(批注) Back Comments are powerful tools for collaboration when multiple authors are creating a document Comments are special items that can be placed anywhere in a document, allowing you to say something about a part of the document The name of the author of a comment is stored in the comment A comment can also include a short sound file How to insert comments Insert|Comment
- Back
- Bookmarks and Hyperlinks(书签和超链接) Back Add bookmarks to your document Bookmarks are like internal hyperlinks They are not displayed in the document Add Hyperlinks into a document Types of hyperlinks An existing or new document, file, or web page An email-address A specific location in the current document, another doc, or web page Another file or program that you drag from By insert|hyperlinks By Inset Hyperlink icon on toolbars By Ctrl+K
- CBIR Back
- Back
- Mail Merge(邮件合并) Demo Back Allows you to send the same document to all the persons on a mailing list. Can be used to print mailing labels for each person on your list. Mail Merge consists of the following steps: Creating a Main Document Creating a Data Source Completing the Main document Merging the Main Document and Data Source.
- Back
- Table of Contents(目录) Back Word can automatically generate a table of contents, then update as you edit your document Prerequisite: the document should be designed using heading and paragraph styles Steps Mark Table of Contents entries first: Alt+Shift+O Create a Table of Content Select Insert|Index and Tables (Reference) Customize the appearance of TOC
- Back
- Caption(题注)
- Spelling and Grammar Back Helps you correct spelling and grammar errors Marks errors with a colored background or wavy underline Ways AutoCorrect: Tools|AutoCorrect Options Spelling check: Tools|Spelling and Grammar Disable: Tools|Options Spelling checker’s dictionary: add words by clicking Add button Synonyms: right-click on the word
- The Spelling Checker
- The Grammar Checker Back
- Advance Search and Replace feature Used for situations where specific words are hard to identify Use wildcards, often-used wildcards: ?: eg. use t?p to find tap, tape, tippy, etc *: use l*t to find let, light, letter, l and t []: use s[ia]t to find sit, sat, etc [!]: use m[!a]st to find mist and most, but not for mast [-]: use [r-t]ight for right, sight, tight, etc [!x-z]: use t[!a-n]ck for tock, tuck, not for tack, tick <<: use <<(per) for perfect, percent, etc >>: use >>(sh) for fish, English, not for fisher Back
- Back
- Document Protection Back Read/Write protection Not allow others to open your document Not allow others to modify your document The file would be open in read-only mode Tools|Options|Security tab Password removal Protect part of a document Tools|Protect Document…
- ●●●●●● ●●●●●●●●● ●●●●●●●●● ●●●●●● Back
- Two lines in one(双行合一)
- What kind of formatting used in this document?
- The Writing Process Typically you can Type a rough draft of your document by a word processor Concentrate on expressing your ideas Edit the document until you are satisfied with its content and writing style Format and print the document: how it looks like? Word processor makes it easy to Let your ideas flow: word wrap Improve the quality of your writing: spelling, grammar, thesaurus Provide professional outlook
- Twelve Steps to Developing an Effective First Draft of your Manuscript—By San Francisco Edit Consolidate all the information: data, references, figures Target a journal Start writing and writing quickly Write in your own voice Write without editing Write the paper in parts Put the first draft aside: at least one day Revise for clarity and brevity: 15-20 words for most sentences Be consistent
- Lab Project The march of progress: create a timeline of important events in the history of document production Compose an article using Word 2003 Find materials via web search engines Include text, tables and graphics or pictures if applicable Use page formatting to make it professional It would be better if it’s written in English. Use Word Grammar Checker to improve your writing


More Related
Audio
Live Player