Quick Setup Guide for RetroTec DM-2 Duct Tester: Simplified Instructions and Configuration
This quick setup guide provides step-by-step instructions for configuring the RetroTec DM-2 duct tester. Learn how to connect devices, set pressure parameters, and enable duct testing modes efficiently. The guide clarifies the process for toggling device settings, selecting test configurations, and ensuring optimal performance during duct testing. With a focus on ease of use, this guide is essential for professionals to streamline the setup and operation of the RetroTec DM-2 meter in real-world applications.

Quick Setup Guide for RetroTec DM-2 Duct Tester: Simplified Instructions and Configuration
E N D
Presentation Transcript
Duct Testing • Quickie Set-Up Guide
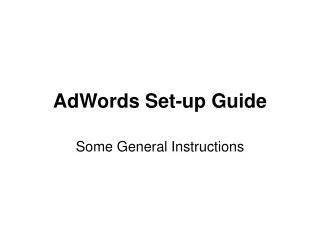
Color Coded Connections
Input B Ref B Ref A Input A
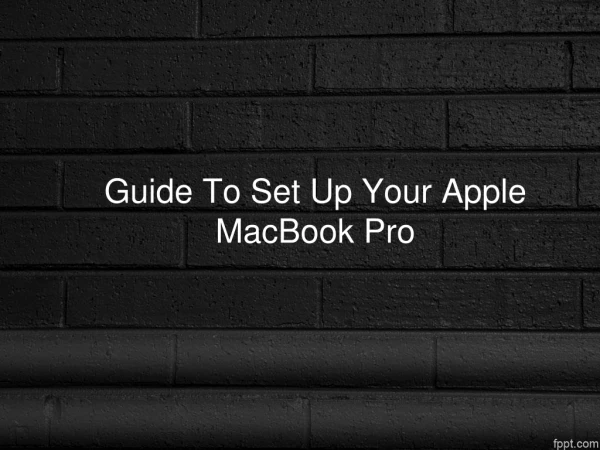
Program your DM2 forDuct Tester (or Blower Door) Turn Manometer ON PressOn/Off button PressExitbutton Set Up Manometer Press Setup button Arrow up or down to Device Setup, then press Enter Enable/disable Devices Highlight with up down arrows, right arrow clicks yes/no Du 200 and/or 1000 can eliminate duct tester DU 200 for a dedicated blower door meter can eliminate blower door 1000 for a dedicated duct test meter HitEXITonce set up Scroll and select Mode Set Up press Enter Enable/Disable different tests Flow cfm @ 50 Pa should be active: to change scroll to test pressure then press Enter.Change to desired pressure, then press Enteragain. For Duct Tester change to 25 pa Exit, Exit to get to the main screen
N = .60 ( located in Setup ) Time = 1 second ( toggle Time Avgbutton) Zero = On ( toggle Auto Zero button)
Meter always wants to go back to default screen, always just press Exit to return to previous screen • You can change the Full Screen Timeout duration by pressing Setupand scroll down to Full Screen Timeout (15 seconds is a good start)
Check Devices Enabled • Toggle Device to see what is enabled • Should display only the devices you want to use • For Duct Test • Press Setup • Arrow up/down to Device Setup • Press Enter • Highlight Du 200 and click YES with right arrow • Press Exit • Select Mode Set UP • Press Enter • Set to 25 Pascals • Press Range/Config to select the plate install on fan • Hint: to start your tests with a good guess at the correct Plate • use the “Mid” plate
Duct Testing Enable the flow @ 25pa for Total Leakage duct test Turn Offthe @25 when doing Leakage to Exterior Click@Pressure button to turn this function on and off
Retrotec Duct TestSet up for Duct TestPress ONPress Exit (to continue)Pressure and Flow @ 25Set Pressure (to 25 Pascals)Punch Buttons 2 and 5Press EnterPress Exit Twice (to Stop Test)
Makes your meter much easier to use Yes for Duct Tester NOfor Blower Door
Press Mode • Shows two channels A&B • Toggle through Mode again to look at fields: • Channels A & B • Pressure / Flow • Air Changes/Hour + volume ft3 • Press @Pressure to get meter to convert and display CFM @25 for Ducts • Reminder: Use actual 25 Pascal for Leakage to Exterior Test (Do Not use the @25 setting)
Automatic Run Recommended Once equipment is set up and meter settings are correct, it is recommended to run the fan speed through manometer PressSet Pressure Duct Tester: Set to @25 Pa Press Enter The fan will respond automatically Be prepared!
Retrotec Duct TesterPlease confirm contents: Meter Case DM-2 Meter Power Supply/Charger “Umbilical” Cord Useful Forms + Handouts Manual
Retrotec Duct TesterPlease confirm contents: Large Case Fan + Duct Plates Low Mid Power Cord Tubing:Red, Green, Blue (and extras) Static Pressure Tap Bungee Cords Tube Fittings Duct Mask / Masking Tape
On-Site Equipment List • Smoke Tube • TEC Exhaust Flow Meter • Pressure Pan • Foam Blocks • Flashlight / Headlight • Cordless Drill + Bits + Extra Battery • Screw Drivers • Vise Grips/Wrench • “Duct” Tape • Leatherman/Knife + Cardboard • Ladder / Stool • Calculator + Camera • Booties + Tyvek Suit • Trash Bags + Paper Towels