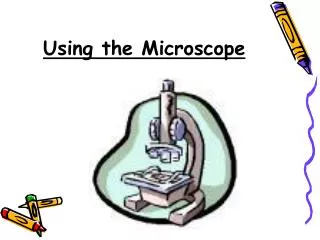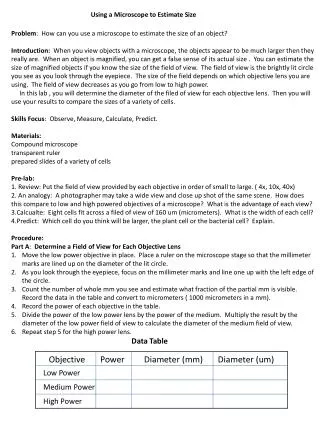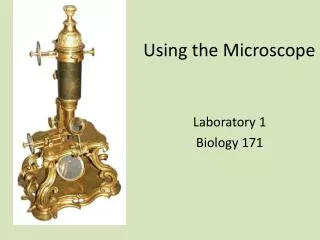
Using a Microscope
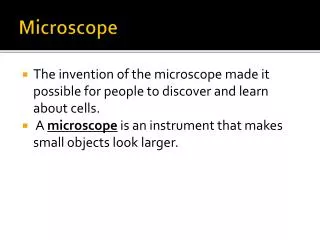
Using a Microscope. Many things are smaller than we can see with the naked eye. To accurately study Biology we need a tool to help us see these tiny things. Microscope is an optical instrument consisting of a lens or combination of lenses for making enlarged images of minute objects.

Using a Microscope
E N D
Presentation Transcript
Using a Microscope • Many things are smaller than we can see with the naked eye. • To accurately study Biology we need a tool to help us see these tiny things. • Microscope is an optical instrument consisting of a lens or combination of lenses for making enlarged images of minute objects. • Merriam-Webster Online Dictionary
Types of Microscopes • Binocular scopes allow you to see in 3D. • Binocular Compound Microscope • A compound microscope is one that has two lens, usually one in the eyepiece and another that can be varied. • These have a magnification of up to 1000X. • We use binocular scopes in our lab.
Monocular Compound Microscope • A monocular microscope has just one eyepiece to look through. • Most students find this type of scope more challenging to use.
Stereo Microscope • A stereo microscope has a magnification of about 10 X. • With a stereo microscope you can look at the details of larger objects. For example, an entire leaf or the whole body of a spider.
This model has an upper light source and a lower light source.
Scanning Electron Microscope • Scanning Electron Microscope • Image appears in 3-dimensions and in black and white. • The magnification is usually 1000X to 10,000X. • It is particularly useful for studying the surfaces of cells and viruses.
Transmission Electron Microscope • The item to be viewed is sliced into very thin slices, the image is a slice of the cell. • These images are used to cross sections of cells and their intracellular structures. • Magnification can be as much as 10,000X to 100,000 X.
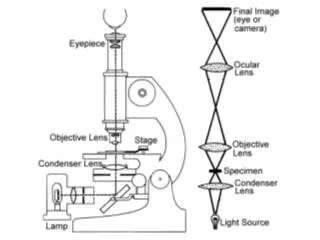
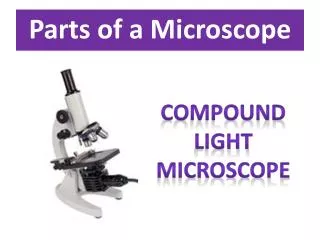
Eyepiece Ocular lens Nosepiece Objective lens Stage Stage clip Light switch Light intensity knob Fine adjustment Coarse adjustment Stage manipulator knobs Condenser Light source Iris diaphragm knob Cord holder Microscope body Know the following Microscope parts and their function.
Ocular Lens • The ocular lens has a 10X magnification.
Objective Lens • There are four objective lenses. • Red – 4X • Yellow – 10X • Blue – 40X • Oil immersion (white) – 100X
Total Magnification • When the image travels through the objective lens and the ocular lens it magnifies the magnification of the objective lens by 10X.
Field of View • Area you see when looking into the microscope • Should be a circle • The diameter of the field of view will change with the different objectives in place
Field of View • The field of view when using the 10x objective (100x total magnification) is 2 mm. • If 8 plant cells extend across the field of view (2 mm), then each cell is 2/8 or 0.25 mm long.
Distance between lens and slide • Use only the fine focus knob with the 40X and 100X lens.
The Oil Immersion Lens • The oil immersion lens or 100X lens is used with special optical oil. It makes the image clear at a higher magnification • Your instructor will tell you if you need to use this lens. • It is important to remove all the oil if you use the oil immersion lens.
Cleaning Please use only lens paper to clean the lenses, never paper towels or Kimwipes. Never use dry lens paper to clean eyepieces. Use the cleaning solution provided or breathe on the surface to be cleaned, then wipe.
Microscopic Images • Prepared slides that are purchased • Have label on one edge
Making Slides Get a clean slide and cover slip Add a small drop of water (not much or you’ll have a mess!) Put object in place Add cover slip
Making your own slides • The most common slide preparation is called the "wet mount" slide • Place a drop of the sample in the middle of a clean slide • Lower a cover slip gently over the drop at an angle, with one edge touching the slide first • Allow the liquid to spread out between the two pieces of glass without applying pressure. • Takes practice to determine just how much liquid to use.
Too much is placed on the slide - the cover slip will "float", creating a water layer that is too thick. • Too little liquid is used - the organisms or speciman may be crushed by the cover glass and evaporation will dry up the specimens quickly
http://www.youtube.com/watch?v=R0Soltmruis Going Fishing – Life in Water
Viewing Your Slide • Place the slide on the stage – it should be secure in the stage clip. • ALWAYS start with the 4X lens. • Use the course focus knob to focus the object • Move to the 10X lens and focus again w/the course focus • NEVER use the course focus with any lens greater than 10X • Move to the 40X lens and focus ONLY WITH THE FINE FOCUS KNOB • Remember to adjust your light for the best image.
Troubleshooting Here are some common problems and solutions. 1. Image is too dark!Adjust the diaphragm, make sure your light is on. 2. There's a spot in my viewing field, even when I move the slide the spot stays in the same place!Your lens is dirty. Use lens paper, and only lens paper to carefully clean the objective and ocular lens. The ocular lens can be removed to clean the inside.
3. I can't see anything under high power!Remember the steps, if you can't focus under scanning and then low power, you won't be able to focus anything under high power. 4. Only half of my viewing field is lit, it looks like there's a half-moon in there!You probably don't have your objective fully clicked into place.
The proper way to carry your microscope. • Always carry the microscope with two hands, holding it close to your body.
Improper carrying. • Carrying the microscope like this could result in your ruining a $1500.00 piece of equipment. • This will not score you brownie points with your instructor!
Proper usage • At the lab table, unwrap only as much cord as you need, the rest should remain stored around the cord wrap.
The microscope should always be stored with the 4X (red) lens in place and the stage in its lowest position.
Always store your microscope in its numbered position, with the dust cover in place.