Download
1 / 3
40 likes | 116 Vues
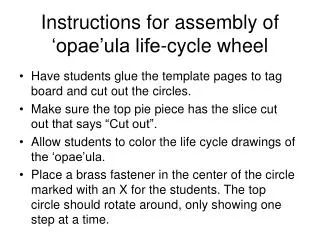
Guide students to assemble a wheel depicting the life stages of 'opae'ula. Use template pages, tag board, and coloring to create a rotating visual aid.

E N D
Instructions for assembly of ‘opae’ula life-cycle wheel • Have students glue the template pages to tag board and cut out the circles. • Make sure the top pie piece has the slice cut out that says “Cut out”. • Allow students to color the life cycle drawings of the ‘opae’ula. • Place a brass fastener in the center of the circle marked with an X for the students. The top circle should rotate around, only showing one step at a time.
eggs 1 month Molting Adults Larvae Post-Larvae 13-15 days Juveniles 7 weeks